
How to Use the AUTOOL C350 Portable EV Charger

The AUTOOL C350 is a portable Level 2 electric vehicle charger. This guide turns the current model-specific controls and official operating sequence into a practical start-to-finish workflow.
Quick answer: Use the C350 only on a grounded, correctly protected circuit confirmed for continuous EV charging. Inspect the supply, cable, connector and vehicle inlet, set current only while stopped, connect fully and verify normal status on both charger and vehicle. Monitor the first minutes; stop energy transfer before disconnecting, then store or holster the cable without strain.
In this guide
Before you start
EV charging is a sustained high-current electrical load. A loose outlet, inadequate branch circuit, interrupted protective earth, damaged cable, wet connector or incorrect current setting can cause shock, arcing, overheating or fire. The portable C350 still requires a compliant grounded outlet and must not be used through an extension cord. Follow the delivered manual and vehicle charging instructions together.
- confirm the delivered unit is AUTOOL C350, with the correct regional voltage, plug and IEC 62196-2 vehicle connector;
- confirm a qualified electrician has approved the circuit, grounding, protection and continuous current limit;
- inspect the outlet or station, plug, display, cable, strain relief, connector and vehicle inlet for heat, moisture, contamination or damage;
- route the cable without extension cords, tight coils, sharp edges, traffic or wheel paths;
- secure and switch off the vehicle and keep children or unauthorized users away; and
- know how to stop the session normally and how to isolate power if a serious fault occurs.
Use the AUTOOL manual download center to locate the current instructions when a manual is available. The delivered model label and current vehicle service information control if an older image or remembered setting differs.
C350 controls and specifications
| Specification or function | Current model |
|---|---|
| Input Voltage | AC 110V / 220V ±20%, depending on regional plug version and configuration |
| Rated Power | 3.3kW listed in manual and comparison chart; feature graphics show charging output up to approximately 3.5kW depending on voltage and current conditions |
| Working Current | 8A / 10A / 12A / 14A / 16A |
| Default Current | 14A |
| Input Frequency | 50Hz / 60Hz |
| Charging Cable | 5m charging cable |
| Power Cable | 1.2m power cable |
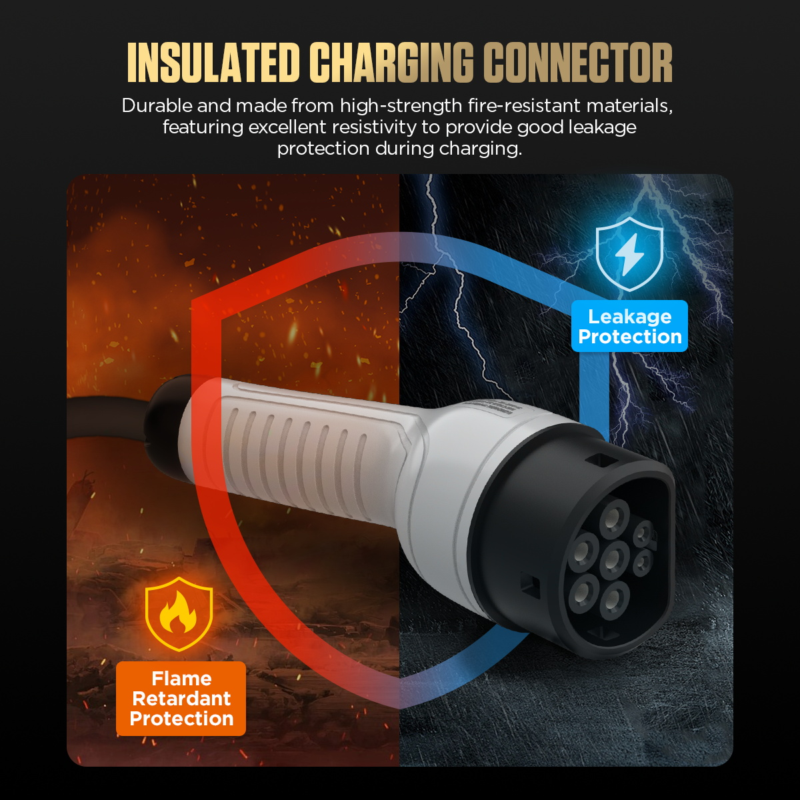
| Connector | European standard 7-pin AC connector / IEC 62196-2 compatible vehicles |
| Protection Class | IP65 |
| Working Temperature | -25°C to 55°C |
The selected current must not exceed the commissioned circuit’s continuous-load limit or the vehicle’s accepted AC current. Do not select a higher current merely because the charger menu offers it. Current C350 sources disagree on the available current menu—8/10/13 A in the retained manual versus 8/10/12/14/16 A on the current product page. Use only the values shown by the delivered unit and its matching manual. Never disable protective earth or change settings during active charging.
How to use the C350
Step 1: Confirm the outlet, regional version and vehicle
Use a properly grounded AC outlet and branch circuit that a qualified electrician has confirmed for the delivered C350 plug, voltage and continuous charging load. Do not use an extension cord or adapter that interrupts the protective earth. Confirm the vehicle inlet is compatible with the delivered IEC 62196-2 connector and the vehicle permits AC charging.
Before moving on, confirm the grounded supply, circuit protection and continuous current limit were established for this charger; a matching plug alone does not prove the circuit is suitable.
Step 2: Inspect the complete charging path
With the C350 disconnected, inspect the wall outlet, plug pins, control box, display, 5 m cable, strain relief and vehicle connector. Do not use the charger for heat damage, cracks, corrosion, moisture, foreign material, bent pins, loose fit or damaged insulation. Keep the connector coupling dry even though the control box has a stated enclosure rating.
Step 3: Park and prepare the cable route
Park so the connector reaches without stretching, coiling tightly, crossing a traffic lane or lying where it can be driven over. Secure the vehicle, switch it off and open the charging door. Keep children and bystanders away from the charging equipment.
Step 4: Connect the C350 to the grounded supply
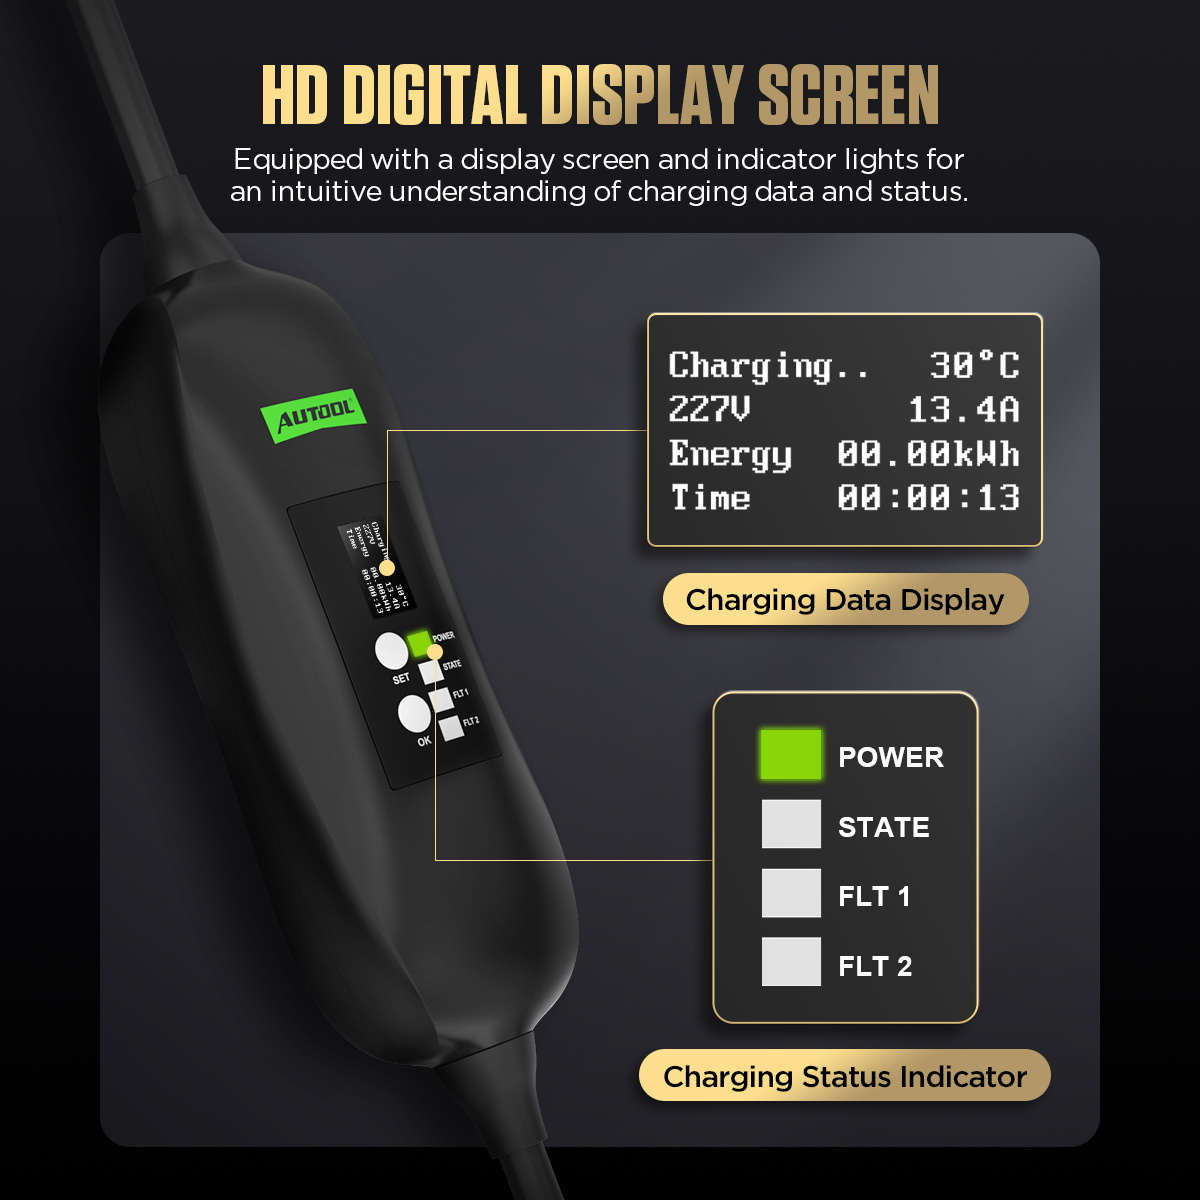
Keep the vehicle connector out of the vehicle, then insert the power plug fully into the verified outlet. Confirm the Power indicator and self-test are normal. If either fault indicator appears, disconnect safely and resolve the supply, ground, temperature or charger condition before continuing.
Step 5: Set current and any delay before charging
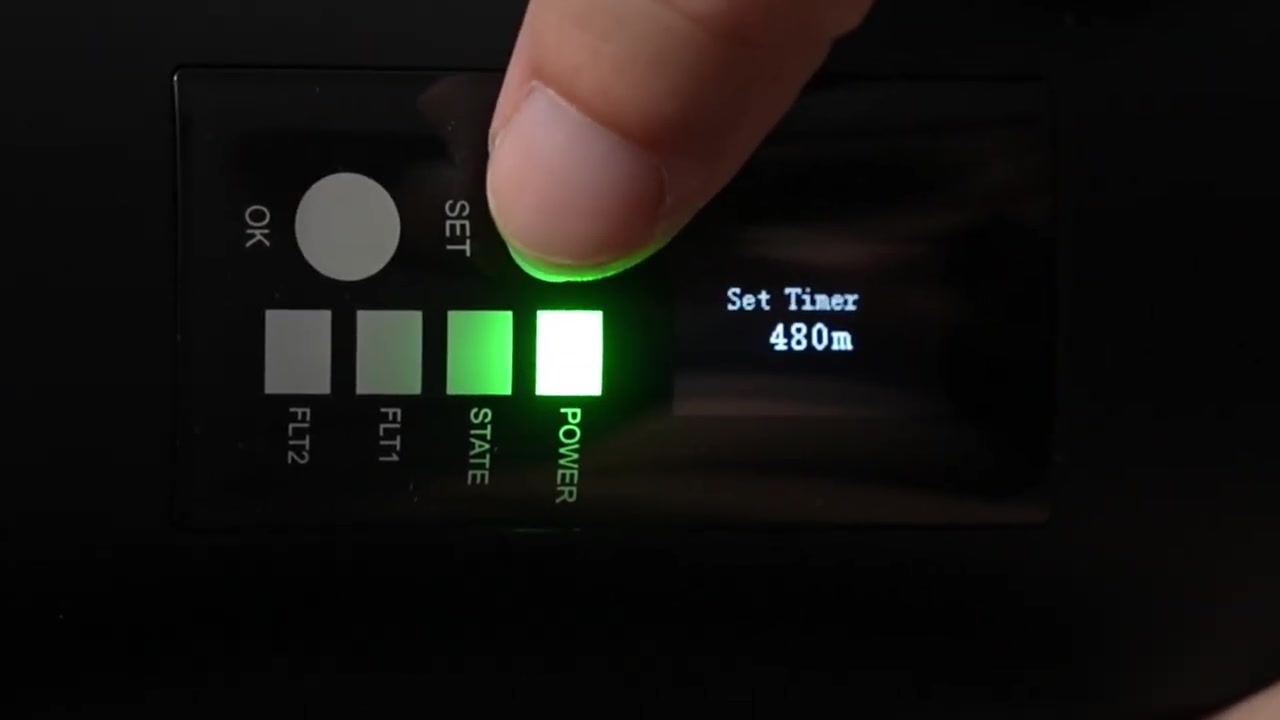
Enter the SET menu only while charging is stopped. Choose a current no higher than the electrician-approved continuous circuit capacity and the vehicle limit, and select a delay only when needed. Current first-party sources conflict between 8/10/13 A and 8/10/12/14/16 A menus; use only the values displayed by the delivered unit and its matching manual. Keep protective-earth detection enabled.
Step 6: Connect the vehicle and confirm the charging state
Inspect the vehicle inlet once more, hold the connector by its handle and insert it fully. Confirm the vehicle recognizes the connection and the C350 State indicator or display shows the expected connected/charging condition. Do not force the latch or touch conductive parts.
Step 7: Monitor the first minutes and the cable path
Check displayed voltage, current, time, energy and temperature against the selected setting and vehicle status. Recheck the outlet, plug, control box, cable and connector for unusual heat, odor, noise, discoloration, movement or moisture. Do not leave a new or questionable setup unattended.
Step 8: Let the vehicle or timer complete under normal indications
Keep the charging path clear and do not change current, ground detection or other settings during an active charge. Normal completion should be confirmed on both the vehicle and C350 status display. A protection event is a reason to investigate the cause, not to bypass grounding or repeatedly restart.
Step 9: Stop charging before touching either connector
Use the vehicle or C350 procedure to stop charging and confirm current flow has ended. Follow the delivered sequence to turn off or isolate the AC supply before removing the vehicle connector. Never plug or unplug the charging connector while the unit indicates active charging.
Step 10: Disconnect by the handles and store dry
Release and remove the vehicle connector by its handle without pulling the cable, then remove the supply plug by its body when the procedure calls for it. Fit protective caps where supplied, let warm components cool, coil the cable loosely and store the C350 clean and dry in its bag.
Before closing the session, confirm both charger and vehicle show energy transfer stopped, then disconnect by the handle and leave the connector, cable and supply with no heat, moisture, damage or unresolved fault.
Read and verify the result
A normal session requires agreement between the charger and vehicle: secure connection, expected current and voltage, stable temperature and no fault or protection indicator. The cable and both ends should remain free of unusual heat, odor, noise, discoloration and movement. A completed energy value is useful, but it does not override a physical warning at the supply, control box or connector.
- The charger display reports its side of the session; confirm the vehicle also recognizes charging and later shows it stopped.
- A lower current may be appropriate for a circuit with a lower continuous rating, but reduced current does not make a damaged or ungrounded outlet safe.
- One protection event may identify an unsafe supply or environment; repeated reset without diagnosis can hide a developing fault.
- An outlet, plug or connector that becomes unusually hot, discolored or loose must be removed from use and inspected by a qualified person.
Stop charging for a red fault or protection indication, smoke, arcing, burning odor, severe or increasing heat, buzzing, melted or discolored plastic, a loose connection, water ingress, damaged insulation, repeated interruption or abnormal vehicle warning. Use normal stop controls when safe; use the C701 emergency stop only for immediate danger, then isolate power and arrange qualified inspection before reuse.
Common mistakes and care
- Use only a correctly grounded, properly protected circuit whose continuous charging capacity has been confirmed by a qualified electrician.
- Never use an extension cord, defeat ground detection, modify wiring or open the charger enclosure.
- Do not use damaged, wet, overheated, loose or contaminated plugs, outlets, cables, connectors or vehicle inlets.
- Make current, timer and access-setting changes only while charging is stopped.
- Stop energy transfer and confirm the non-charging state before plugging or unplugging the vehicle connector.
- Treat repeated protection events, abnormal heat, odor, noise, discoloration, arcing or water contact as reasons for qualified inspection.
- Do not use an extension cord, travel adapter or grounding bypass to make the plug fit.
- Do not select current from advertised charger capability alone; the circuit and vehicle limits both apply.
- Do not change current, ground detection, timer, access mode or wiring while energy is flowing.
- Do not rely on an IP headline as permission for immersion, standing water, a wet connector or heavy-rain operation.
- Do not pull the cable to disconnect, drive over it, leave the connector on the ground or coil it tightly while warm.
Frequently asked questions
Can I use an extension cord with the C350?
No. The retained manual requires an uninterrupted protective-ground connection and explicitly excludes extension cords. Use only the correctly installed supply intended for continuous EV charging.
Should I select the highest current for faster charging?
Only if the commissioned branch circuit and vehicle both permit it. Select no more than the lowest applicable continuous limit; a menu option is not evidence that the wiring or outlet can carry it safely.
What should I do after a fault resets?
Identify and correct the cause before continuing. Check supply, ground, temperature, moisture, connector condition and vehicle status. Repeated or serious electrical faults require qualified inspection rather than repeated restart.
Final C350 checklist
- Exact regional charger, vehicle connector and grounded circuit confirmed
- Circuit protection and continuous current limit established by a qualified electrician
- Supply, cable, connector and vehicle inlet clean, dry and undamaged
- Current and optional timer or access settings chosen while stopped
- Normal state confirmed on both charger and vehicle; first minutes monitored
- Energy transfer stopped and non-charging state confirmed before disconnecting
- Connector capped or holstered; cable stored without strain; no abnormal heat or fault left unresolved
The safest C350 routine is simple but strict: trust the commissioned electrical boundary, inspect the entire path, make settings before energy flows, verify both ends of the session and stop at the first electrical warning. Protective features are backups, not substitutes for a sound circuit and intact connector.











Comments 0
Questions, fixes, and real-world diagnostic notes from readers.
Be the first to share a diagnostic result or ask a follow-up question.