
How to Use the AUTOOL T22 Workshop Tool Cart

The AUTOOL T22 is a mobile workshop tool cart. This guide combines the exact product configuration with the retained assembly manual where available and a controlled load, movement and storage workflow.
Quick answer: Assemble the T22 from the caster base upward using its exact manual, square and test the empty cart, then place heavy equipment low and distribute the load. Close drawers and secure loose tools before moving, push only on a clear level route, and apply the caster brakes before opening a drawer or operating equipment.
In this guide
Before you start
A loaded workshop cart can tip, roll, drop a drawer or damage connected vehicle equipment if it is assembled out of square, overloaded or moved with loose tools and live cables. Keep the exact manual open during assembly, use help to support the side frames, and prove every caster, brake, drawer and fastener on an empty cart before adding workshop equipment.
- confirm the exact T22 manual and match the delivered base, panels, shelves, drawers, slides, handle, casters and hardware;
- set out parts on clean padding and keep left/right panels and brake casters in their illustrated orientation;
- choose a level assembly area with enough room to support both side frames without twisting them;
- prepare the correct hand tools without using impact force to pull misaligned holes together;
- plan which heavy equipment will occupy the lowest platform and how leads or clamps will be secured; and
- clear the first unloaded rolling route and identify a level parking location outside vehicle and lift travel.
Use the AUTOOL manual download center to locate the current instructions when a manual is available. The delivered model label and current vehicle service information control if an older image or remembered setting differs.
T22 controls and specifications
| Specification or function | Current model |
|---|---|
| Product | AUTOOL T22 3X Tier Rolling Tool Tiered Storage Cart |
| Product Use | Automotive service, diagnostic work, programming power supply storage, workshop tool organization, and mobile utility storage |
| Product Size | 44 × 74 × 100cm |
| Product Weight | 23kg |
| Product Material | Cold-rolled steel plate |
| Plate Thickness | Bottom plate 3.0mm; plate layer 1.5mm; column 1.5mm |
| Load Bearing | ≤300kg / 661 lbs according to the dedicated T22 specification panel |
| Caster Size | 3 inches according to the dedicated T22 specification panel |
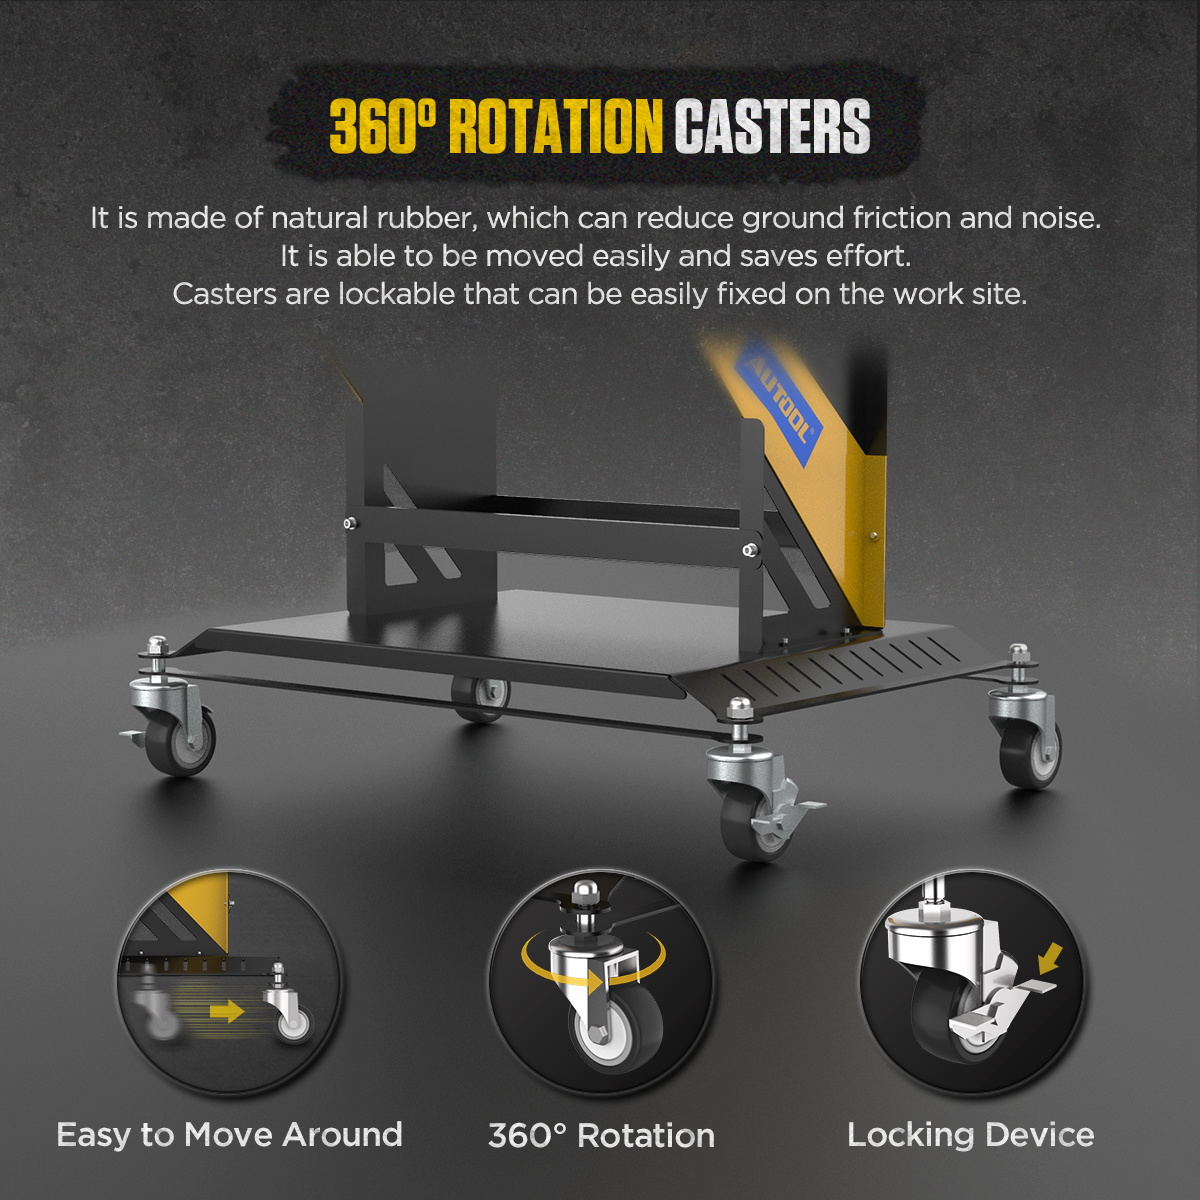
| Caster Type | 360° swivel casters with lockable wheels |
| Surface Finish | Powder-coated glossy finish for rust and corrosion resistance |
For T22, the current page shows both a 300kg dedicated-panel figure and conflicting series comparison data. Use a conservative 100kg total boundary until the rating on the delivered cart is confirmed. Keep each item within the platform footprint, preserve equipment ventilation and follow any lower equipment, battery, floor, slope or workplace boundary. A locking drawer or caster reduces movement but does not make an unstable load safe.
How to use the T22
Step 1: Confirm the exact T22 and inventory every part
Open the exact retained manual before assembly and compare the delivered base, left and right panels, shelves, drawers, slides, handle, hooks, strap parts, casters and fasteners with its diagrams. Keep parts on protective padding and stop for missing, bent or unidentified structural hardware.
Before moving on, confirm the exact T22 manual, complete parts inventory, brake-caster positions and a level supported assembly area.
Step 2: Install the casters on the base in the illustrated positions
Support the base securely without standing it on an unstable edge. Install the casters with their supplied cap nuts or specified hardware and place the two brake casters in the positions shown by the exact manual so they remain accessible when the handle and cart orientation are established.
Step 3: Assemble the left and right frame sections
Build the left side panel and outer panel with their brackets, then repeat for the right side. Start all matching screws by hand, keep bracket and nut orientation consistent with the diagrams, and leave the structure loose enough to align without forcing holes.
Step 4: Join both frame sections to the caster base
With another person supporting the panels, bring the left and right assemblies onto the base in the illustrated orientation. Install the matching fasteners progressively, square the frame and confirm the cart rests on all casters without twist before final tightening.
Step 5: Fit the model-specific upper structure, slides and storage parts
Follow the six illustrated T22 stages for the labeled handle, hooks, strap hardware, shelves and remaining upper structure; keep every numbered part in the orientation shown.
Step 6: Square, tighten and test the empty cart
Tighten all structural fasteners in a progressive cross-pattern while the cart is square. Roll the empty cart slowly on a level floor, turn it in both directions, apply each caster brake and operate every drawer, workbench, shelf, hook or strap. Correct rubbing, rocking or a loose connection before loading.
Step 7: Plan the load before placing equipment
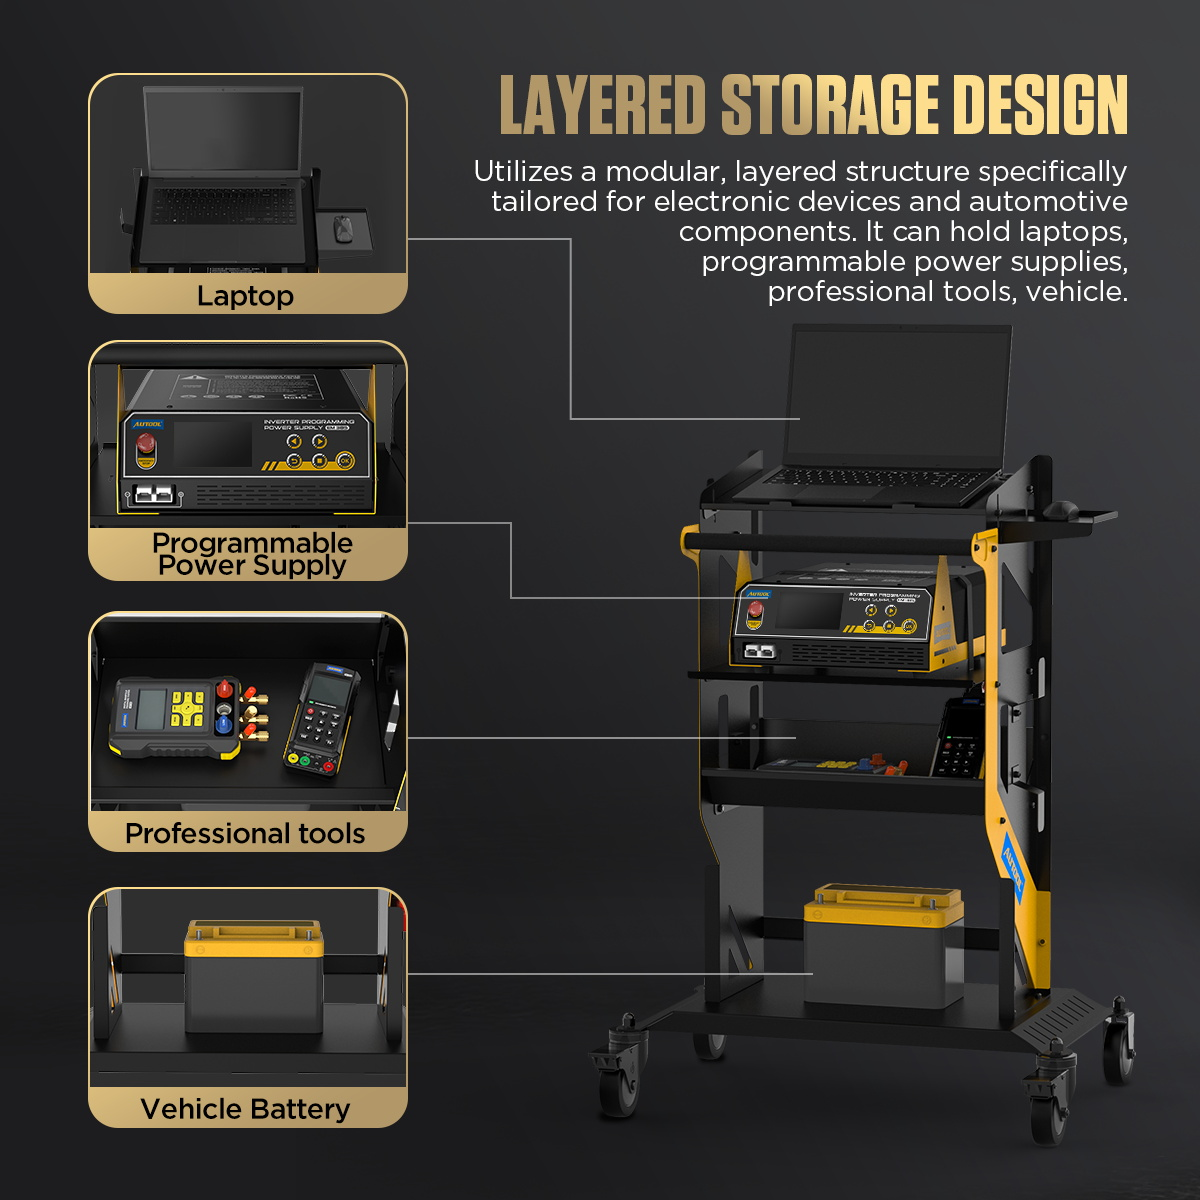
List the equipment, tools, batteries and accessories to be carried, then allocate the heaviest items to the lowest suitable platform and balance weight left-to-right. Use 100kg as the conservative operating boundary until the delivered T22 rating is confirmed, because the current exact page also displays a conflicting 300kg dedicated-panel value.
Step 8: Protect and secure the diagnostic equipment
Place a laptop, power supply or service machine on a platform that fully supports its feet and ventilation clearances. Use the intended strap where provided, route clamps and leads on hooks without sharp bends, and keep battery terminals, hot tools, liquids and chemical containers from contacting one another.
Step 9: Close storage and prepare the travel path
Close every drawer, lower or secure any adjustable work surface and remove loose objects from the top. Release caster brakes, inspect the route for slopes, cords, drains and people, then push from the handle at walking speed; do not pull the cart blindly or use it on stairs.
Step 10: Park, brake and work from a stable cart
Stop on a level surface outside vehicle and lift travel, orient the cart so cables do not cross the aisle, then apply the accessible caster brakes. Confirm the cart does not roll before opening one drawer or using equipment; close drawers before repositioning it.
Step 11: Shut down equipment before moving the cart again
End the connected diagnostic or service procedure, isolate power and disconnect vehicle leads by their handles. Stow clamps, probes and cables, close drawers, check the top surface and only then release the brakes and move the cart.
Step 12: Inspect fasteners, casters, drawers and finish
Regularly check every structural fastener, caster, brake, slide, handle, hook, strap and lock. Clean spills promptly, prevent corrosive chemical exposure, touch up approved surface protection when required and store the unloaded or safely loaded cart in a dry ventilated area.
Before closing the setup, confirm the loaded cart remains square and stable, all drawers close, every caster and brake works, loose items are contained and the storage route stays clear.
Read and verify the result
The empty cart should sit square on all casters, roll without binding, stop when its brakes are applied and let each drawer or work surface move without scraping or releasing unexpectedly. After loading, repeat the stability and brake check, then confirm that cables, batteries and tools remain contained during a slow controlled turn.
- A caster that lifts, drags or does not brake indicates assembly, adjustment or damage that must be corrected before loading.
- Open only one drawer at a time and watch the cart’s center of mass; a smooth slide does not mean an overloaded drawer is safe.
- Push through a slow turn with the first controlled load and confirm nothing shifts, projects or pulls on connected equipment.
- Park on level ground, apply the brakes and verify no roll before placing a laptop or operating service equipment.
- Recheck fasteners after initial use and after any impact, caster replacement or load-layout change.
Stop using the cart if a caster or brake fails, the frame rocks, a drawer opens during travel, a panel or slide deforms, fasteners loosen repeatedly, corrosion reaches a load path, or the planned route has an uncontrolled slope. Unload and isolate it rather than relying on another caster or a temporary strap.
Common mistakes and care
- Do not stand, sit, ride or climb on the cart or use it as a step, jack support or vehicle restraint.
- Move only with drawers closed, loose items removed or secured and the travel path clear; never use the cart on stairs or an uncontrolled slope.
- Keep heavy loads low and distributed, observe the conservative total capacity and do not infer a per-shelf or per-drawer rating.
- Apply caster brakes on a level surface before opening a drawer or operating equipment from the cart.
- Remove a cart from service for loose structure, failed brakes, damaged casters, distorted panels, corroded load paths or unstable drawers.
- Do not stand, sit, ride or climb on the cart, shelves or workbench.
- Do not move the cart with a drawer open, an adjustable surface raised, loose tools on top or leads connected to a vehicle.
- Do not concentrate the total listed capacity in one drawer or upper shelf; keep heavy items low and distributed.
- Do not pull the cart blindly, roll it on stairs or let it coast on a slope; push at walking speed along a clear route.
- Do not use a code lock, strap or caster brake as a substitute for correct load containment and stable parking.
Frequently asked questions
Can I stand on the T22?
No. It is a storage and equipment cart, not a step, seat, work platform, jack support or vehicle restraint. Use suitable access equipment and keep people off every shelf and work surface.
Should I lock the casters before or after opening a drawer?
Park on a level surface and apply the caster brakes before opening a drawer or operating equipment. Close all drawers and secure loose items again before releasing the brakes and moving.
Can the whole rated load go in one drawer or top shelf?
No. A listed total cart capacity is not an individual shelf or drawer rating. Keep heavy items low, distribute them across suitable supports and stop if a shelf, slide, caster or frame deflects or becomes unstable.
Final T22 checklist
- Exact T22 manual, parts and orientation confirmed
- Caster base and side frames square; all structural fasteners tightened
- Empty rolling, turning, braking, drawer and work-surface tests passed
- Heavy items low, load distributed and total boundary respected
- Equipment supported and ventilated; clamps, batteries and cables separated
- Drawers closed and loose items secured before every move
- Cart parked level, outside vehicle travel, with brakes applied before use
- Fasteners, casters, brakes, slides, straps and finish included in routine inspection
The T22 is most useful when it behaves like a controlled workstation, not a loose tool pile: assemble it square, load from the bottom up, close and secure before movement, then lock it on level ground before work begins.











Comments 0
Questions, fixes, and real-world diagnostic notes from readers.
Be the first to share a diagnostic result or ask a follow-up question.