
How to Use the AUTOOL AS505 Transmission Fluid Tester Step by Step

The AUTOOL AS505 checks automatic transmission fluid with an optical probe and displays both transmittance and fluid temperature. Identify the ATF, confirm a vehicle-approved sampling route, switch the engine off, establish that the ATF is below 60°C, clean the probe, press TEST and read the percentage together with its result icon and temperature.
AS505 is a fluid tester, not an ATF exchanger. It does not drain, flush, refill or exchange transmission fluid, and one optical reading cannot diagnose the entire transmission.
In this guide
Confirm the fluid and access route first
| Situation | AS505 decision | Why |
|---|---|---|
| Identified automatic transmission fluid with an approved dipstick or sampling route | Test is possible | The task matches the current manual |
| Sealed transmission with no user-accessible sampling route | Stop and use the vehicle workshop procedure | AS505 does not authorize opening a fill, drain or level plug |
| Unknown fluid, mixed sample or dirty access point | Do not test yet | An optical result is not a fluid identifier |
| Engine oil, brake fluid, power-steering fluid or coolant | Use the correct fluid-specific tester | AS505 is for automatic transmission fluid |
| Requested drain, flush, refill or exchange service | Use proper ATF service equipment and procedures | AS505 only measures a fluid sample |
Fluid color, vehicle fuel type and a convenient-looking tube do not prove that the sample or access route is correct. Use the vehicle service information and service history before opening anything.
Prepare for a clean automatic transmission fluid test
Have four 1.5 V AAA batteries, a clean lint-free wipe, suitable gloves, the current vehicle service information and the identified ATF. Park securely, apply the parking brake, switch the engine off and do not insert the probe until the ATF is known to be below the manual’s 60°C limit. Use the vehicle’s available temperature data or an appropriate independent check instead of guessing from elapsed time or a nearby surface.
Stop if the vehicle has no approved sampling route, the fluid cannot be identified, the probe is damaged, a plug would need to be opened without the vehicle procedure, or the hose would have to be forced. Never run the engine while the AS505 probe is inserted.
AUTOOL AS505 step-by-step procedure
Step 1: Confirm the exact tester and task
Verify that the device is an AS505 and the task is an optical transmittance reference check on identified automatic transmission fluid. Do not use the tester to identify a fluid or to perform an exchange.
Completion check: The model, fluid and intended measurement all match.
Step 2: Identify the transmission fluid
Confirm the exact ATF from the vehicle service information, service record or labelled container. Do not infer the fluid specification from color, odor or the AS505 percentage.
Stop: If the fluid is unknown, mixed or visibly contaminated by another substance, resolve that issue before testing.
Step 3: Confirm an approved sampling route
Use the vehicle service information to find the specified ATF dipstick or sampling method. Many vehicles have no user-accessible dipstick; AS505 does not make a sealed transmission user-serviceable.
Completion check: You can name the approved access point and the exact procedure for restoring it.
Step 4: Secure and cool the vehicle
Park on a stable surface, apply the parking brake, switch the engine off and keep clear of hot or moving components. The manual requires the transmission fluid temperature to be below 60°C before measurement.
Completion check: The engine is off, the access route is stable and reliable vehicle data or an appropriate check establishes that the ATF is below 60°C.
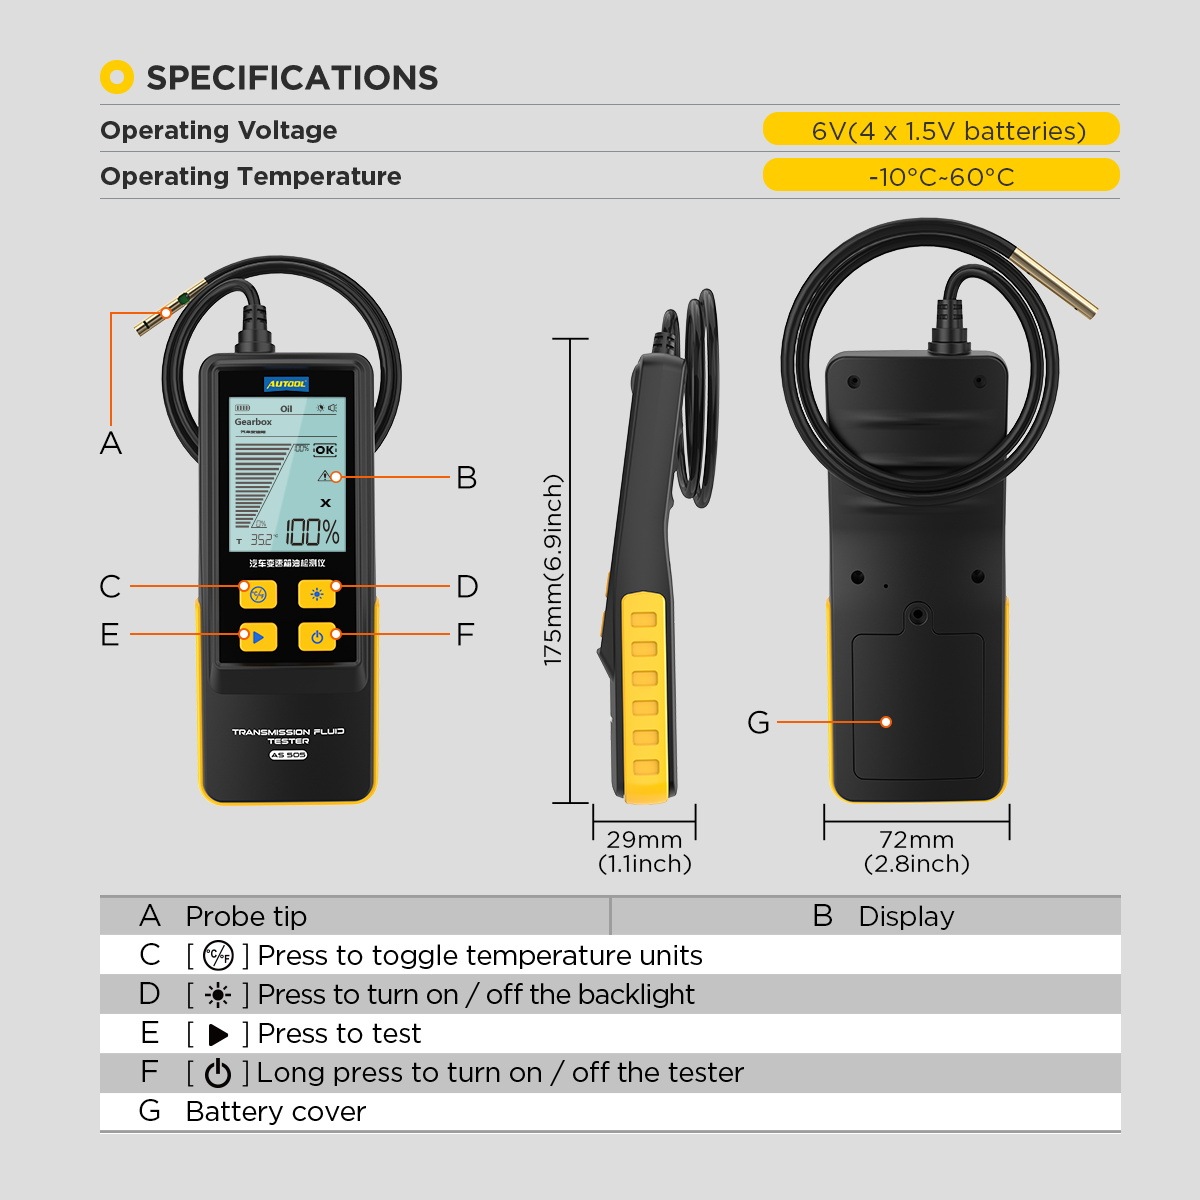
Step 5: Inspect the AS505 and probe
Check the housing, display, buttons, flexible hose and optical sensing end. The hose should be free of cuts, crushed sections and tight kinks; the sensing tip should be secure and cleanable.
Stop: Do not insert a damaged, loose or contaminated probe.
Step 6: Install four AAA batteries
Open the rear battery cover, install four 1.5 V AAA batteries in the marked polarity and close the cover securely.
Completion check: The batteries are seated correctly and the cover closes without force.
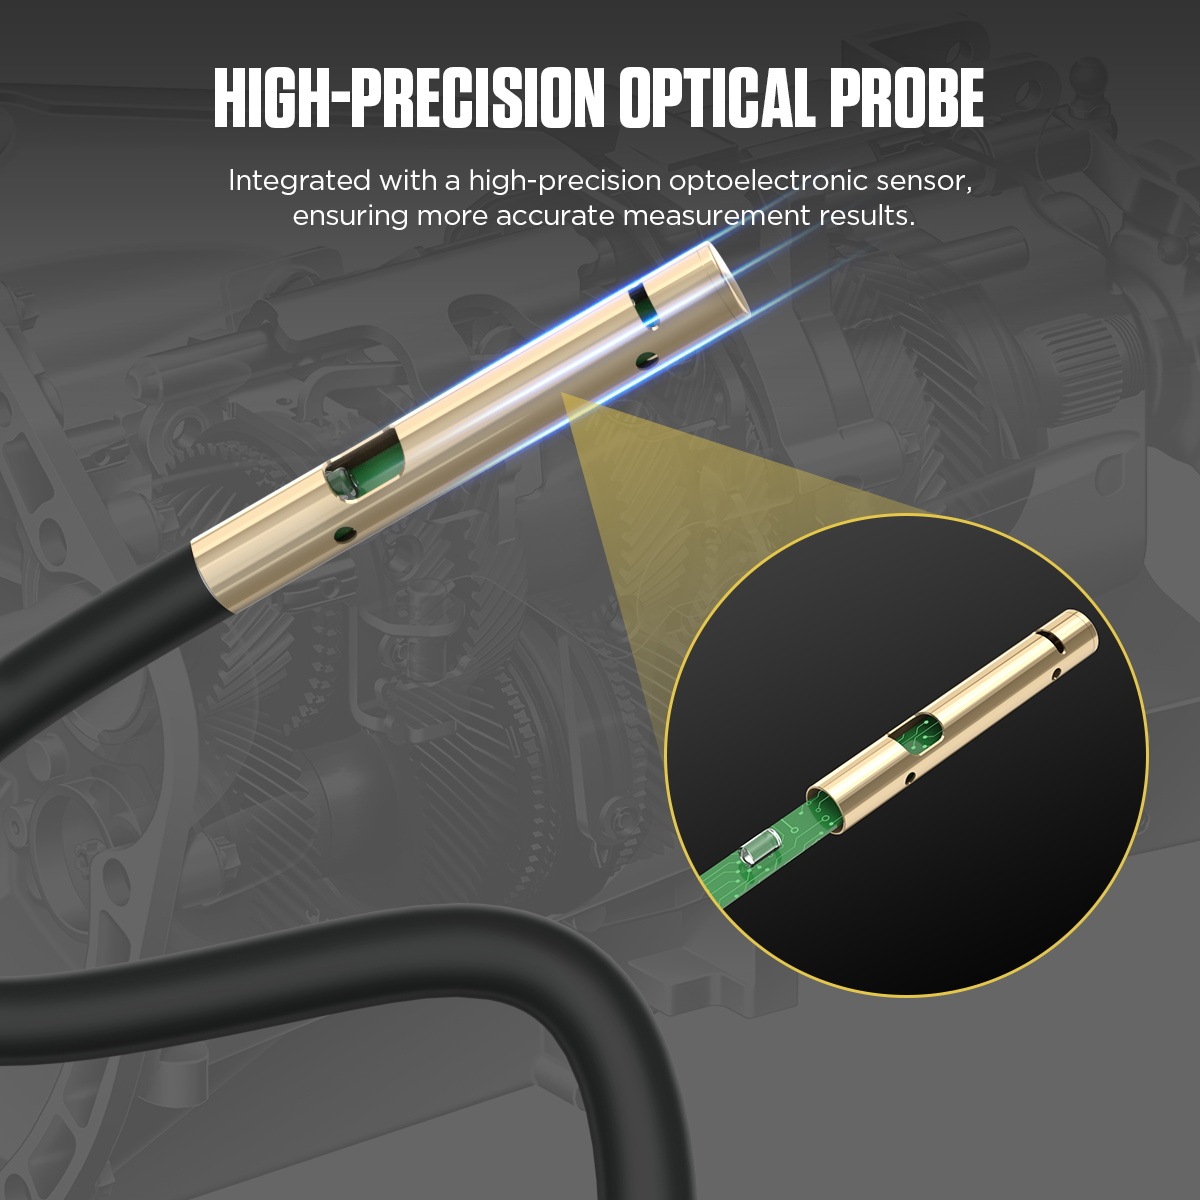
Step 7: Wipe the optical probe clean
Use a clean lint-free wipe on the sensing area before every measurement. Remove old fluid and fibers without adding solvent, cleaner or another oil to the probe.
Completion check: The optical area is clean, dry and free of visible residue.
Step 8: Power on the AS505
Hold the power key for more than about two seconds. Confirm that the display starts and the battery indicator is stable. The tester can switch itself off after five minutes without activity.
Stop: Reseat or replace the batteries if power or the screen remains unstable.
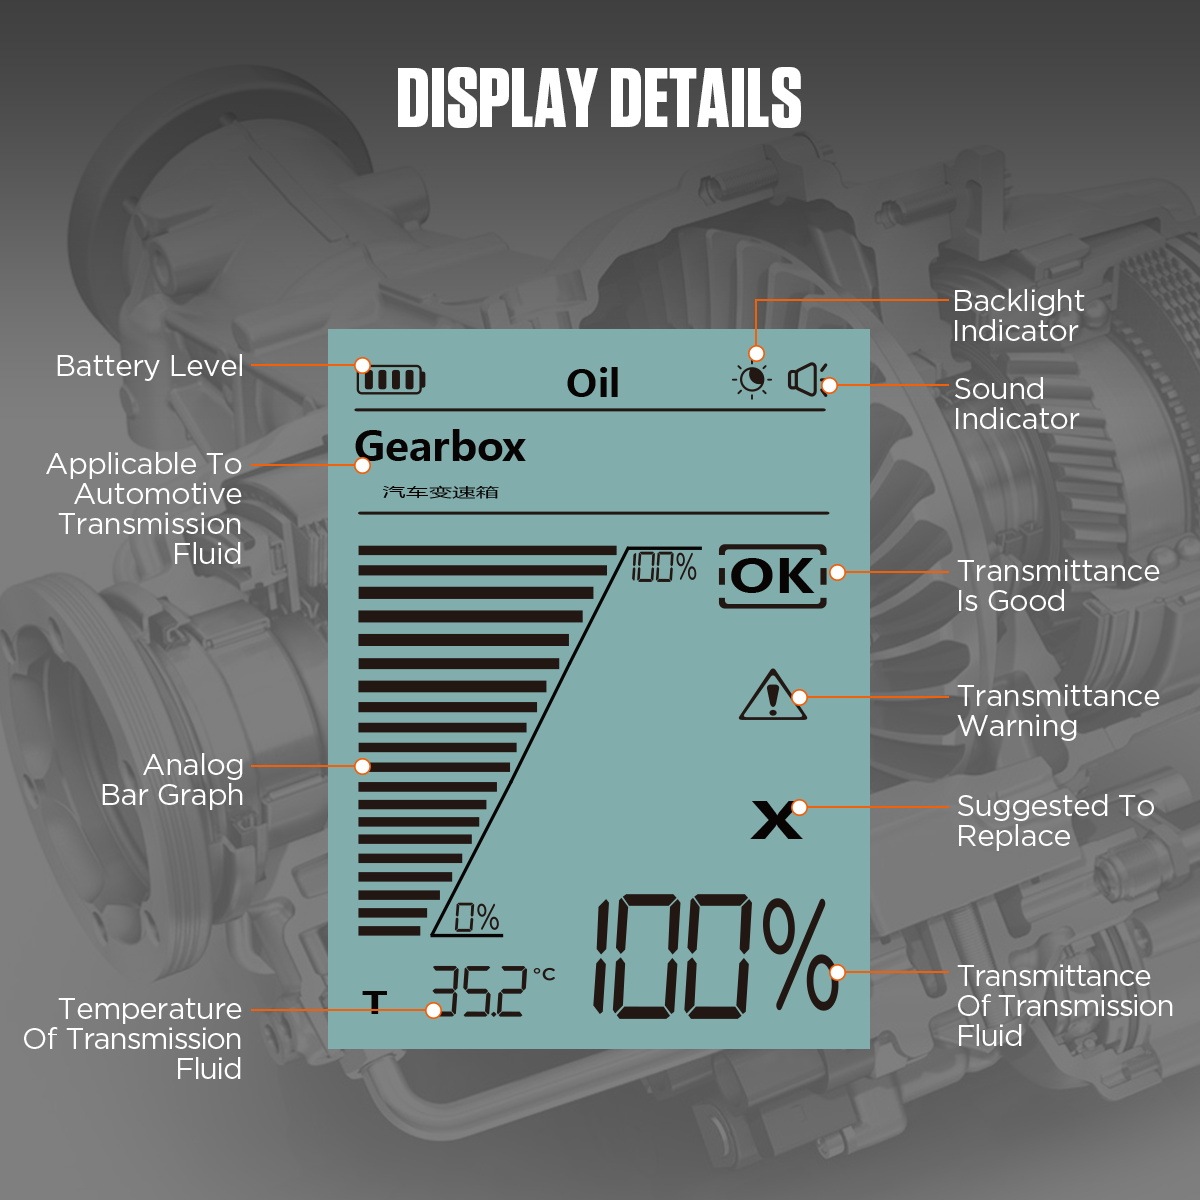
Step 9: Set the temperature unit and backlight
Press the temperature key to select °C or °F if needed, and use the separate backlight key when the display is difficult to read. AS505 has no gasoline-versus-diesel test-mode selection.
Completion check: The Gearbox screen, temperature unit, battery indicator and result area are clearly visible.
Step 10: Prepare the access area
Clean loose dirt from around the approved dipstick or sampling point while it remains closed. Arrange the AS505 so the hose can reach without crossing a hot part, belt, fan or sharp edge.
Common mistake: Treating a nearby tube or service plug as permission to insert the probe.
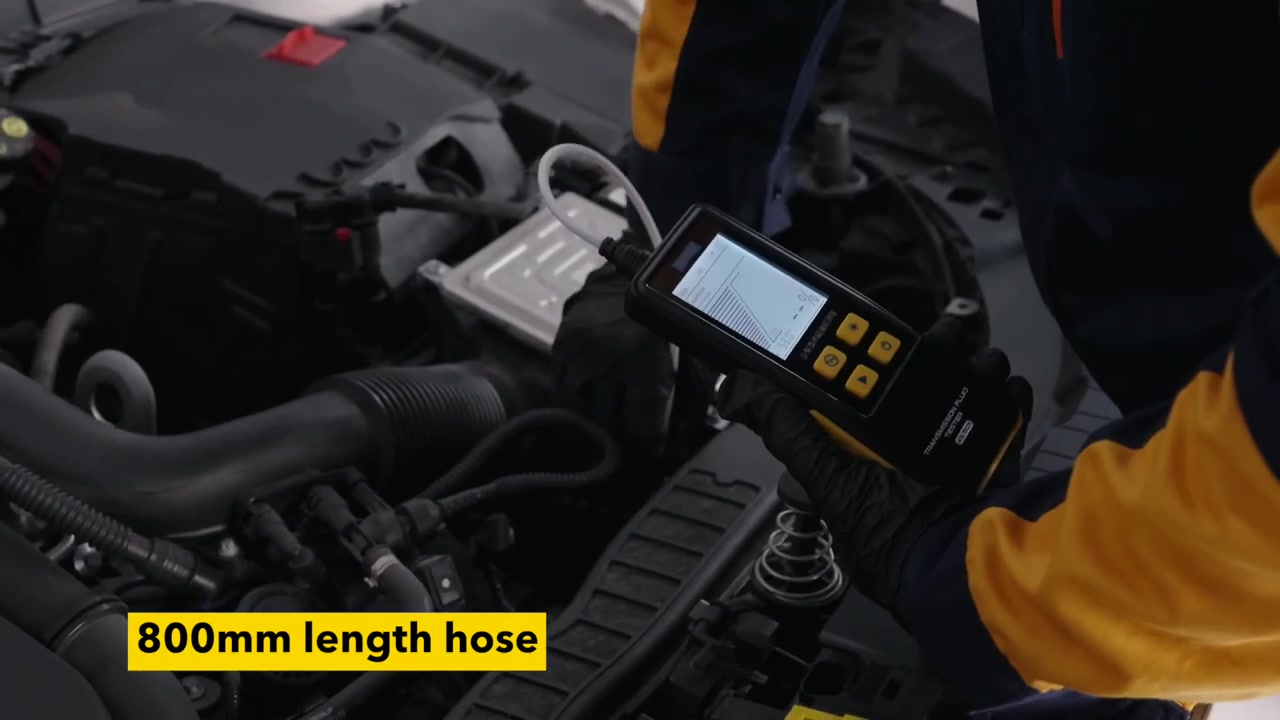
Step 11: Open only the approved sampling route
Remove the specified ATF dipstick or expose the approved sample only as the vehicle procedure allows. Keep the dipstick and any cap on a clean surface, and prevent dirt or wiping fibers from entering.
Stop: Do not open a fill, drain or level plug merely to reach fluid for AS505.
Step 12: Guide the sensing end into the fluid
Feed the flexible probe gently through the approved route until the optical sensing area is properly submerged in ATF. Keep the hose free of sharp bends and do not push against resistance.
Stop: If the probe catches, binds or cannot reach the sample smoothly, withdraw it with gentle control and use the vehicle’s prescribed workshop sampling method.
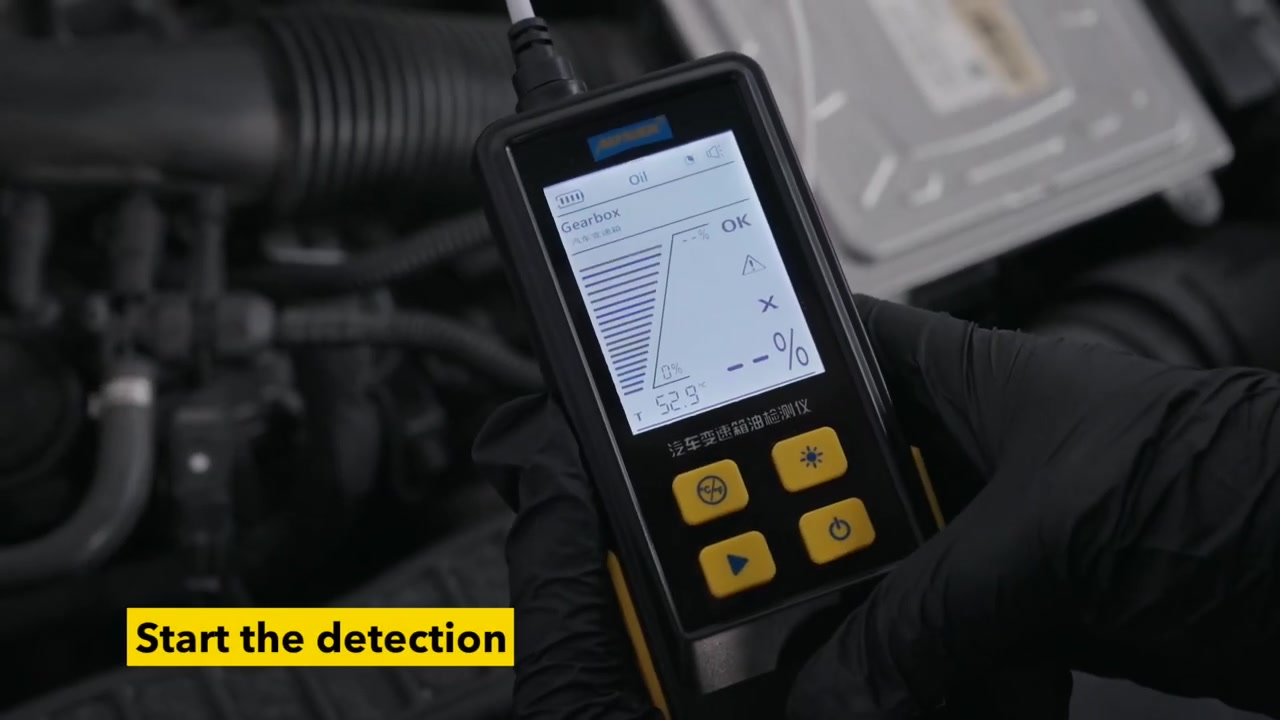
Step 13: Press TEST and keep the probe stable
Press the TEST key once. Keep the sensing area immersed and the hose still while the AS505 completes the optical measurement.
Completion check: The display settles on a transmittance percentage, result icon and fluid temperature.
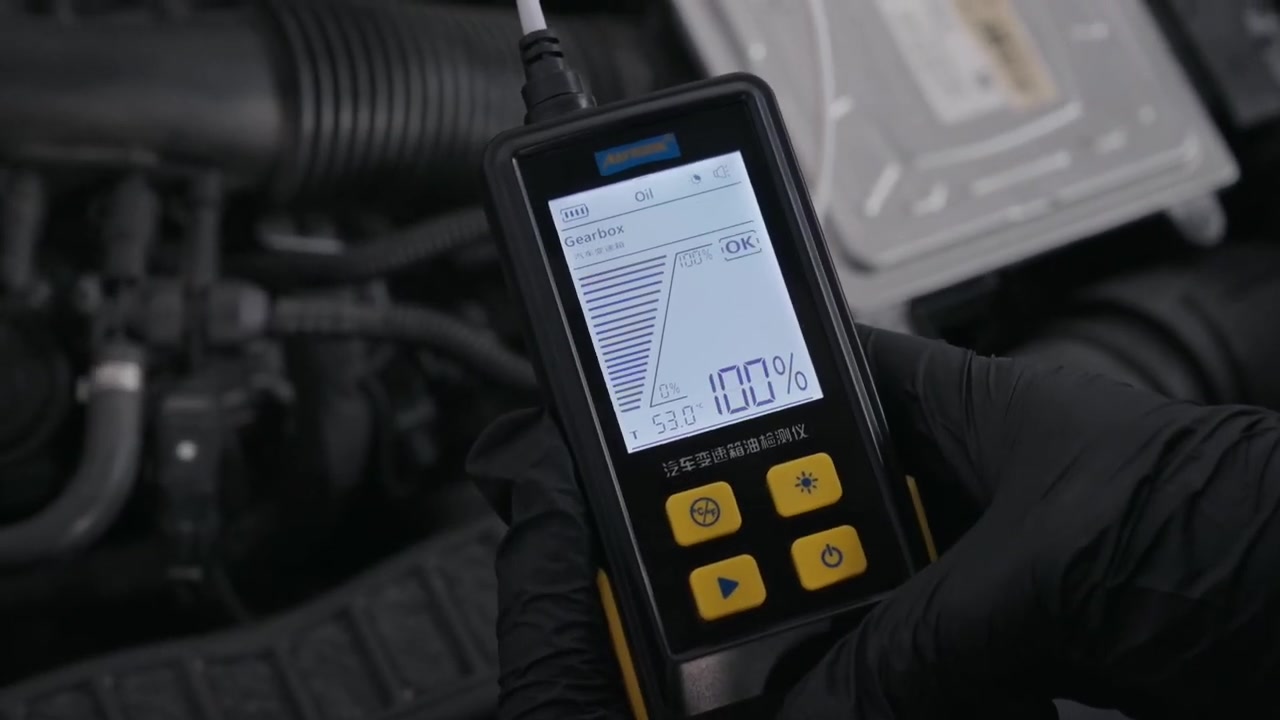
Step 14: Read and record all three result fields
Record the percentage together with the OK, warning or suggested-replacement icon and the displayed fluid temperature. Also record the vehicle, ATF specification and sampling point so the result has useful context.
Pass condition: Percentage, icon, temperature, fluid identity and access point are all recorded.
Step 15: Apply the manual’s transmittance bands
The current manual treats transmittance above 60% as good, 60–30% as warning and below 30% as suggested replacement. Because the printed wording shares the exact 60% boundary, use the icon actually shown by the AS505 and the vehicle’s service requirements at that point rather than inventing decimal precision.
A warning or replacement icon is a maintenance prompt. It is not proof of one chemical failure or an instruction to perform an unapproved flush.
Step 16: Keep the result within its limits
Use the indication with the required ATF specification, service history, mileage, duty cycle, leaks, shift symptoms, diagnostic codes and vehicle maintenance schedule. The AS505 does not measure viscosity, clutch wear, metal content, hydraulic pressure or complete transmission health.
Common mistake: Comparing percentages from different, unidentified fluids as if optical transmittance were a universal laboratory grade.
Step 17: Verify an unexpected result once
For an implausible result, gently remove the probe, wipe it clean, reconfirm the fluid and approved sample, then repeat once under the same cooled and stable condition. Do not average away a warning.
Stop: End the test if readings remain unstable, the sample identity changes, the probe is difficult to remove or the vehicle has transmission symptoms that require diagnosis.
Step 18: Withdraw the probe and restore the access
Guide the hose out without force. Wipe the probe immediately, reinstall the dipstick fully or close the specified sampling point exactly as the vehicle procedure requires, and inspect for a displaced seal or spilled fluid.
Completion check: The probe is clean, the access is correctly restored and no foreign material entered the transmission.
Step 19: Power off and store dry
Hold the power key for about two seconds to switch off. Store the clean, dry probe without a tight bend and keep the tester away from moisture and contamination. Remove the batteries for long storage.
Common mistake: Storing the optical tip with used ATF on it can contaminate the next sample and make a future result less reliable.
What a complete AS505 test looks like
A complete test begins with fluid identity and approved access, not probe insertion. The vehicle was secure and cool, the probe and opening stayed clean, no sealed port was improvised, the result included percentage, icon and temperature, and the sampling route was restored without force or contamination.
When the indication or vehicle schedule calls for service, follow the ATF specification and service procedure for that transmission. For the delivered control layout, localized pages or an updated revision, find the AS505 entry in the AUTOOL manual download center before beginning work.











Comments 0
Questions, fixes, and real-world diagnostic notes from readers.
Be the first to share a diagnostic result or ask a follow-up question.