
How to Use the AUTOOL RE110 Remote Key Tester

The AUTOOL RE110 is an automotive remote-key signal tester. This guide turns the current model-specific controls and official operating sequence into a practical start-to-finish workflow.
Quick answer: Use the RE110 on a controlled bench and test one function at a time. Hold the remote at a repeatable position, press each button and record the RF frequency or infrared indication, then test the button cell with the correct polarity. Compare results with the remote's regional specification or a known-good matching key; the RE110 does not program or pair keys.
In this guide
Before you start
A remote that fails at the vehicle can have a weak cell, worn button, damaged transmitter, radio interference, receiver fault or lost pairing. The RE110 helps separate transmitter output and battery condition from the rest of that chain. It cannot establish vehicle authorization, immobilizer status or receiver health by itself.
- identify the remote, vehicle market, expected RF band and whether the remote actually uses infrared;
- inspect the case, buttons, battery contacts and previous water or impact damage before testing;
- place the RE110 on a dry bench away from phones, chargers, other keys and strong radio transmitters;
- mark one repeatable remote position and distance so button-to-button comparisons are meaningful;
- prepare a known-good matching remote or the exact regional specification when available; and
- use insulated handling and correct polarity when the button cell is removed.
Use the AUTOOL manual download center to locate the current instructions when a manual is available. The delivered model label and current vehicle service information control if an older image or remembered setting differs.
RE110 controls and specifications
| Specification or function | Current model |
|---|---|
| Operating Temperature | -10°C to 60°C |
| Operating Voltage | 4 × 1.5V AAA batteries |
| Type-C Power Supply | 5V / 1A |
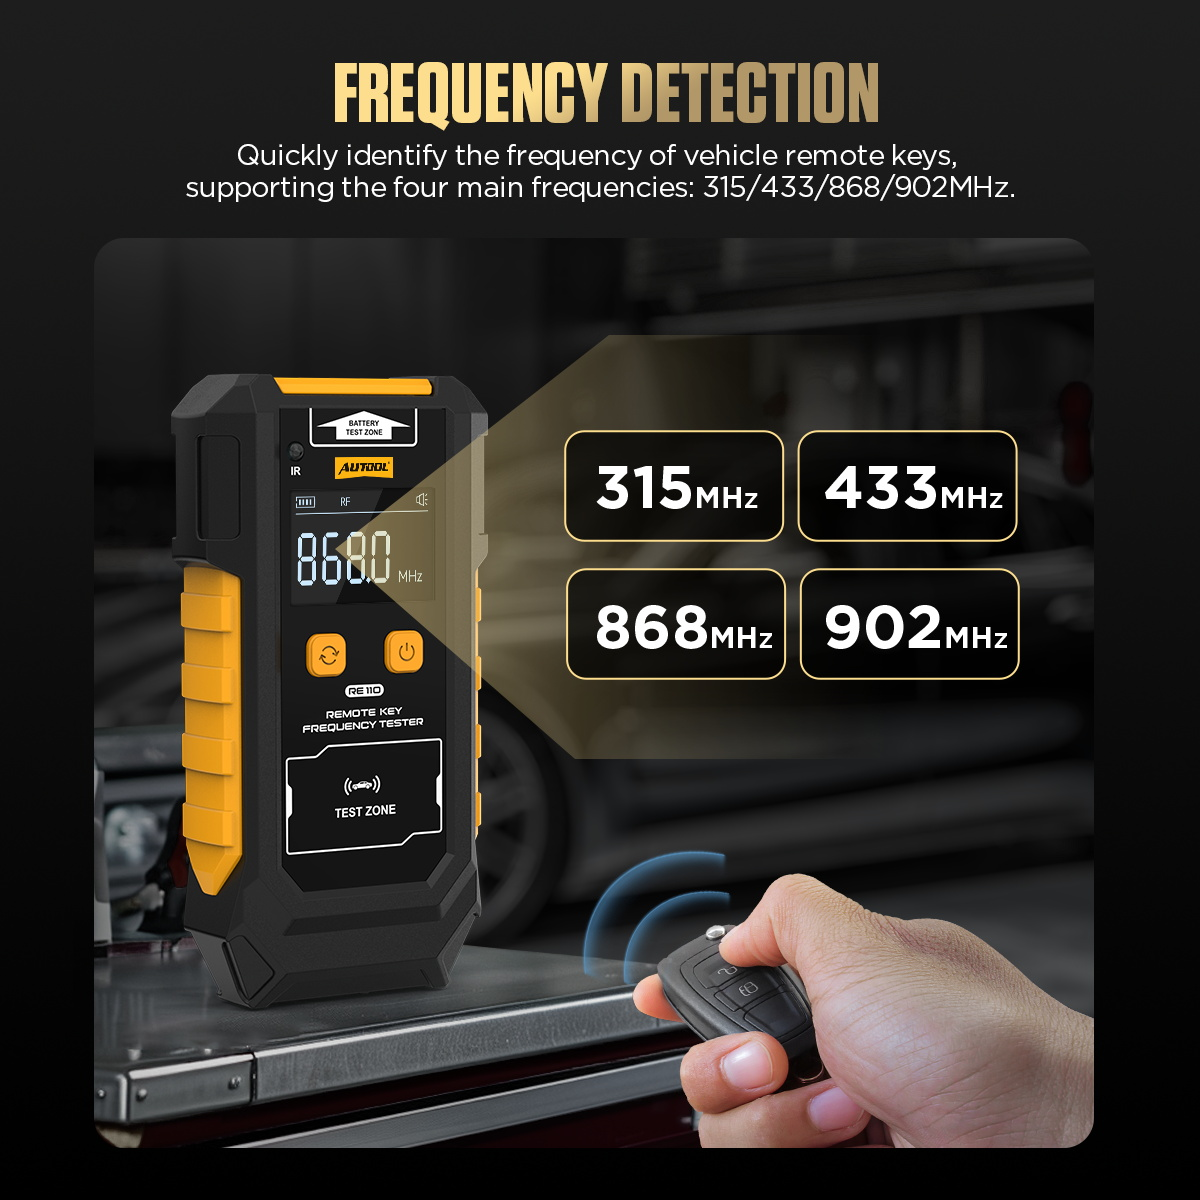
| Detection Frequency Bands | 315 / 433 / 868 / 902MHz |
| Battery Measurement Voltage | 0-6V |
| Supported Button Batteries | CR2032 / CR2025 |
| Storage Temperature | -20°C to 65°C |
| Product Size | 162 × 85 × 37mm |
| Structure Overview | The RE110 structure is arranged for quick RF, IR, and button battery testing. Use the correct test area and mode for each function. |
| Test Areas | Battery Testing Area, Infrared Receiver, Key Testing Area |
A displayed carrier frequency or transmission indication confirms output at the tester under that setup. It does not prove transmitted code correctness, rolling-code synchronization, usable range at the vehicle or successful pairing. An open-circuit button-cell value can also look acceptable while voltage collapses under load, so combine battery and transmission observations.
How to use the RE110
Step 1: Identify the remote and choose one test
Record the key or remote identity, region and symptom, then inspect its case and buttons. Use the RE110 to check radio-frequency transmission, infrared transmission or the button cell separately; it does not program, pair or prove authorization to a vehicle.
Before moving on, pause and check the connection against the physical labels. A secure-looking connection can still be the wrong port, polarity, range or adapter.
Step 2: Supply the specified power and enter RF mode
Use four fresh 1.5V AAA batteries installed with the marked polarity or a regulated Type-C 5V/1A supply. Place the RE110 on a dry bench away from strong transmitters, then long-press the power switch for two seconds. Confirm the display starts normally in RF frequency mode.
Step 3: Run the RF frequency test close to the key area
Hold the remote close to the marked key testing area at a repeatable distance and orientation, then press one button once. Record the displayed frequency and units. The listed bands are 315, 433, 868 and 902MHz; use a short press of the power switch to clear the current frequency before the next controlled test.
Step 4: Repeat every button under the same conditions
Test lock, unlock, trunk and other buttons from the same position. A button that produces no repeatable signal may indicate a weak cell, worn switch or remote fault, but interference and setup distance must be ruled out before condemning the remote.
Step 5: Switch to IR mode only for an infrared remote
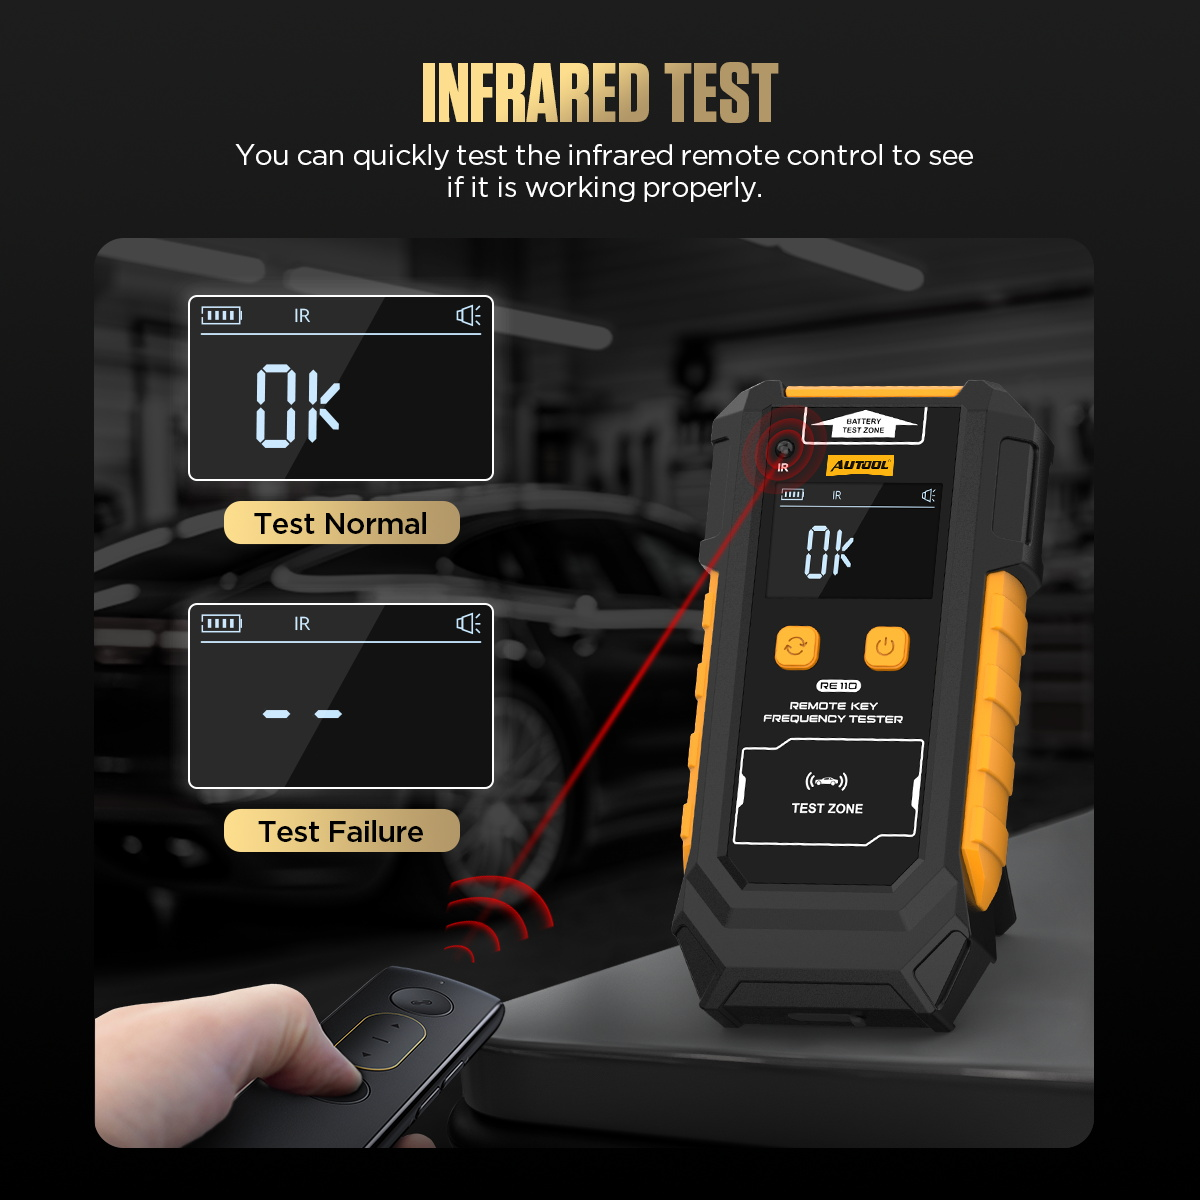
Press the mode switch until IR is shown, aim the remote's infrared emitter at the RE110 receiver and press the intended button. An OK indication confirms detected IR output at that moment. No response from an RF-only remote is expected and must not be reported as an IR failure.
Step 6: Switch to BAT mode and test a supported button cell
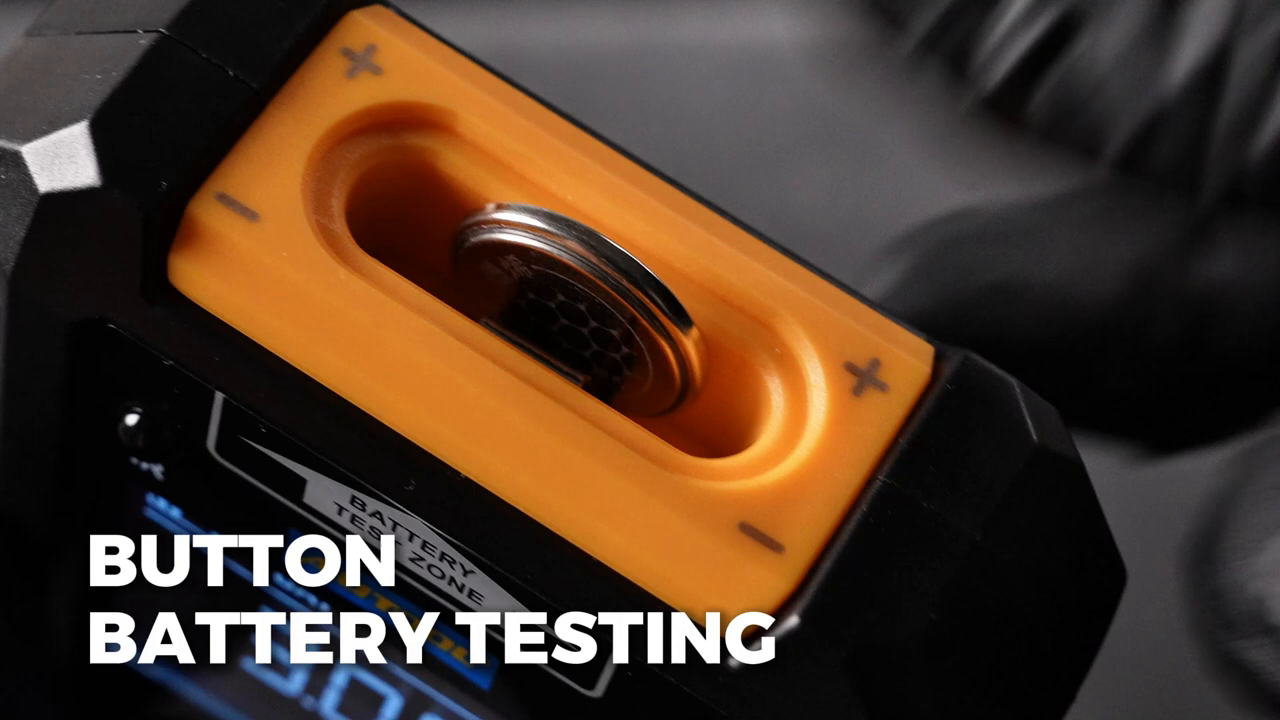
Remove the battery only by the remote maker's procedure, identify it as a supported CR2025 or CR2032, then press the mode switch to BAT. Place the cell in the 0-6V test area with the marked polarity and read the voltage. Keep metal tools from bridging it; open-circuit voltage should be combined with remote behavior or an appropriate loaded test when required.
Step 7: Compare, document and power off
Repeat an unexpected reading after changing only one controlled variable, such as battery, button or remote position. Record frequency, units, button and battery result, then power the RE110 off and store it dry. Vehicle pairing or immobilizer work requires the authorized vehicle procedure and separate equipment.
Do not end the job at the first plausible indication. Repeat or confirm the observation under the same controlled condition, then restore the vehicle connection and check for leakage, warnings or an abnormal response.
Read and verify the result
Look for repeatability first. The same button, distance and orientation should produce a stable frequency or indication. Compare every button and, when available, a known-good matching remote. One missing button response with other buttons stable points in a different direction than an entire remote that becomes normal after battery replacement.
- Match the displayed RF frequency to the exact region and remote specification; common bands are not interchangeable proof for every vehicle.
- An RF-only remote should not be failed for producing no infrared response.
- A visible RF or IR transmission does not validate the rolling code, transponder or vehicle receiver.
- Repeat an unexpected result after changing one variable—battery, button, position or comparison remote—so the cause remains traceable.
Stop if the RE110 or button cell heats, a cell leaks or swells, polarity is uncertain, the display is unstable near an interference source, or the remote must be damaged to reach the battery. Move to the correct remote service procedure instead of forcing the case or shorting the cell.
Common mistakes and care
- Place the remote key close to the key testing area for more accurate readings.
- If the frequency value cannot be displayed normally, the remote key frequency may not be supported by this device.
- Supported RF bands are mainly 315MHz, 433MHz, 868MHz, and 902MHz.
- When testing CR2025 / CR2032 batteries, pay attention to the positive and negative polarity markings.
- Avoid strong electronic signal interference sources during testing, such as signal towers, base stations, utility poles, phone calls, or message transmission.
- Do not disassemble or modify the device without authorization.
- Store the product in a dry place and avoid hot, humid, or non-ventilated environments.
- Do not describe a visible RF signal as proof that the vehicle must unlock.
- Do not compare remotes from different markets without confirming their expected frequency.
- Do not bridge a button cell with metal tools or reverse its polarity on the tester contacts.
- Do not infer remote range from one close-range bench reading.
- Do not use the RE110 as a substitute for authorized key programming, pairing or immobilizer diagnosis.
Frequently asked questions
Can I use the RE110 setup from a different AUTOOL model?
No. Similar housings and accessories do not prove identical ranges, controls, power requirements or connection methods. Match the exact model first.
Does one normal result prove the system is fault-free?
No. It proves only that the tested condition was within the chosen acceptance criteria at that moment. Continue the vehicle-specific diagnostic path when the symptom remains.
What should I do when the reading is unstable?
Stop and check power, connection security, sealing, range selection, test-point suitability and vehicle state. Repeat only after the cause of instability is understood.
Final RE110 checklist
- Remote identity, market, expected RF band and IR capability confirmed
- Bench cleared of obvious RF interference and test position kept constant
- Every button tested and recorded separately with displayed units
- Infrared mode used only for a remote that actually transmits IR
- Button cell identified and tested with correct polarity
- Unexpected result repeated with only one controlled variable changed
- RE110 powered off; remote and battery restored by the correct procedure
The RE110 is most useful as a separator: battery, RF output and IR output can be checked independently before moving to vehicle-side diagnosis. Preserve the exact setup and comparison, avoid conclusions the tester cannot prove, and hand pairing or immobilizer work to the authorized procedure.










Comments 0
Questions, fixes, and real-world diagnostic notes from readers.
Be the first to share a diagnostic result or ask a follow-up question.