
How to Use the AUTOOL SPT301 Spark Plug Tester

The AUTOOL SPT301 is an bench spark plug tester. This guide turns the current model-specific controls and official operating sequence into a practical start-to-finish workflow.
Quick answer: With the SPT301 switched off and unplugged, install dry, compatible spark plugs, close the protective cover, verify the exact power input, begin at low simulated RPM, and compare spark consistency while increasing speed gradually. Return to low speed, switch off and unplug before opening the cover or moving a plug.
In this guide
Before you start
Use the tester on a dry, stable bench away from fuel, solvent vapor and conductive debris. The spark plugs must be removed from the engine. A spark tester produces high voltage: keep the cover closed and never install, remove or touch a plug while the unit is powered.
- confirm that the model label reads AUTOOL SPT301 and that its power label matches the available supply;
- inspect the housing, transparent cover, plug holders, leads and controls for cracks, looseness or contamination;
- use dry plugs with intact ceramic insulators and compatible thread, reach and terminal geometry;
- choose a same-type known or better-performing plug as a reference where the test layout supports one;
- check that every plug seats securely without forcing or side-loading its ceramic; and
- keep hands, tools, fuel and cleaning solvent away from the energized test chamber.
Use the AUTOOL manual download center to locate the current instructions when a manual is available. The delivered model label and current vehicle service information control if an older image or remembered setting differs.
SPT301 controls and specifications
| Specification or function | Current model |
|---|---|
| Input Power | AC 110V / 220V ±10% |
| Output Power | DC12V ±2 1A |
| Simulated RPM | 200-9000 RPM |
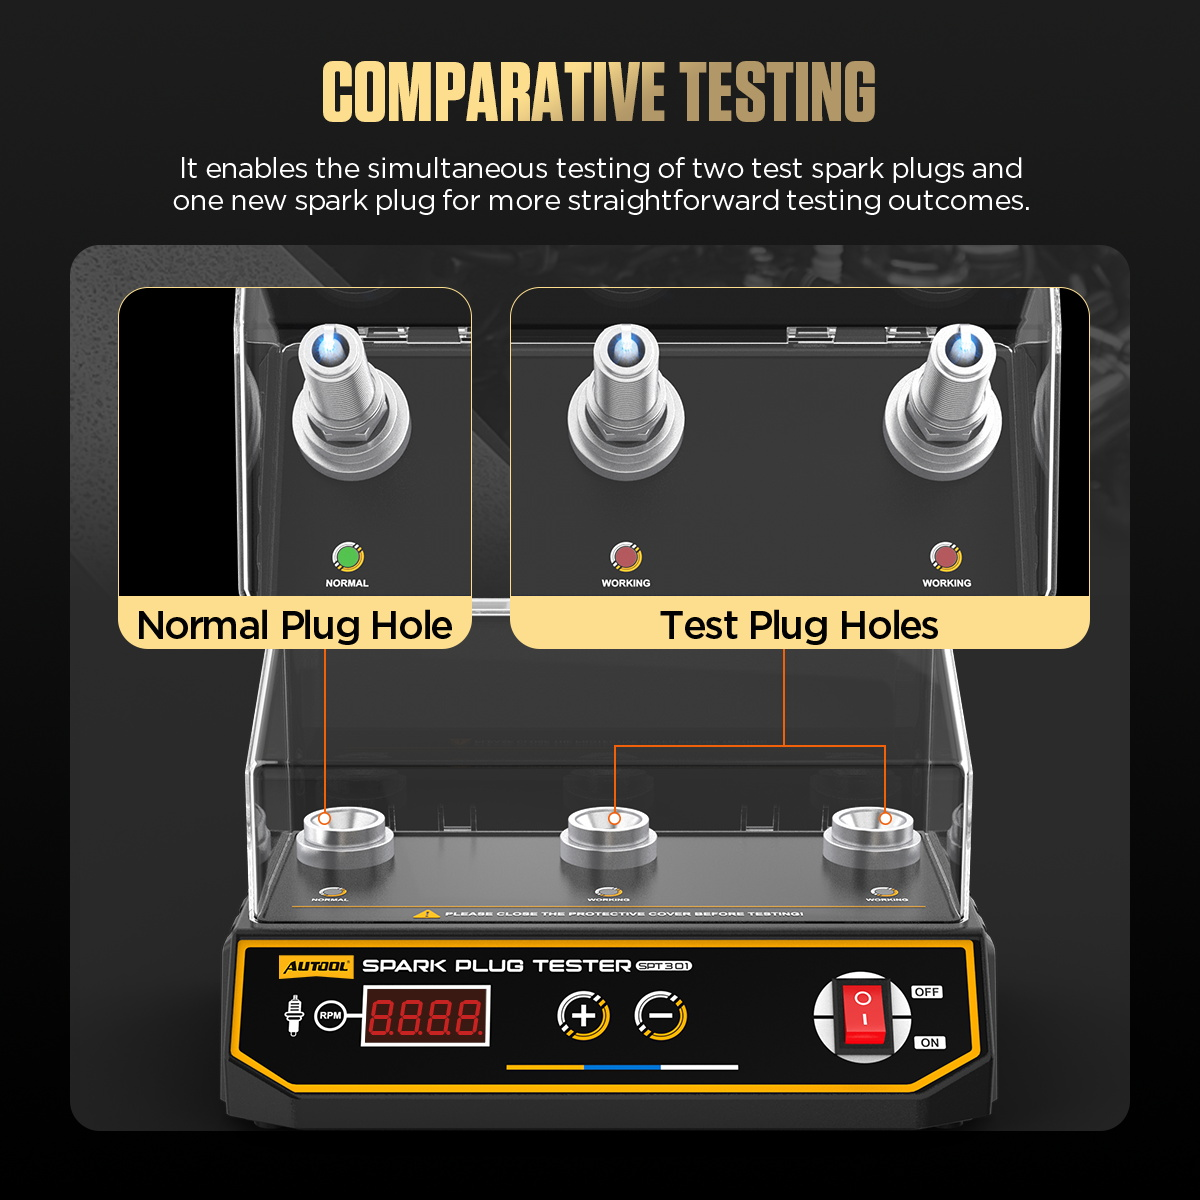
| Test Holes | Two test plug positions |
| Test Hole Positions | 3 |
| Safety Protection Cover | Supported |
This is a simulated bench comparison, not a complete ignition-system test. It does not reproduce cylinder pressure, combustion temperature, coil output, wiring resistance, ECU control or every in-vehicle fault. Keep the exact model within its marked voltage and simulated-RPM limits.
How to use the SPT301
Step 1: Switch off the tester and inspect the spark plugs
Keep the tester unplugged while loading it. Use only removed, dry spark plugs with intact insulators and terminals; do not bring fuel, solvent vapor or a plug still connected to the engine into the bench test area.
Before moving on, confirm the tester remains unplugged, the plugs are dry and no fuel or solvent vapor is present.
Step 2: Match the plug type and prepare a reference
Compare plugs with the same thread, reach and terminal arrangement. Check the gap and visible condition, then select a known or better-performing plug as a reference when the test layout provides a reference position.
Step 3: Fit the plugs in the correct test positions
Install a known reference plug in the normal/reference position and up to two plugs of the same type in the test positions. Thread or clamp each plug only by the intended holder and confirm the insulator is not side-loaded.
Step 4: Close the transparent protective cover
Check that every plug is secure, no loose item remains inside and the high-voltage leads are intact. Close the protective cover fully before applying power, and keep hands away from the plugs and internal connections.
Step 5: Verify the exact power input
Read the delivered unit and adapter labels before connection. Use only the stated mains or adapter input for this exact model; do not infer voltage compatibility from another SPT tester that looks similar.
Step 6: Start at the lowest simulated engine speed
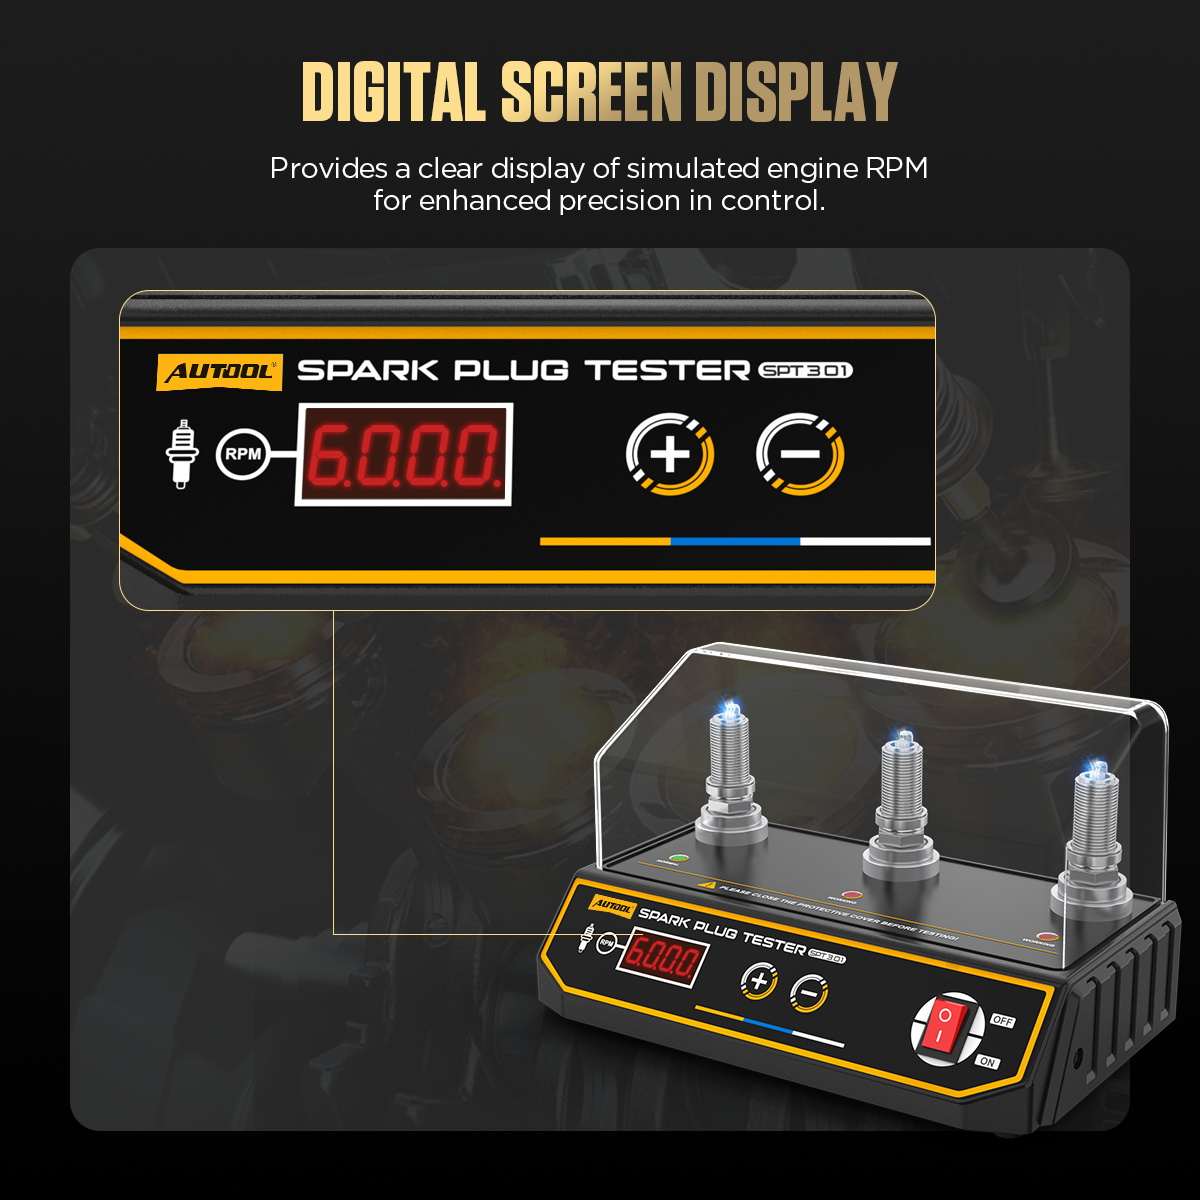
Use the speed controls and display to begin near 200 RPM, then increase gradually through the required range without exceeding 9000 RPM. Watch all plug gaps from outside the closed cover and stop immediately if arcing occurs anywhere other than the intended gaps.
Step 7: Compare spark consistency across the RPM range
Raise simulated RPM in controlled increments and compare regularity, missed events and visible stability side by side. Hold each condition long enough to confirm a pattern, but do not run the plugs longer than needed for comparison.
Step 8: Return to low speed, switch off and unplug
Reduce simulated RPM to the lowest setting, switch the tester off and disconnect its power. Wait for the display or indicators to go dark and for stored electrical energy to dissipate before opening the cover.
Step 9: Remove the plugs and record the comparison
Open the cover only after shutdown, remove the plugs without touching energized parts, and record which position held each plug. Treat the result as a controlled comparison, then continue the vehicle-specific ignition diagnosis if a symptom remains.
Before touching a plug, confirm simulated RPM is at minimum, power is off, the tester is unplugged and its display or indicators are dark.
Read and verify the result
Judge the plugs side by side under the same tester position, plug type and simulated RPM conditions. Look for repeatable missed sparks, irregular timing or loss of stability as RPM rises. Brightness alone is not a complete performance measure, especially when gaps, plug designs or viewing angles differ.
- A plug that remains regular while a same-type comparison plug repeatedly misses is stronger evidence than one isolated flicker.
- If results change when plug positions are swapped, inspect the tester position, holder and connection before condemning the plug.
- Different plug types, gaps and wear conditions are not a controlled comparison; record those differences before interpreting the result.
- A plug that passes on the bench can still fail under cylinder pressure or because of the vehicle coil, wiring, module or mechanical condition.
Stop immediately for arcing outside the intended plug gaps, a damaged cover or lead, smoke, odor, unstable power, a loose plug or abnormal tester noise. Turn the speed down, switch off, unplug and wait before opening the cover. Do not touch an energized plug to correct the setup.
Common mistakes and care
- Regularly check parts that need to be tightened or connected. Tighten loose parts before operation.
- Avoid rubbing the housing against rough surfaces to reduce wear.
- Do not overload the equipment, and make sure the safety guard remains complete and reliable.
- If wiring shows aging or damage, stop use and contact support before continuing.
- Turn off the power before inserting, removing, or adjusting spark plugs.
- Do not touch the spark plug directly during operation.
- The higher the working frequency, the stronger the displayed spark plug intensity during testing.
- Do not insert, remove or reposition a spark plug while the tester is connected to power.
- Do not operate with the protective cover open or use the unit near fuel and solvent vapor.
- Do not connect the wrong mains voltage or substitute an adapter merely because its plug fits.
- Do not compare unlike plug types and then interpret brightness alone as a pass or fail.
- After shutdown and discharge, keep the chamber clean and dry and store the unit with no stress on the holders or leads.
Frequently asked questions
Can the SPT301 diagnose an engine misfire by itself?
No. It compares removed spark plugs under simulated bench conditions. A misfire can also involve the coil, wiring, control module, fuel delivery, compression or other vehicle conditions.
Why use a reference plug?
A same-type known or better-performing plug provides a controlled side-by-side pattern. It helps separate a repeatable plug difference from a tester position or setup issue.
Can I change a plug while the tester is running?
No. Reduce speed, switch the tester off, unplug it and wait for discharge before opening the cover or touching any plug.
Final SPT301 checklist
- Exact SPT model and power input confirmed
- Dry, compatible plugs inspected and reference selected
- Plugs secured in the correct positions with the cover closed
- Test started at low RPM and increased only in controlled steps
- Spark pattern compared under the same conditions and position effects checked
- Speed returned low; tester switched off, unplugged and discharged before opening
Used this way, the SPT301 gives you a controlled spark-plug comparison without turning a bench observation into an unsupported diagnosis. Record the pattern, then verify the remaining ignition and engine conditions on the vehicle.











Comments 0
Questions, fixes, and real-world diagnostic notes from readers.
Be the first to share a diagnostic result or ask a follow-up question.