
How to Use the MRCARTOOL F109 Brake Fluid Bleeder

The MRCARTOOL F109 brake fluid bleeder draws new fluid from its rear bottle and sends it through a 3.5 m filling hose to a sealed master-cylinder reservoir adapter. The machine maintains adjustable pulsating pressure while the operator drains used fluid at the service points prescribed by the vehicle manufacturer. A reliable result starts before the vehicle connection: confirm the exact fluid, pressure and bleed sequence, place both bottle hoses at the bottom of the new-fluid supply, purge the filling line into a waste container until bubble-free, then connect at zero pressure.
Quick answer: Put the F109 on a stable dry surface and confirm the nameplate voltage and protective earth. Fill the rear bottle with new, unopened brake fluid of the exact vehicle specification; place both the suction and pressure-balance hoses at the bottom. Connect the reservoir adapter to the filling hose over a waste container, power on and hold Start until fluid exits without bubbles. Power off and wait for the gauge to remain at 0 bar. Install the adapter on the clean vehicle reservoir, reconnect the filling hose, power on, hold Start while setting vehicle-approved pressure, then release Start only after stable pressure is established. Bleed one prescribed point at a time into the recovery bottle. Close every bleeder, power off and wait for stable zero before disconnecting.
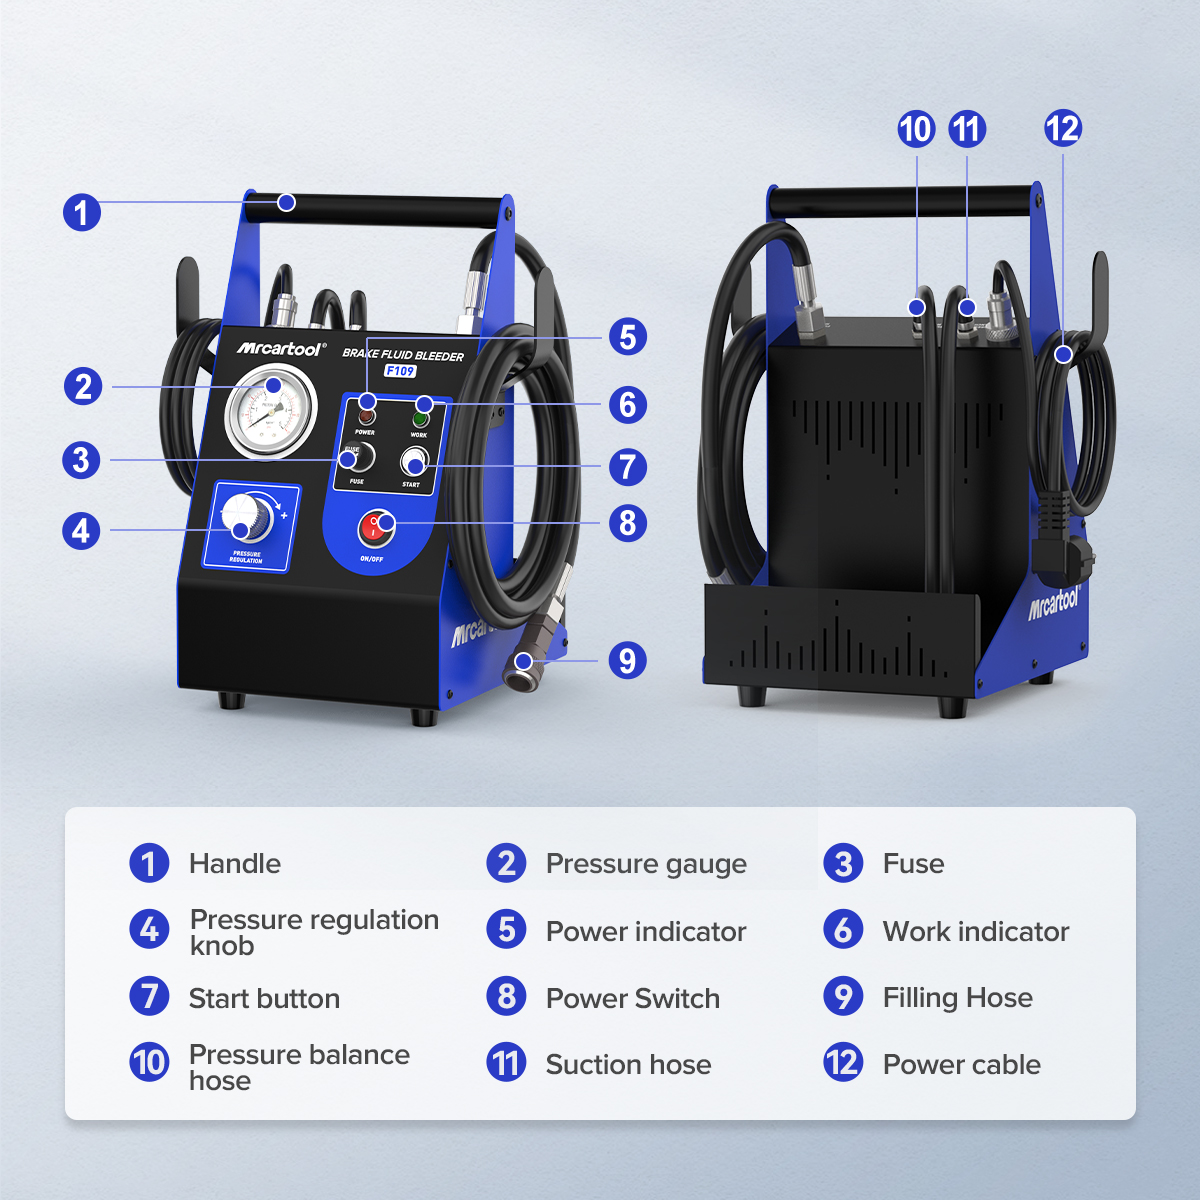
In this guide
Understand the F109 and its limits
The exact manual describes F109 as professional Class I equipment for filling and draining brake fluid in automotive brake and clutch systems. It requires a grounded AC supply matching the machine nameplate. Listed maximum power is 35 W, working-pressure range is 0.5–2.5 bar, maximum output flow is 1.6 L/min and the filling hose is 3.5 m. The machine monitors pressure and supports low-fluid protection, but those limits are capabilities—not permission to use the highest pressure on a particular reservoir.
The vehicle manufacturer controls fluid chemistry, maximum filling pressure, reservoir adapter, service-point order, electronic routines and final acceptance checks. The F109 can maintain supply pressure and reduce the need for a second person at the pedal; it cannot identify fluid, repair a leak, choose a universal wheel order, activate ABS valves or prove a dry hydraulic unit is fully purged.
Brake and clutch hydraulics are safety-critical. Operation is for trained, qualified personnel. Wear splash goggles and compatible gloves, protect paint and wiring from brake fluid, keep the work area dry and ventilated, and route the grounded power cable away from heat, oil, sharp edges and moving parts. If the fluid, adapter, pressure, bleed sequence or final test is uncertain, stop before opening the system.
Prepare the machine and vehicle
- Read the vehicle procedure and record the exact new fluid, maximum permitted pressure, service-point sequence and any ABS, clutch or pedal routine.
- Inspect the power cable, earth connection, filling hose, suction hose, pressure-balance hose, quick connector, gauge, pressure knob and adapters.
- Do not operate in rain or a damp area, and do not use a damaged cable, hose, adapter or enclosure.
- Check the vehicle for an unexplained low level, active leaks, damaged lines, abnormal pedal or brake warning before starting a routine exchange.
- Prepare enough unopened correct fluid for priming and the complete sequence, plus a visible reserve; never use captured or unknown fluid.
- Support the vehicle safely and route the 3.5 m filling hose without tangles, twists or concentrated pull on the reservoir.
Set up the new-fluid bottle
Place F109 upright on a flat, stable surface. Clean the rear bottle and cap area before opening it, add only new brake fluid of the exact specification, and set the bottle securely in its bracket. Insert both the suction hose and pressure-balance hose to the bottom. The suction hose feeds the pump; excess-pressure return fluid travels back through the balance hose. Keep both ends submerged and visible throughout the job.
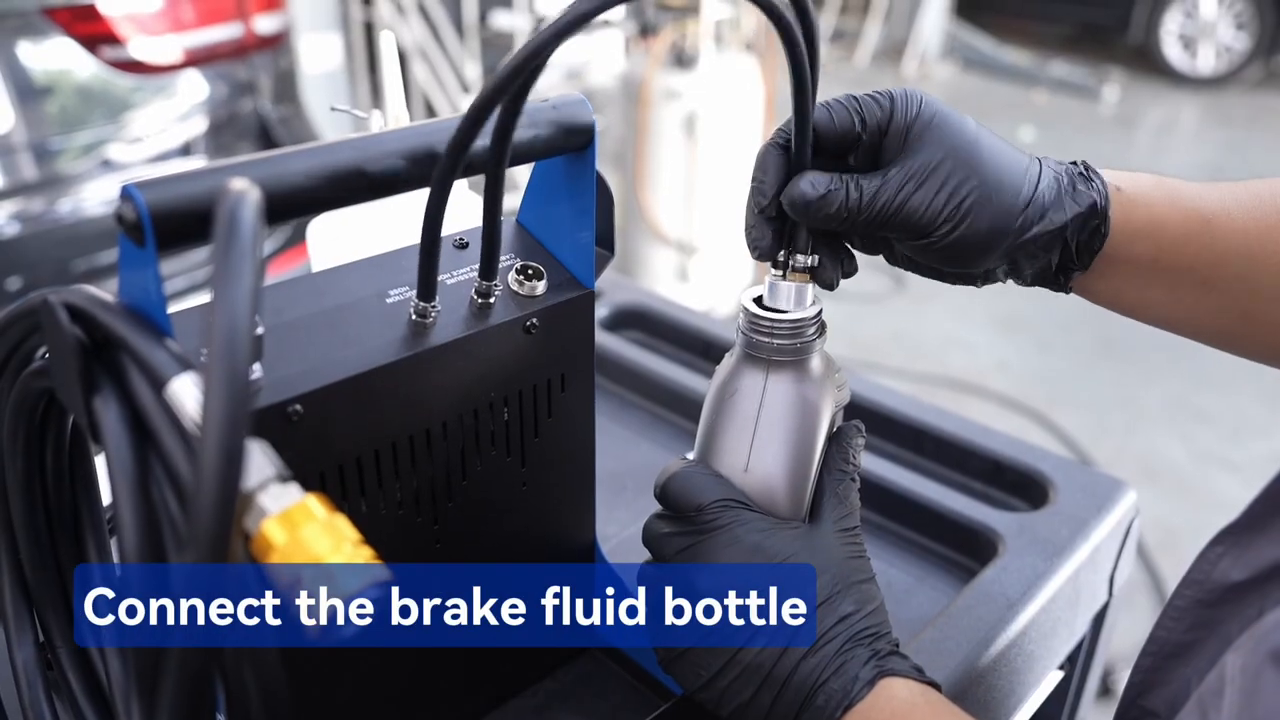
The machine includes low-fluid protection, but the operator must still watch the supply. Automatic shutdown after the pump draws air is a last defense, not a normal endpoint. If the fluid level approaches either hose inlet, stop with the active bleeder closed and correct the supply before air reaches the vehicle reservoir.
Prime the filling line before every first startup
1. Start with the pressure knob at minimum
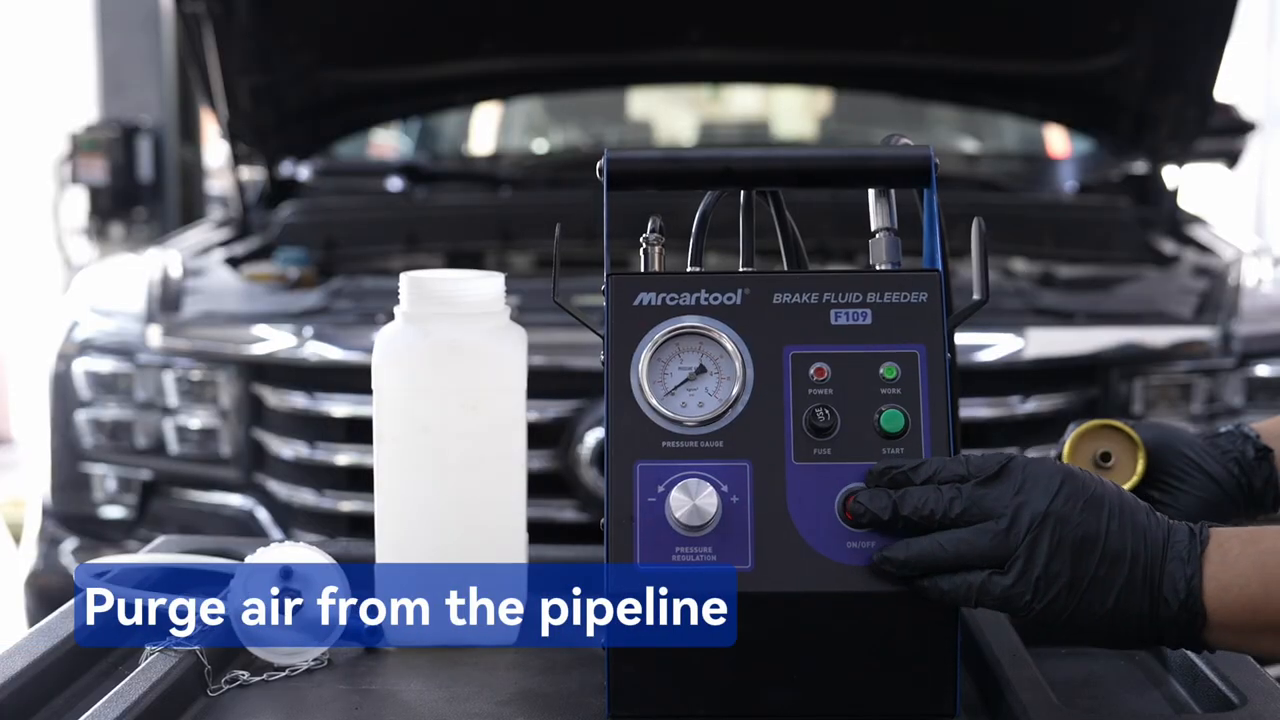
Turn the pressure adjustment knob counterclockwise to its lowest setting. Do not install the adapter on the vehicle yet. Connect the correct adapter to the filling-hose quick connector and direct its outlet into a compatible used-fluid container. Confirm the supply voltage matches the rear nameplate, connect the grounded power lead and switch on the main power.
2. Hold Start until the outlet is bubble-free
Press and hold Start to run the pump. The basic procedure gives about 30 seconds as the initial purge reference, while the detailed instruction says to observe the outlet and continue until brake fluid flows without bubbles. Visual condition controls: never stop only because a timer elapsed. Keep the adapter contained so priming fluid cannot splash onto the vehicle or floor.
3. Return to stable zero
Switch off the machine and watch the pressure gauge fall slowly to 0 bar. Wait until it remains at zero before removing the priming adapter or touching the quick connector. Treat the discharged fluid as used material even though it began as new fluid; do not pour it back into the supply bottle.
Connect to the vehicle and build pressure
4. Fit the reservoir adapter
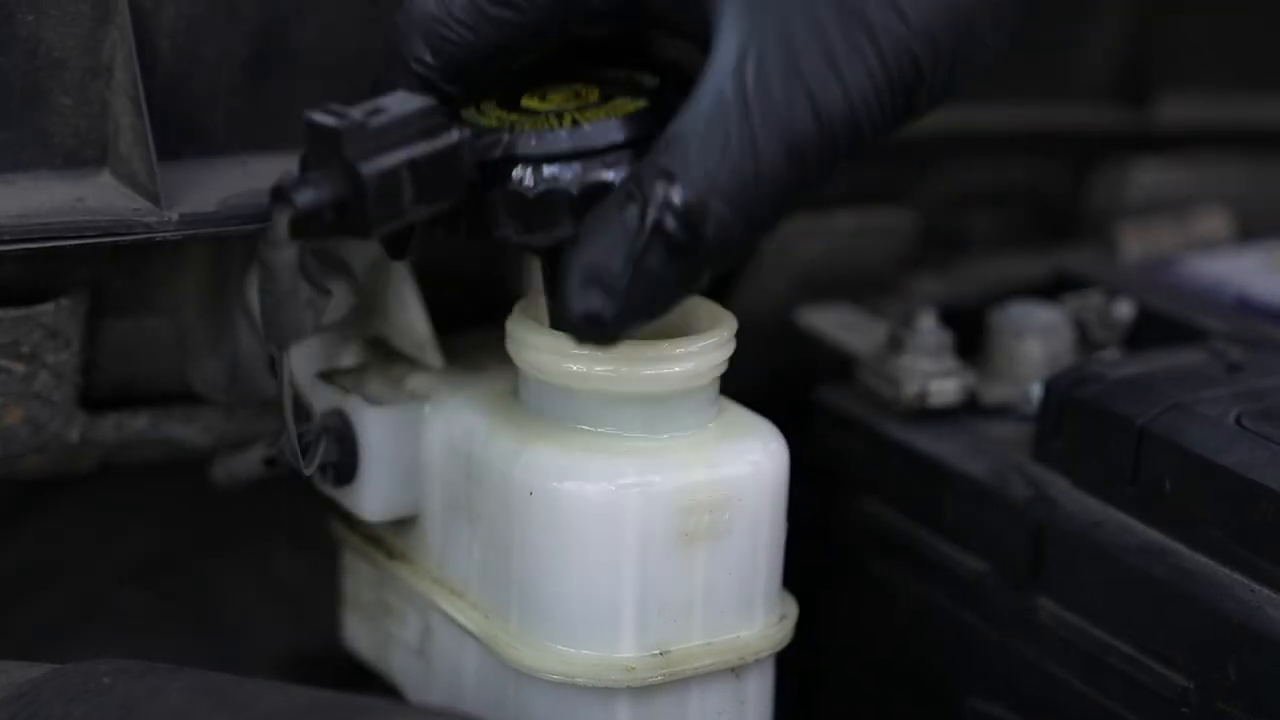
Clean around the vehicle reservoir, remove its cap and install the correct adapter squarely on the intended sealing surface. The official video shows the adapter fitted before the filling hose is attached. Dry-fit and secure it without forcing or distorting the reservoir. If it cannot resist a light controlled pull at zero pressure, obtain the exact adapter instead of improvising a seal.
5. Connect and perform a low-pressure seal check
Connect the filling-hose quick fitting to the installed adapter, then power on F109. Hold Start while turning the pressure knob clockwise gradually. The detailed manual says to build at least 1.0 bar before releasing Start; the machine should continue only when pressure has established. Pause early to inspect the adapter, reservoir, hose ends and machine for seepage or movement. If pressure will not build, release Start—the pump should stop—and find the leak rather than running continuously.
6. Set the vehicle-approved pressure
Adjust the knob while watching the gauge, using the vehicle manufacturer’s value. The manual states a factory default around 1.5 kg/cm² and gives 1.6–2.0 bar only as a general fallback when the manufacturer supplies no particular working pressure. Do not use that fallback if the vehicle forbids pressure bleeding or imposes a lower limit. Never exceed the F109’s 2.5 bar working ceiling, and reduce pressure if the reservoir or adapter shows distortion.
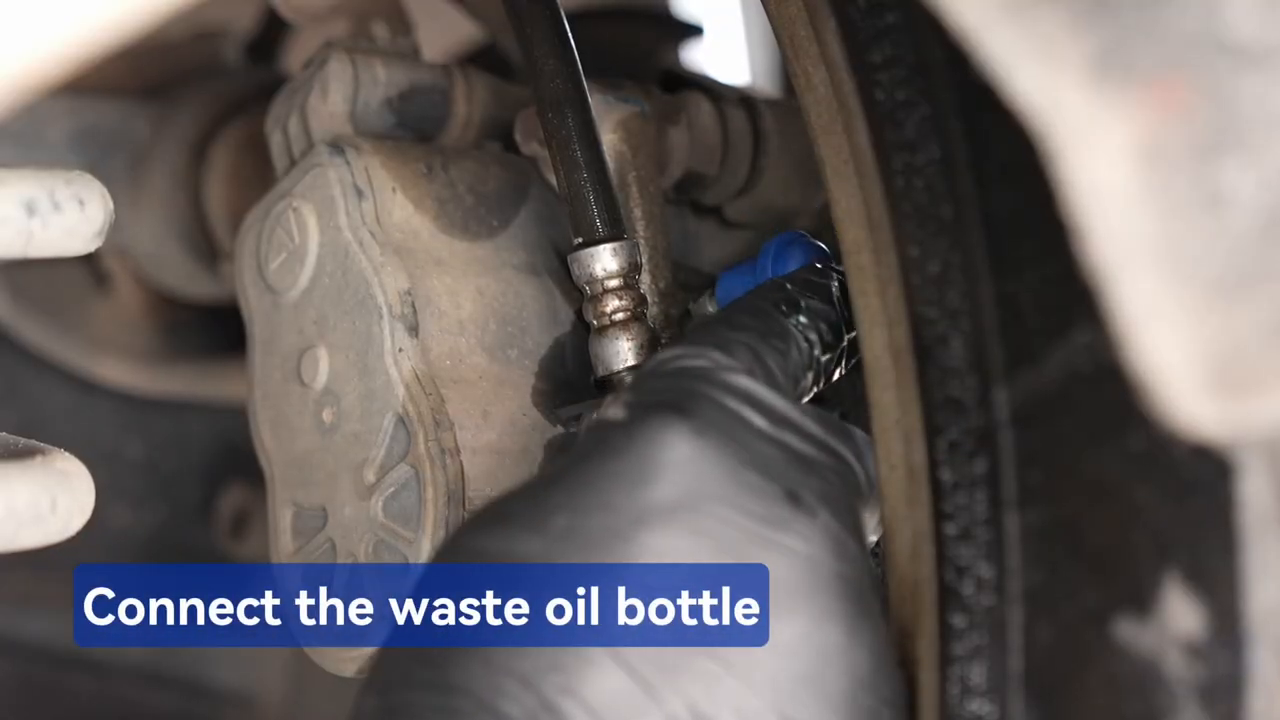
Exchange brake fluid point by point
7. Connect the recovery bottle
Lift and support the vehicle as required. At the first service point specified by the manufacturer, clean the bleeder, fit the correct wrench and attach a snug transparent hose leading to the recovery bottle. Secure the bottle upright below or beside the work area where it cannot contact a hot brake, tip over or be pulled into moving suspension.
8. Open, observe and close
With the F109 Work indicator on and pressure stable, open the bleeder only the specified amount. Watch the removed fluid, bubble pattern, supply level and gauge together. Continue to the vehicle-defined endpoint—such as a specified volume, clean replacement fluid or completion of an electronic activation—not merely until the color looks better. Close the bleeder to its specified torque before removing the catch hose. Wipe and inspect it immediately.
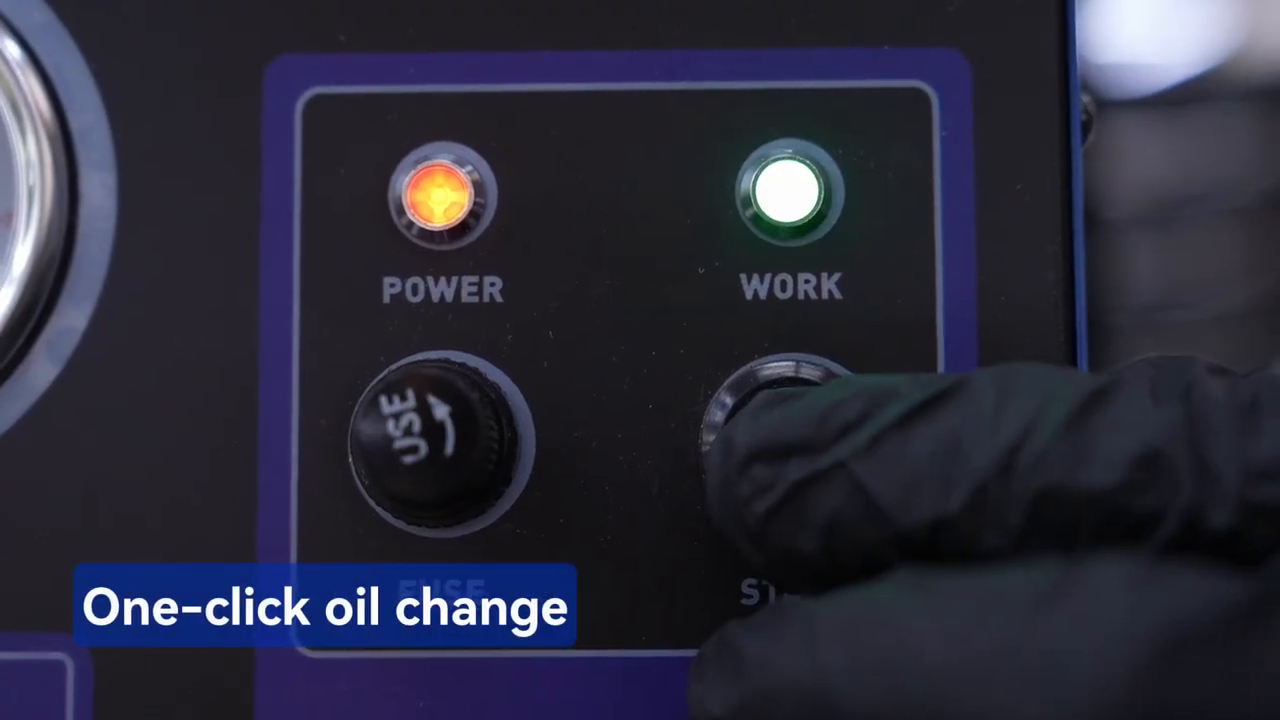
9. Follow the exact sequence
Move the catch hose to the next prescribed point. Do not assume the farthest wheel is always first; split hydraulic layouts and ABS procedures differ. Keep the new-fluid bottle above its safe reserve, and do not leave the operating machine unattended. If a circuit was opened or ran dry, complete any required master-cylinder preparation, scan-tool ABS activation, pedal sequence or second pass. Pressure delivery alone does not replace those steps.
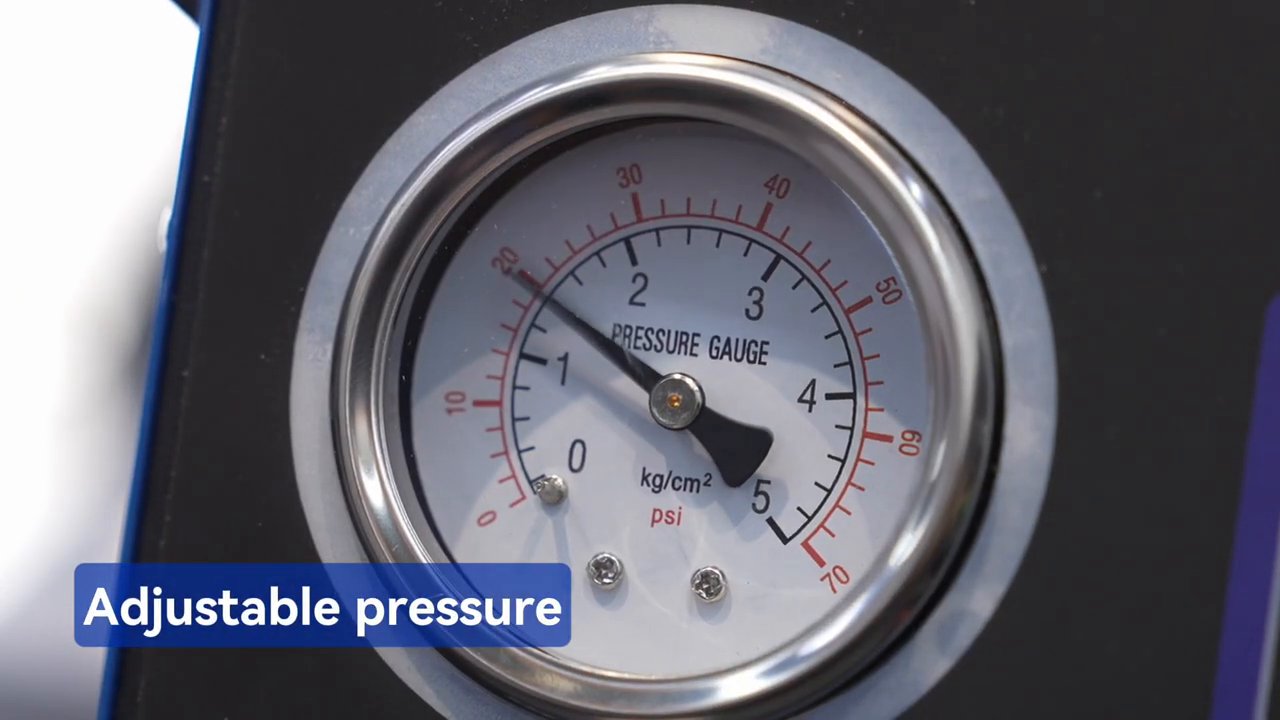
Stop, disconnect and verify
10. Close before stopping
Close the active bleeder and confirm every other service point is closed. Switch off the F109. A low-fluid shutdown can also stop the pump, but it does not replace this controlled sequence. Watch the gauge fall and wait until it remains at 0 bar. Never loosen the reservoir adapter, quick connector or bottle cap to bleed pressure.
11. Restore the reservoir
At stable zero, disconnect the filling hose, remove the adapter carefully and set the final fluid level exactly as the vehicle procedure requires. Reinstall the clean original cap and diaphragm. Inspect the reservoir, all serviced bleeders and every disturbed hydraulic part for seepage. Keep priming and removed fluid in compatible labelled waste containers and use the lawful disposal route.
12. Pass the brake acceptance checks
With the vehicle stationary, perform the specified pedal feel and pedal-hold checks, inspect for leaks and confirm warning indicators. Complete required diagnostic or electronic routines. Refit wheels and torque fasteners when removed. Only after every static check passes should a qualified operator perform the prescribed low-speed brake test in a controlled area. A soft, sinking or inconsistent pedal, fluid loss, warning or unequal braking is a no-drive result.
Troubleshooting
| Symptom | Check first |
|---|---|
| Pump stops when Start is released | Pressure has not established; check supply hoses, bottle level, adapter seal, quick fitting and open bleeders |
| No bubble-free flow during priming | Both bottle hoses submerged, correct hose roles, tight fittings, fluid reserve and pump inlet |
| Pressure rises too quickly | Return knob toward minimum, stop, inspect a blocked outlet or closed path and verify the vehicle limit |
| Gauge falls with all bleeders closed | Stop and inspect the reservoir adapter, hose ends, machine path and vehicle for leakage |
| No flow at one service point | Correct sequence, bleeder opening, hose blockage, hydraulic restriction and required ABS routine |
| Machine stops during the job | New-fluid level, suction-hose immersion, power and whether low-fluid protection activated |
| Pedal remains soft | Keep vehicle stationary; inspect for air, leaks, wrong sequence and incomplete electronic procedure |
Frequently asked questions
Must F109 be primed before vehicle connection?
Yes. The exact manual makes initial purging mandatory, and the official video shows the adapter discharged into a separate bottle before it is installed on the vehicle. Continue until the outlet is visibly bubble-free.
What pressure should I use?
Use the exact vehicle value. F109’s 0.5–2.5 bar range is a machine capability. The manual’s 1.6–2.0 bar fallback applies only when the vehicle information gives no distinct figure and pressure bleeding is otherwise permitted.
Can I run another fluid through F109?
No. The manual limits the machine to brake fluid for automotive brake and clutch systems and warns that other fluids can damage it. Use only new, unopened fluid matching the exact vehicle.
Can I disconnect as soon as power is off?
No. Close the bleeders, switch off and wait for the gauge to fall slowly and remain at 0 bar. Only then remove the quick fitting or reservoir adapter.
Final F109 checklist
- Vehicle fluid, pressure, adapter, bleed sequence and electronic procedure confirmed
- Nameplate voltage and protective earth verified
- Machine, cables, hoses, gauge and adapters dry and undamaged
- Suction and pressure-balance hoses at the bottom of the new-fluid bottle
- Filling line primed into waste until bubble-free
- Gauge returned to stable 0 bar before vehicle connection
- Exact adapter sealed with no movement during low-pressure check
- Pressure maintained at the vehicle-approved value below 2.5 bar
- Each prescribed point completed and closed before moving on
- Supply level remained visible and machine was never unattended
- All bleeders closed and gauge stable at zero before disconnecting
- Final level, cap, leaks, pedal, warnings and controlled stop passed
For the control labels and priming sequence supplied with the current unit, select F109 on the MRCARTOOL manual download page before service.
The F109 makes one-person pressure delivery practical, but its best protection is disciplined order: correct fluid, both bottle hoses submerged, an air-free prime, exact adapter, vehicle-approved pressure and one service point at a time. Close the hydraulic path before stopping, wait for stable zero before disconnecting and treat the final pedal and leak checks as release gates—not optional cleanup.











Comments 0
Questions, fixes, and real-world diagnostic notes from readers.
Be the first to share a diagnostic result or ask a follow-up question.