
How to Use the AUTOOL AS507 Power Steering Fluid Tester Step by Step

The AUTOOL AS507 measures the light transmittance and temperature of fluid in an identified hydraulic power-steering reservoir. Confirm that the vehicle actually has a serviceable fluid reservoir, clean the optical probe, immerse it fully, press TEST, and read the percentage, status icon and temperature together.
AS507 does not identify an unknown fluid or diagnose a pump, steering rack, leak, pressure fault or complete power-steering system. A vehicle with electric power steering and no hydraulic-fluid reservoir has nothing for this tester to sample.
In this guide
Decide whether AS507 fits the vehicle
| Vehicle or fluid condition | Decision | Why |
|---|---|---|
| Hydraulic power steering, correct reservoir identified, specified fluid known and safely accessible | Test is possible | The probe can read the intended fluid without guessing the system or liquid |
| Electric power steering with no hydraulic-fluid reservoir | Do not use AS507 | There is no power-steering fluid to test |
| Electro-hydraulic system or unfamiliar reservoir layout | Check the vehicle service information first | The pump may be electric, but the fluid circuit and access method remain vehicle-specific |
| Reservoir or fluid identity is uncertain | Stop and identify both before opening anything | AS507 cannot identify an unknown cap, reservoir or fluid specification |
| Steering is noisy, heavy, leaking, aerated or accompanied by a warning | Inspect and diagnose the system | An optical fluid reading cannot locate the mechanical, hydraulic or electrical fault |
| Fluid temperature is 60°C / 140°F or higher | Let the system cool before testing | The manual requires power-steering fluid below 60°C during the test |
Some hydraulic steering systems specify a dedicated power-steering fluid, while others specify a particular transmission fluid. Use only the vehicle’s exact service information; never infer the required fluid from its color, from another vehicle or from the AS507 reading.
Prepare the tester, vehicle and fluid access
Have the current vehicle service information, four 1.5 V AAA batteries, eye protection, fluid-resistant gloves and a clean lint-free wipe. Park securely on a level surface, apply the parking brake, switch the engine and ignition off, and wait until the fluid is below 60°C.
Locate the actual hydraulic power-steering reservoir before opening anything. Clean loose dirt from around the closed cap, note the specified fluid and level procedure, and make sure the flexible probe can reach the fluid without being forced against a baffle, screen, hose or moving part.
AUTOOL AS507 step-by-step procedure
Step 1: Confirm the exact tester and task
Verify that the unit is an AS507 and that the task is to check the optical transmittance of identified power-steering fluid. Do not use it for brake fluid, engine oil, coolant, fuel or an unidentified liquid.
Completion check: The tester model, vehicle system and intended fluid all match.
Step 2: Determine whether the steering system contains fluid
Use the owner’s or service information to distinguish hydraulic or electro-hydraulic steering from electric power steering. Do not assume every vehicle has a reservoir simply because the steering wheel has power assistance.
Stop: If the vehicle uses electric power steering with no hydraulic circuit, this test is not applicable.
Step 3: Identify the correct reservoir
Confirm the reservoir location, cap marking and access procedure from vehicle information. Similar-looking containers can hold brake fluid, coolant or washer fluid.
Common mistake: Choosing a reservoir by position or fluid color can contaminate the wrong system and make the reading meaningless.
Step 4: Confirm the specified fluid
Record the exact fluid specification required by the vehicle. The AS507 reports an optical condition indicator; it does not identify the fluid or confirm that the correct product was installed.
Completion check: You know the system, reservoir and specified fluid without relying on the tester to identify them.
Step 5: Secure and cool the vehicle
Park on a level surface, apply the parking brake, switch the engine and ignition off, and protect the work area from contamination. Let the power-steering fluid cool below 60°C before inserting the probe.
Stop: Do not open a hot, pressurized or vehicle-specific sealed system, and do not test while the engine is running.
Step 6: Inspect the AS507 controls and probe
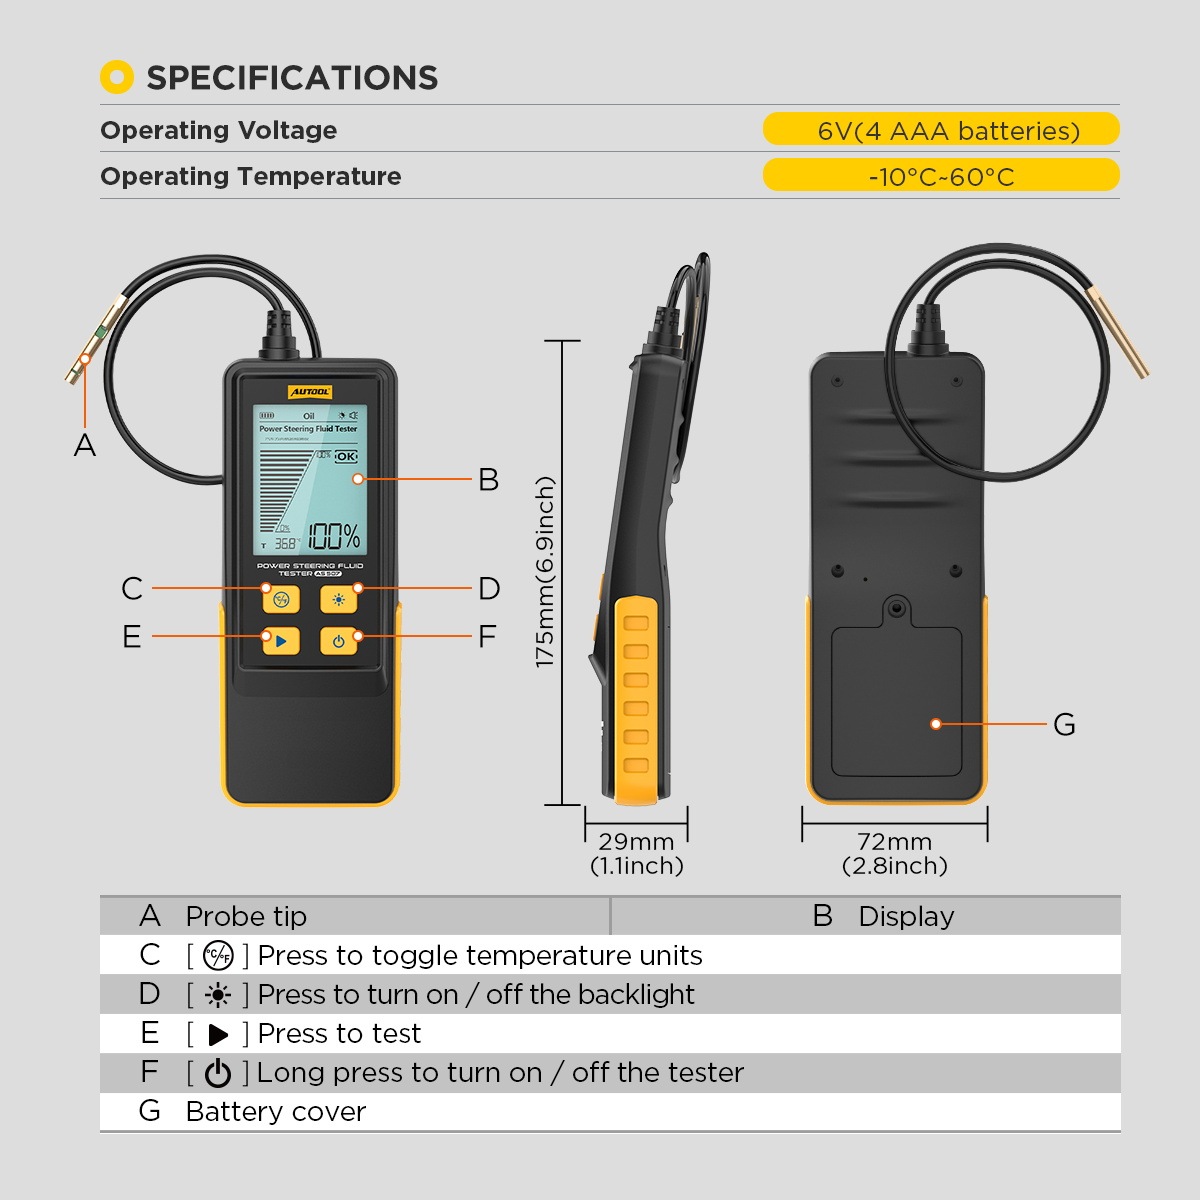
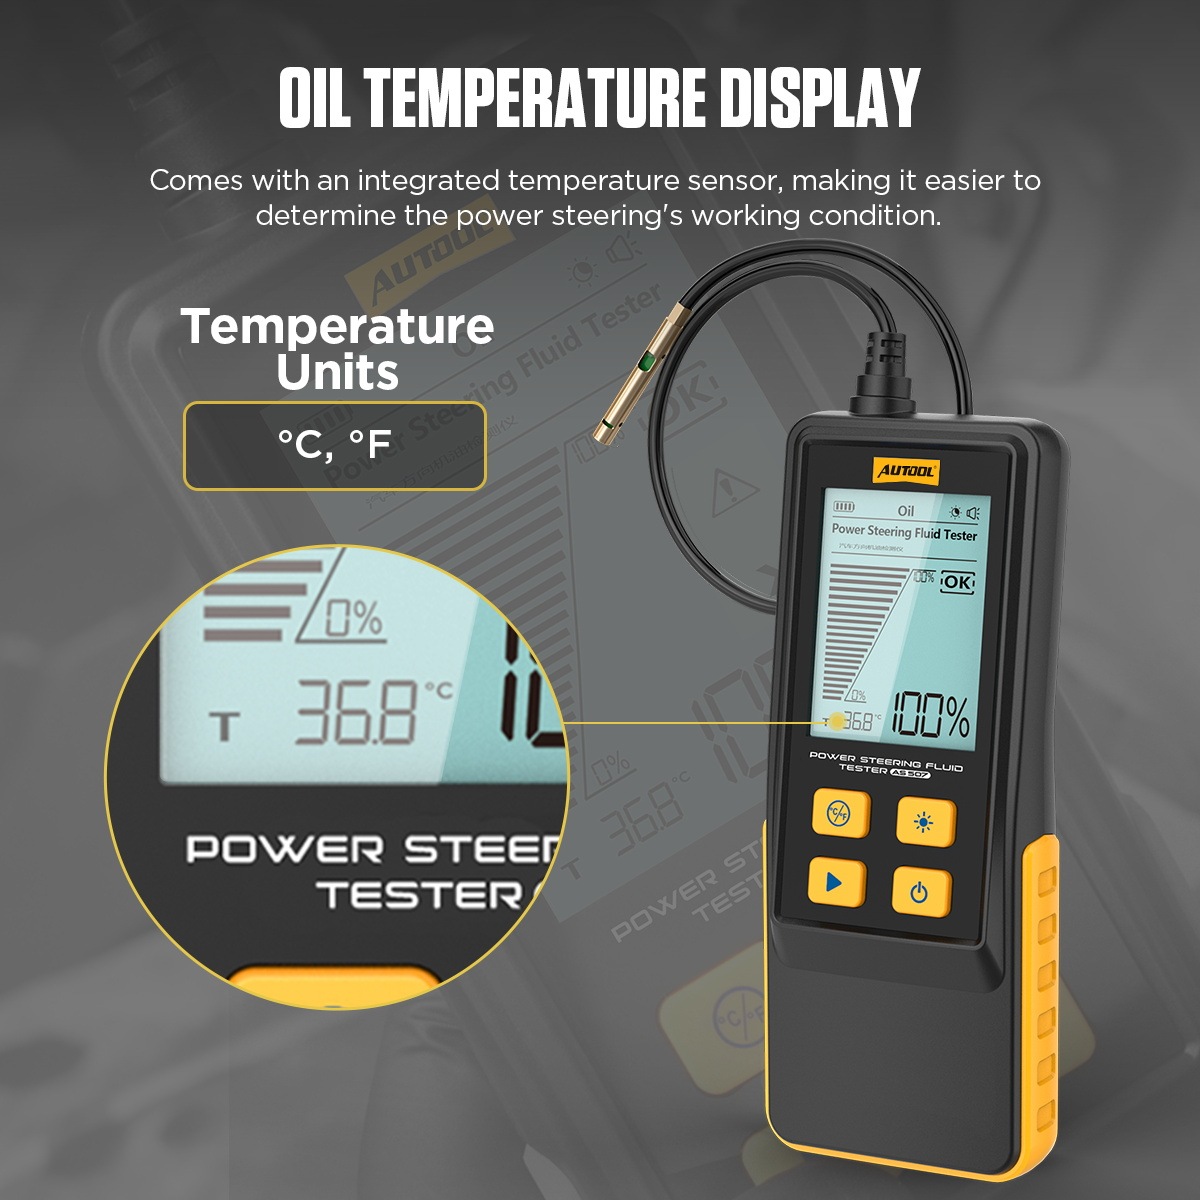
Check the housing, display, cable, flexible hose, probe tip, keys and battery cover. The front keys control temperature units, backlight, TEST and power; the power key requires a press longer than two seconds.
Stop: Do not use a cracked housing, damaged cable, bent probe or contaminated optical tip.
Step 7: Install four 1.5 V AAA batteries
Open the rear battery cover, install four fresh AAA batteries with the indicated polarity, and close the cover securely. Do not mix old and new batteries or different battery types.
Completion check: The cover is seated and the battery symbol does not indicate inadequate power.
Step 8: Clean and dry the optical probe
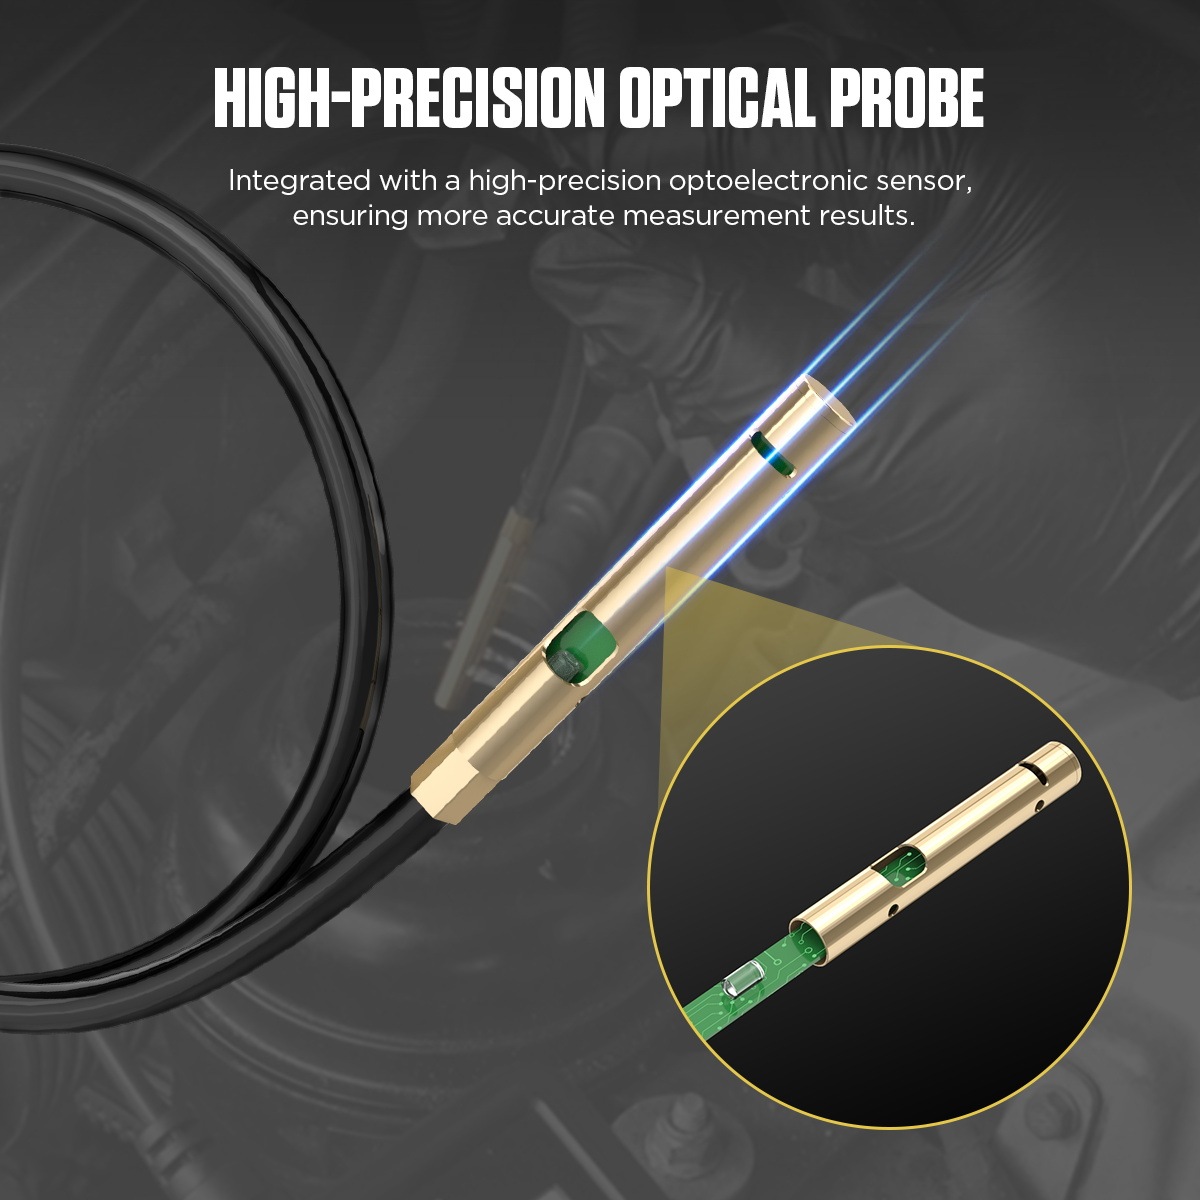
Wipe the probe tip gently with a clean lint-free material before every test. Remove old fluid, dust and moisture without scratching or bending the optical assembly.
Common mistake: Residue from a previous vehicle can alter light transmission and cross-contaminate the next reservoir.
Step 9: Clean around the closed reservoir
Remove dirt from the cap and surrounding area before opening it. Follow the vehicle procedure for cap removal, level position and any required precautions.
Completion check: Loose debris cannot fall into the reservoir when the cap is opened.
Step 10: Power on the AS507
Long-press the power key for more than two seconds. Confirm that the display starts, shows Power Steering Fluid Tester and presents a usable battery level.
Stop: If the display, keys or battery indication is unstable, correct the battery or tester condition before exposing the probe to fluid.
Step 11: Set the temperature unit and backlight
Press the °C/°F key if a different temperature unit is needed. Use the backlight key only as required for a clear view of the display.
Completion check: The chosen temperature unit is understood and the display is readable before the probe enters the reservoir.
Step 12: Open only the confirmed power-steering reservoir
Remove the correct cap without allowing dirt, lint or tools to enter. Observe the vehicle’s level and cap procedure; do not disturb another reservoir or disconnect a hose to create access.
Stop: If the opening is screened, obstructed or too narrow for safe probe access, do not force the tip through it.
Step 13: Guide the flexible probe into the fluid
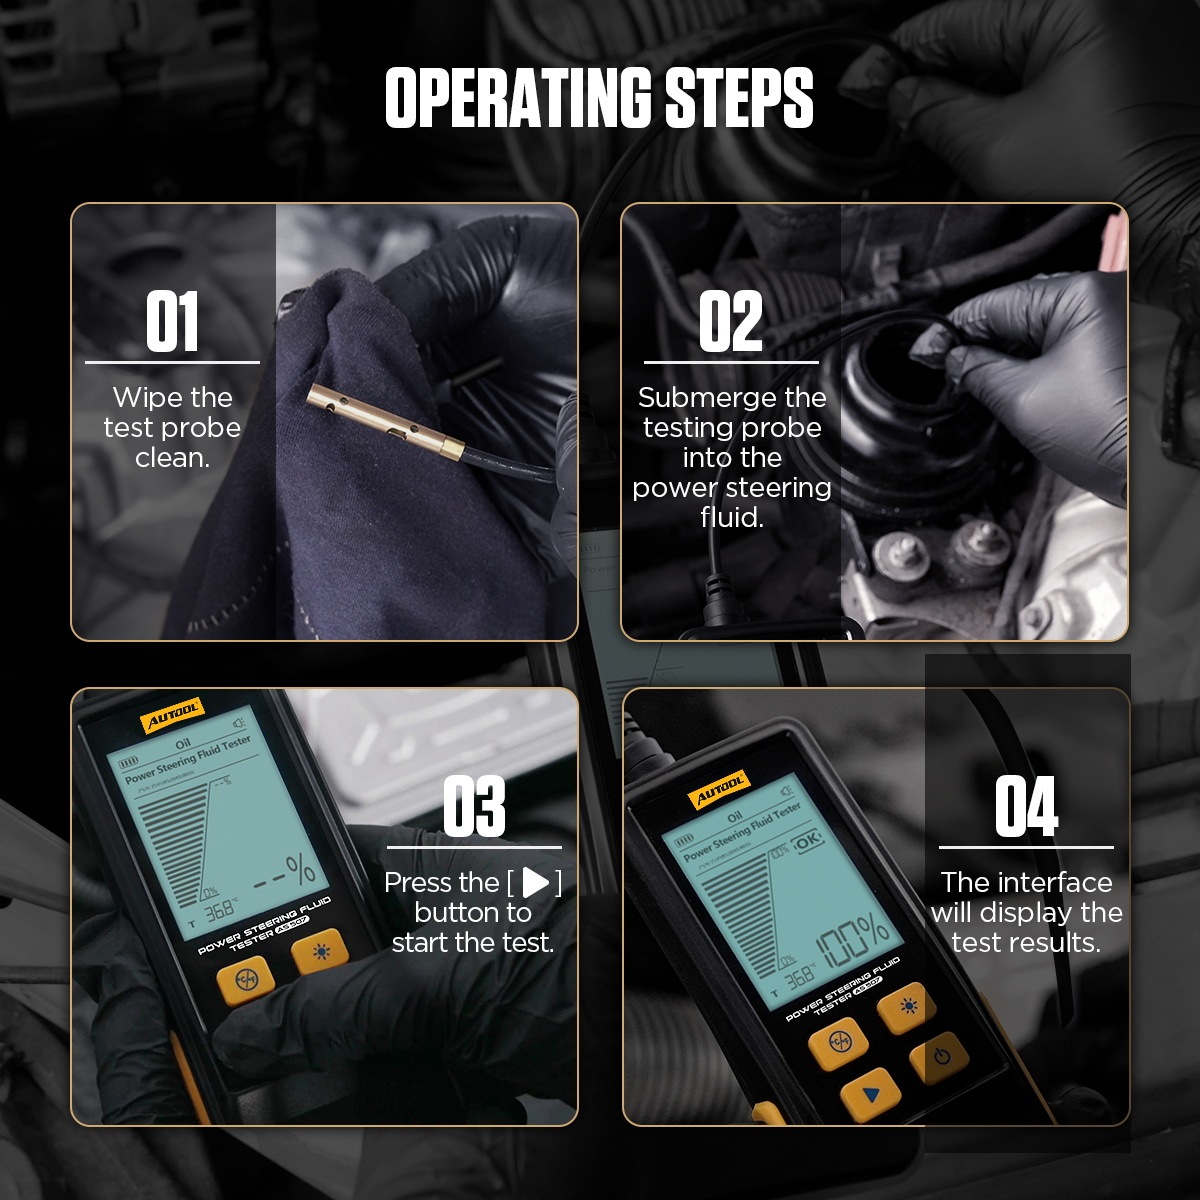
Hold the cable and lower the probe gently through the approved opening. Keep it away from sharp edges and do not scrape the optical tip along the reservoir wall or internal parts.
Completion check: The probe reaches the intended fluid freely and the cable is not kinked or trapped.
Step 14: Fully submerge the probe tip
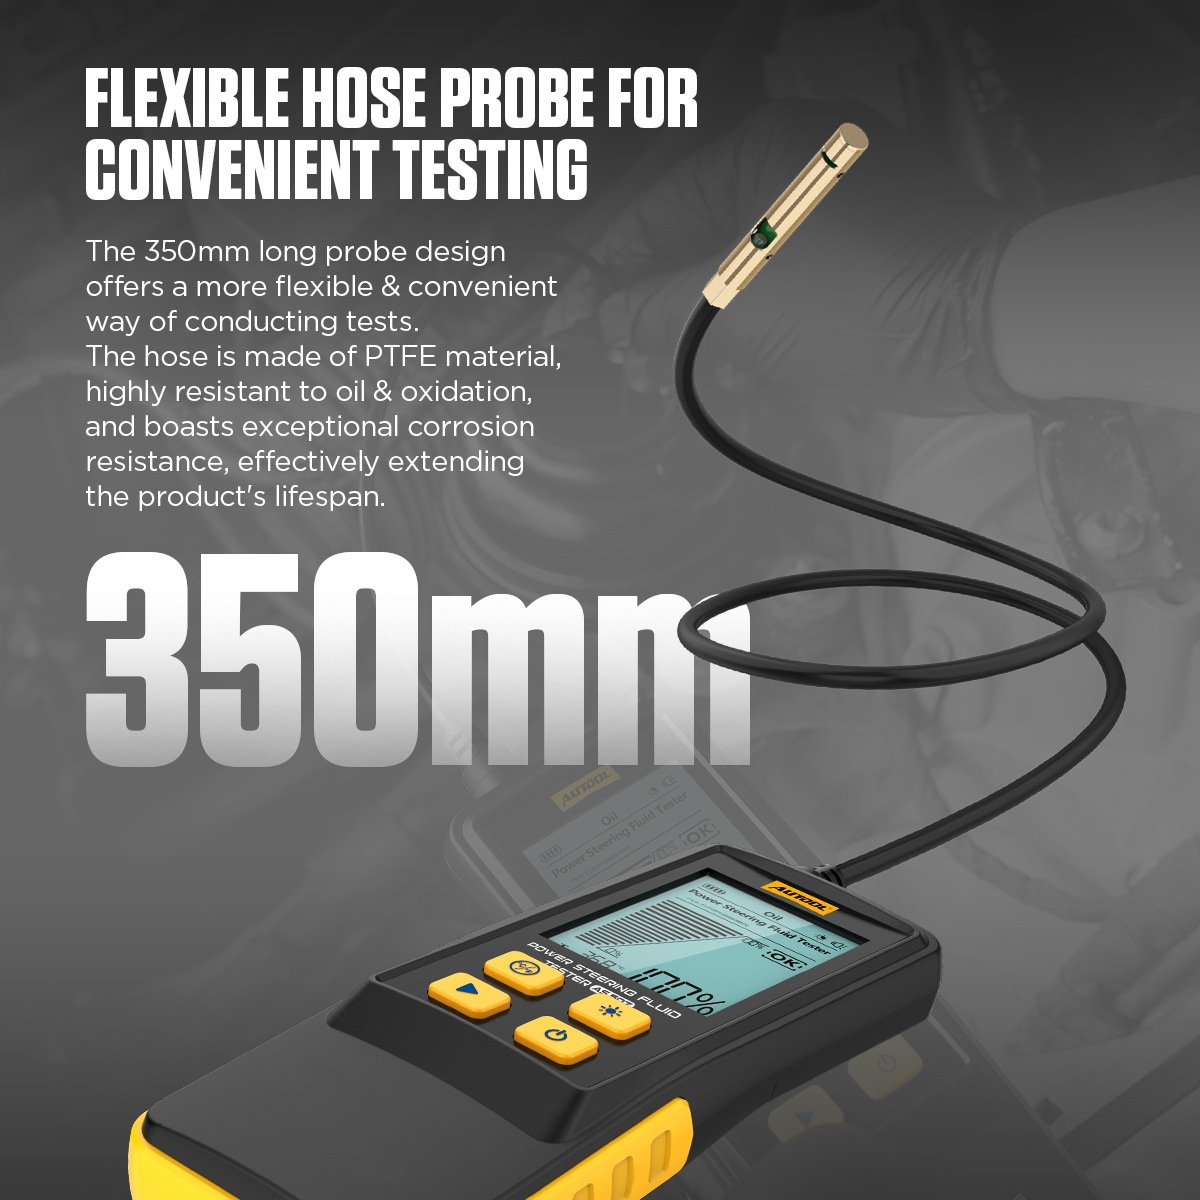
Immerse the optical sensing section completely in the power-steering fluid, as required by the manual. Keep the housing outside the reservoir and avoid resting the tip against the bottom or wall.
Stop: A partly submerged tip, surface foam or a probe pressed against the container can produce an unrepresentative optical path.
Step 15: Press TEST and hold the probe steady
Press the triangular TEST key once, then keep the submerged probe still while the AS507 measures. Do not stir the fluid, raise the tip through the surface or add fluid during the reading.
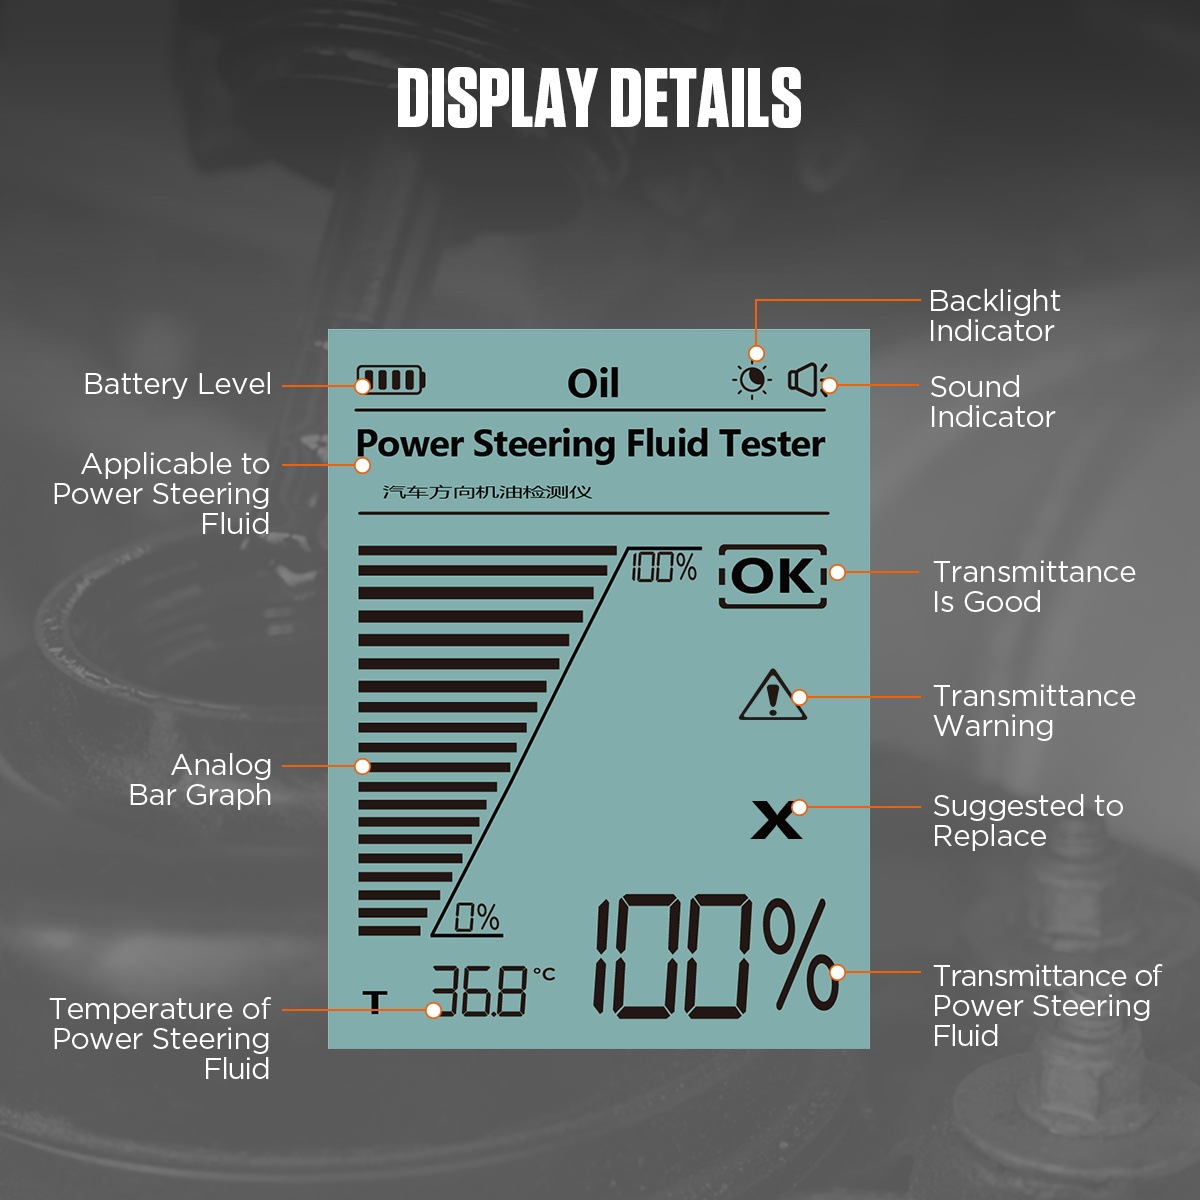
Completion check: The display settles on a transmittance percentage, a status icon and a fluid temperature.
Step 16: Read all three result fields
Read the large percentage as light transmittance, the adjacent status icon as the tester’s condition band, and the lower temperature value as the measured fluid temperature. Do not record the percentage without its icon and temperature.
Completion check: The record includes vehicle identity, specified fluid, percentage, icon, temperature and test date.
Step 17: Apply the manual’s indication bands
The current AS507 manual defines more than 60% transmittance as good, 30% to 60% as warning, and below 30% as a suggested replacement condition. At a displayed boundary such as exactly 60%, follow the icon shown by the tester and the vehicle’s service requirements rather than rounding the number upward.
These are AS507 condition indications, not universal fluid specifications. A good icon does not prove that the correct fluid is installed, and a warning does not identify the cause of contamination or degradation.
Step 18: Keep the result within its diagnostic limits
Use the reading with the vehicle’s fluid specification, service interval, appearance, level and steering symptoms. AS507 does not measure viscosity, additive reserve, water percentage, metal wear, pump pressure or steering-rack condition.
Stop: A leak, low level, foaming, repeated fluid darkening, abnormal noise, heavy steering or warning message requires system diagnosis even if the transmittance icon looks acceptable.
Step 19: Verify an unexpected reading once
If the result conflicts with the known service condition, remove the probe, clean and dry it, reconfirm the correct reservoir and fluid temperature, then repeat one controlled reading. Do not average repeated tests to hide a stable warning.
Completion check: The verification either agrees with the first reading or the tester/fluid condition is referred for further inspection.
Step 20: Withdraw and clean the probe
Lift the probe slowly without touching dirty surfaces, then wipe all fluid from the sensing tip and hose with a clean lint-free material. Keep drips away from painted surfaces and electrical connectors.
Completion check: The probe is clean and dry, with no residue left for the next vehicle.
Step 21: Restore the reservoir and fluid level
Reinstall the correct cap and verify the fluid level exactly as the vehicle procedure specifies. If service is required, use only the specified new fluid and approved method; never add fluid solely to change a test result.
Stop: Do not release the vehicle with a low level, leak, incorrect fluid, uncertain cap seal or unresolved steering complaint.
Step 22: Power off and store the tester
Long-press the power key for about two seconds to switch off. The unit also shuts down after about five minutes without operation, but manual shutdown confirms the test is complete. Store the clean, dry probe without a sharp bend and remove the batteries for extended storage.
Completion check: The AS507, probe and work area are clean, dry and ready for the next documented test.
How to interpret AS507 without overdiagnosing
Optical transmittance is most useful as a repeatable condition indicator when the correct reservoir, fluid and procedure are known. Compare like with like: the same vehicle, specified fluid, clean probe and controlled temperature. Do not compare percentages across unrelated fluid specifications or use color alone as a substitute for the reading.
If AS507 displays a warning or replacement indication, verify the service history and inspect the hydraulic system before deciding the work. Fluid service cannot repair a leak, worn pump, damaged rack, restricted line or electrical fault in an electro-hydraulic system.
What a complete AS507 test looks like
A complete AS507 test begins by confirming that the vehicle has an accessible hydraulic power-steering reservoir and identifying its specified fluid. The vehicle is secure and cool, the probe is clean and fully submerged, and one steady test records percentage, icon and temperature together. The result is interpreted as a bounded fluid-condition indication, then the reservoir is restored and the probe is cleaned before storage.
If the delivered controls, display bands or safety instructions differ from this guide, find the current AS507 revision in the AUTOOL manual download center before continuing.











Comments 0
Questions, fixes, and real-world diagnostic notes from readers.
Be the first to share a diagnostic result or ask a follow-up question.