
How to Use the AUTOOL SC301 Cooling System Tester and Filler

The AUTOOL SC301 is a cooling-system vacuum tester and filler. This guide turns the current model-specific controls and official operating sequence into a practical start-to-finish workflow.
Quick answer: With the cooling system completely cold, connect the SC301 to an external air source, separate recovery and new-coolant containers, the correct vehicle adapter and a 12V supply. Run Testing Mode first; proceed to vacuum filling only after the setup holds the selected vacuum.
In this guide
Before you start
Cooling systems can retain heat and pressure long after shutdown. Park and secure the vehicle, allow the complete system to become cold, confirm zero pressure by the approved method, and identify the specified coolant plus every circuit that the vehicle procedure requires you to service.
- confirm that the model label reads AUTOOL SC301 and read every power, pressure, vacuum and hose marking on the delivered unit;
- inspect tanks or containers, hoses, seals, valves and adapters for damage, contamination and incompatible residual coolant;
- open the exact vehicle filling, flushing, bleeding and final-level procedure before disconnecting anything;
- prepare the correct new coolant and a separate stable recovery path with enough capacity;
- wear eye protection and coolant-resistant gloves, and keep spills away from belts, electrical connectors and walking areas; and
- plan how the system will be restored, bled, warmed, cooled and checked for leaks after machine service.
Use the AUTOOL manual download center to locate the current instructions when a manual is available. The delivered model label and current vehicle service information control if an older image or remembered setting differs.
SC301 controls and specifications
| Specification or function | Current model |
|---|---|
| Pressure Range | -1~2bar |
| Power Supply | DC 12V |
| External Air Source | External air compressor required; around 0.7MPa or higher recommended |
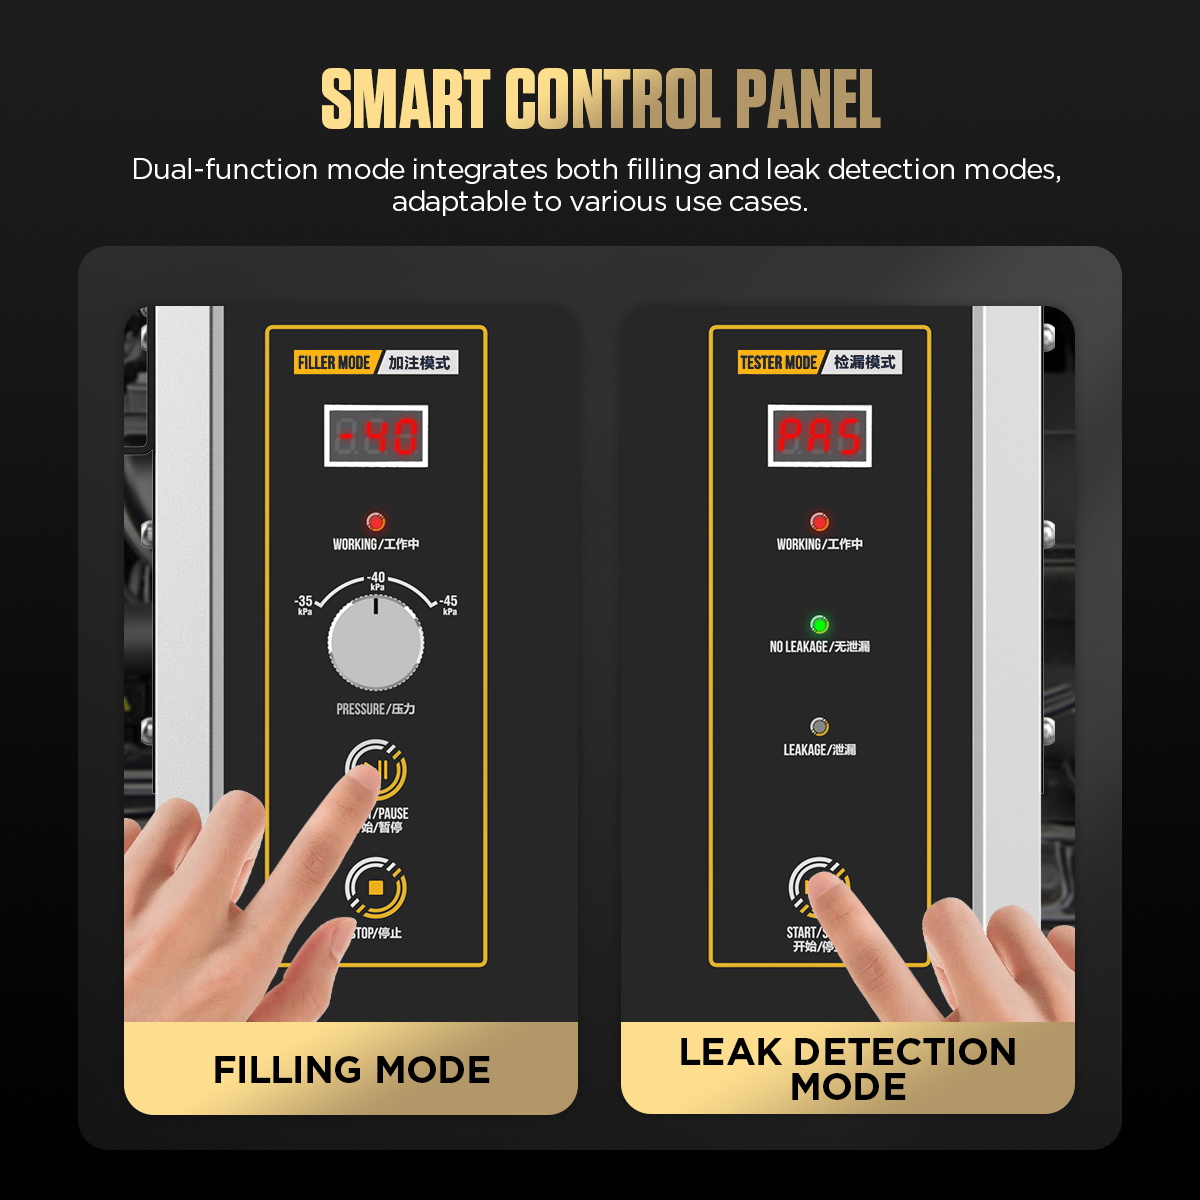
| Selectable Vacuum Pressure | -35KPa / -40KPa / -45KPa |
| Product | AUTOOL SC301 Cooling System Tester & Filler |
| Main Functions | Cooling system vacuuming, coolant filling, and pressure leak detection |
| Manual Power Rating | DC 12V / 5A |
| Operating Temperature | -10°C~60°C shown on the specification image; confirm with the latest manual if operating outside this range |
| Liquid Input Hose Length | 0.5m |
| Filling Hose Length | 2m |
The SC301 can select -35, -40 or -45 kPa and requires a 4.5-8 bar external air supply. Those tool ranges do not prove every reservoir, radiator or hose can tolerate the highest setting. Use the lower applicable boundary from the vehicle procedure and the condition of the system.
How to use the SC301
Step 1: Let the cooling system become completely cold
Park securely, switch the vehicle off and wait until the engine, radiator, hoses and reservoir are fully cold. Never remove a pressure cap from a hot or pressurized cooling system. Confirm the specified coolant type and prepare separate containers for new and recovered coolant.
Before moving on, confirm the complete cooling system is cold and depressurized, the coolant chemistry is correct, and the recovery path has enough capacity.
Step 2: Inspect the SC301 and choose the correct adapter
Confirm the housing, 12V power lead, air input, air output hose, liquid input hose, filling hose, seals and three supplied adapters are intact. Test-fit the adapter at the vehicle reservoir or approved service opening without forcing it; a similar diameter does not guarantee a seal.
Step 3: Connect air, recovery, new coolant and the vehicle
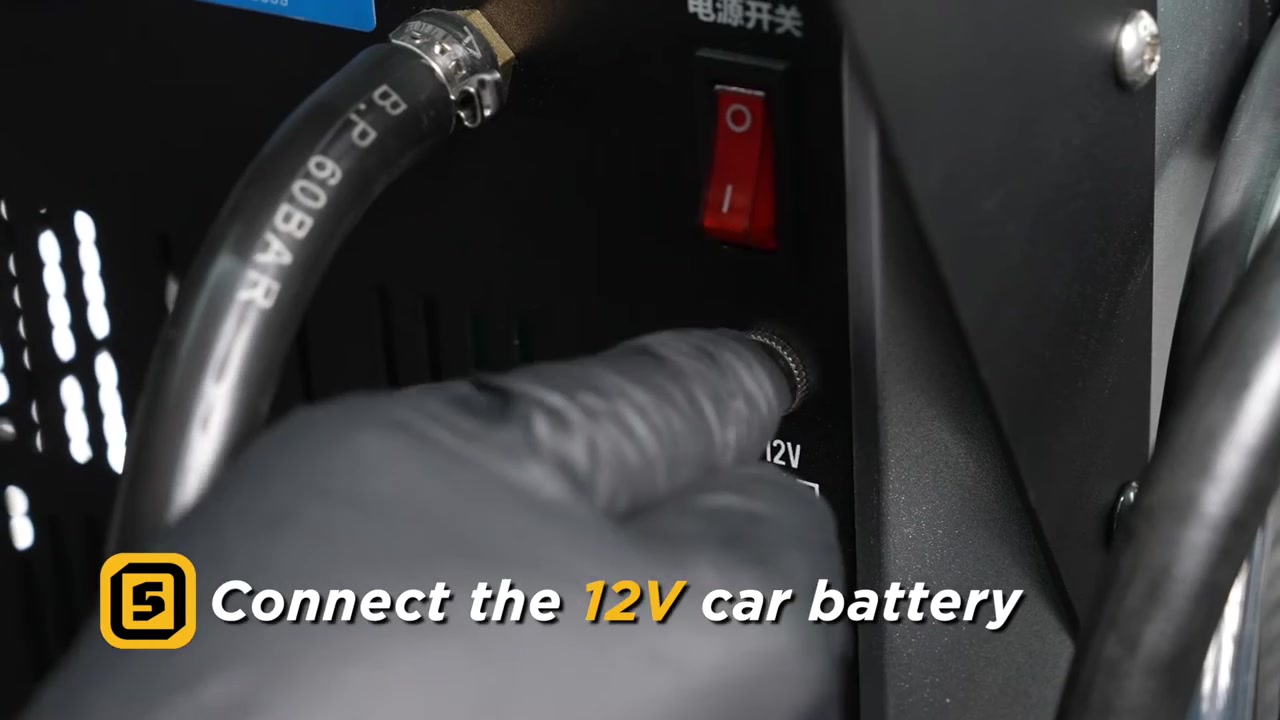
Keep the drain valve open—parallel to the air hose—during setup. Connect a clean external air compressor to the air input, route the air-output hose into a stable recovered-coolant container, place the liquid-input hose in the correct new coolant, and connect the filling hose to the vehicle through the fitted adapter. Connect the SC301 to a 12V, 5A-capable supply as marked.
Step 4: Select a vacuum level that the vehicle can tolerate
Power on and choose -35, -40 or -45 kPa only after checking the vehicle procedure and the condition of the reservoir, hoses and radiator. Use the lower applicable vacuum on an older or weakened system. Confirm every hose remains submerged or secured and is not kinked.
Step 5: Run Testing Mode and watch the full hold period
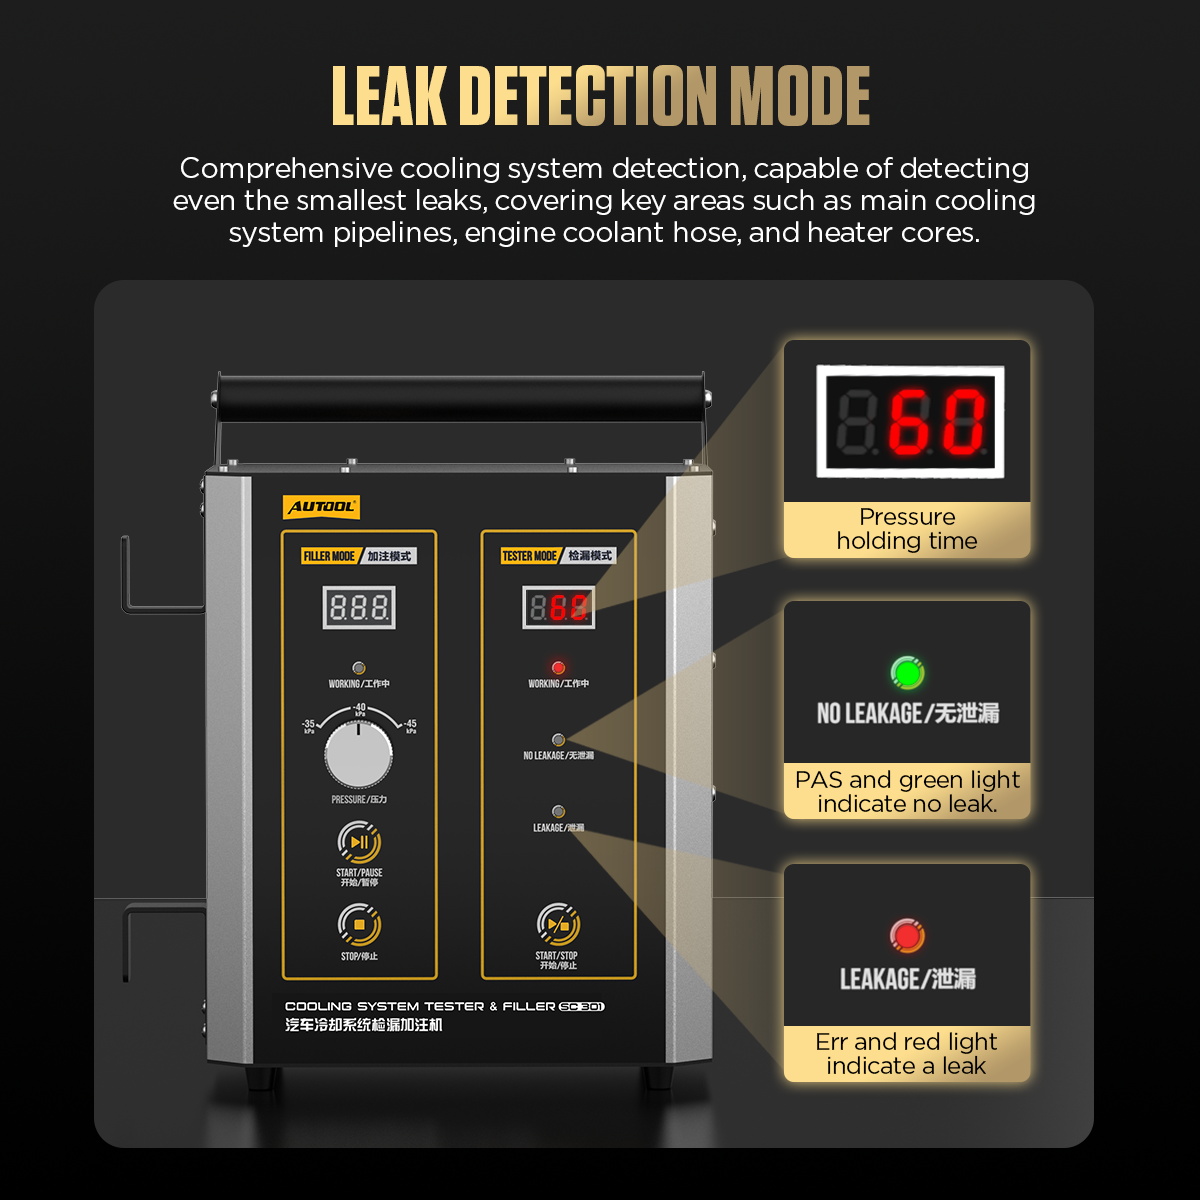
Select Testing Mode and start the vacuum cycle. After evacuation, the SC301 performs its 60-second hold check. A green indication means the connected setup held the selected vacuum for that test; a red indication directs you to stop and inspect the adapter seal, hose connections and cooling system for leakage.
Step 6: Resolve a failed hold check before filling
Pause the process and check the entire temporary connection first. Reseat the vehicle adapter, confirm the drain-valve and hose positions, then inspect the vehicle system according to its service procedure. Do not treat one red indication as proof of a particular failed component, and do not proceed until the cause is understood.
Step 7: Run Filling Mode with the inlet submerged
After old coolant has been drained by the approved vehicle procedure and the setup holds vacuum, put the liquid-input hose fully into the correct premixed coolant and select Filling Mode. Start the cycle and watch the container, vehicle adapter and hoses continuously while vacuum draws coolant into the system.
Step 8: Pause, repeat if required and verify the final level
Pause if the new-coolant container approaches empty, the hose draws air or a connection moves. The unit can repeat evacuation and filling cycles when required; if no coolant enters for about two minutes, stop and correct the inlet, seal or setup. Finish the level and bleed procedure specified for the vehicle rather than assuming vacuum filling removes every possible air pocket.
Step 9: Recover line contents and clean the hoses
Disconnect the vehicle only after the system is safe, then close the drain valve. Hold Tester Start until the buzzer, release it, and press Tester Start again to clean the pipes. Route discharge from the filling port into a recovery container and stop when no more liquid leaves.
Step 10: Power down, restore and inspect
Switch the SC301 off, disconnect the 12V supply and air source, cap or store the clean hoses, and restore the vehicle reservoir or pressure cap. Complete the vehicle-specific bleeding, warm-up, cool-down and final level/leak checks before returning the vehicle to service.
Before closing the job, confirm every vehicle cap, hose and connector is restored and complete the required bleed, warm-up, cool-down, final-level and leak checks.
Read and verify the result
Read the 60-second hold result as a test of the connected setup at the selected vacuum. Green supports proceeding under that condition; red directs you to inspect the adapter, temporary hoses and vehicle cooling system. It does not identify a failed component by itself.
- Repeat a failed hold check only after correcting a known connection or vehicle-system issue.
- Keep the new-coolant inlet submerged; drawing air can interrupt filling and reintroduce air into the service path.
- If no coolant enters for about two minutes, stop and inspect the inlet, seal and setup instead of extending the cycle.
- Complete the vehicle-specific bleeding, warm-up, cool-down and final-level checks after vacuum filling.
Stop immediately for residual heat or pressure, leakage, a moving or collapsed hose, incorrect fluid direction, pressure overload, loss of flow, abnormal pump or air noise, or a container approaching empty or full. Return the machine and vehicle to their documented safe state before changing a connection.
Common mistakes and care
- Open a cooling system only when it is completely cold and depressurized.
- Use the coolant chemistry and mixture specified for the exact vehicle; do not mix incompatible coolants.
- The SC301 requires an external compressed-air source within the stated input range.
- Use a lower applicable vacuum on aging reservoirs, hoses and radiators.
- Recover used coolant in a stable container and dispose of it under local rules.
- Do not use Testing or Filling Mode on a hot or pressurized cooling system.
- Do not close, reverse or improvise the drain-valve and hose arrangement during setup.
- Do not use the highest vacuum by default on an aging reservoir, radiator or hose assembly.
- Do not let the new-coolant inlet uncover or mix a different coolant chemistry into the system.
Frequently asked questions
Can I open the cooling system while it is still warm before using the SC301?
No. Let the complete system cool and depressurize it by the vehicle-approved method. A warm reservoir can still release pressurized coolant and steam.
Does a successful vacuum hold prove the whole cooling system is fault-free?
No. It supports the connected setup under that vacuum condition. Temperature-dependent, pressure-dependent and intermittent leaks may require additional vehicle-specific tests.
Can I use universal coolant for every vehicle?
No. Use the chemistry, concentration and bleeding procedure specified for the exact vehicle. Mixing incompatible coolant can create deposits, corrosion or service problems.
Final SC301 checklist
- Cooling system completely cold and vehicle coolant specification confirmed
- External air, 12V power, recovery container, new coolant and vehicle adapter secured
- Vacuum level chosen within both tool and vehicle limits
- 60-second hold result understood and any leak direction resolved
- Vehicle bleed, final level and warm/cold leak checks completed
- SC301 hoses recovered, cleaned and stored without trapped coolant or pressure
The SC301 is most effective when testing and filling stay separate: prove the sealed setup first, draw in only the correct coolant, then finish the vehicle’s own bleeding and verification procedure.










Comments 0
Questions, fixes, and real-world diagnostic notes from readers.
Be the first to share a diagnostic result or ask a follow-up question.