
How to Use the AUTOOL AS503 Engine Oil Tester Step by Step

The AUTOOL AS503 indicates engine-oil transmittance with an optical probe and also displays oil temperature. Confirm oil compatibility, let the engine and oil-access area cool below 60°C, wipe the probe, choose gasoline or diesel mode, reach the oil through the specified access point, press TEST and read the percentage with its symbol and temperature.
The result is a maintenance reference. It is not a laboratory measurement of viscosity, wear metals, fuel dilution, additive depletion or complete engine condition.
In this guide
Check compatibility before testing
| Application | AS503 decision | Why |
|---|---|---|
| Identified gasoline-engine lubricating oil without an excluded additive | Use gasoline mode | Matches the current operating modes |
| Identified diesel-engine lubricating oil without an excluded additive | Use diesel mode | Matches the current operating modes |
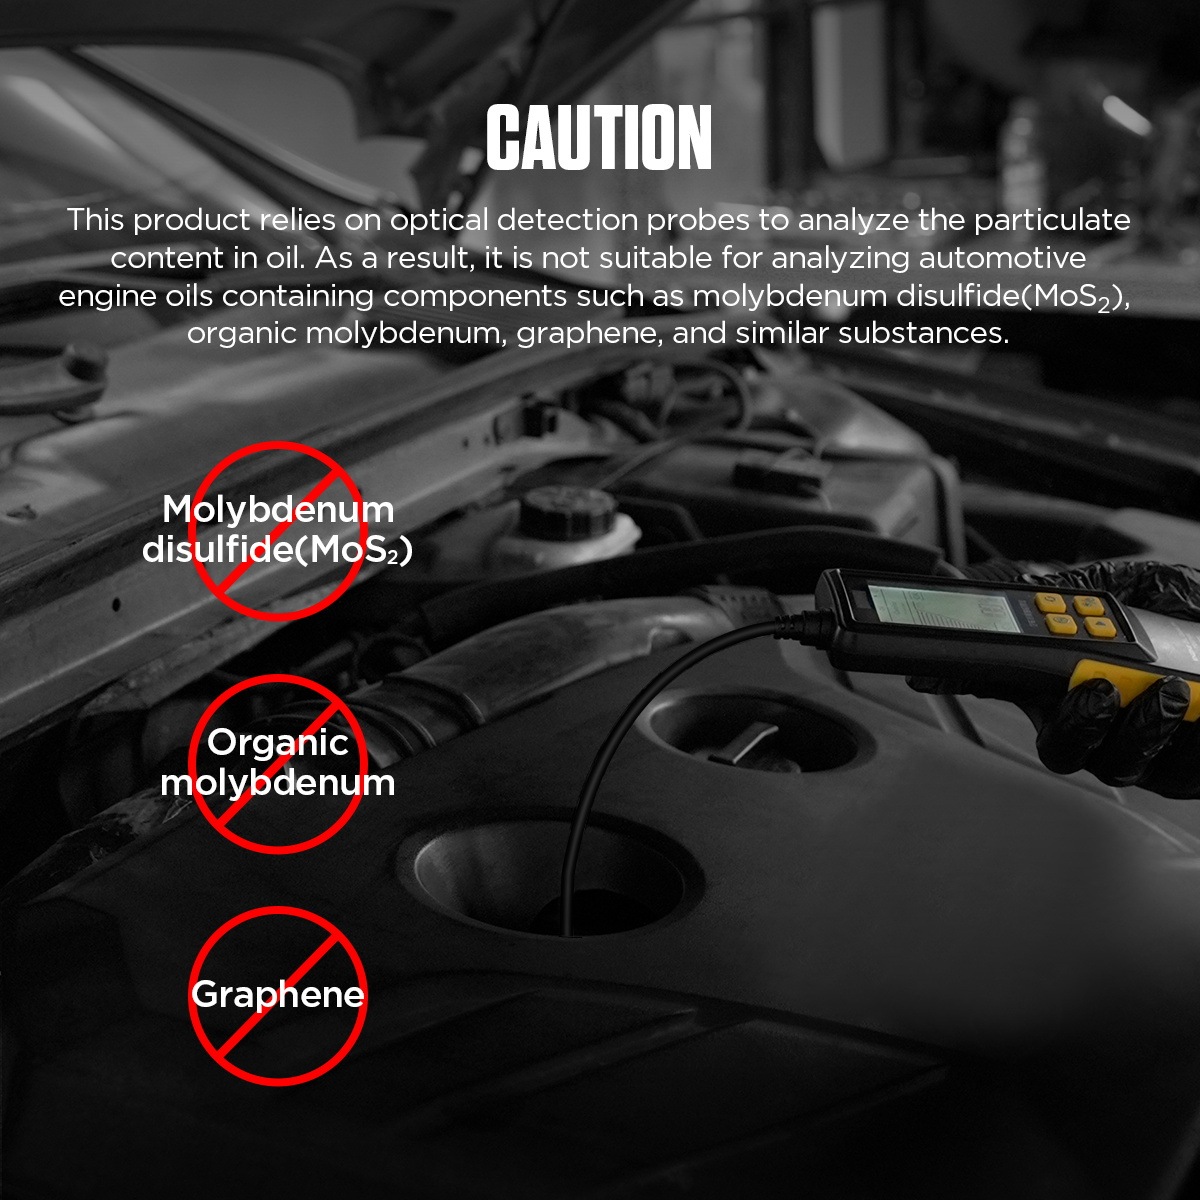
| Oil containing MoS₂, organic molybdenum, graphene or a similar optical-interference additive | Do not test | The additive can bias an optical transmittance result |
| Suzuki J20A application | Do not test with the current configuration | The current AS503 product guidance excludes it |
| Brake fluid, transmission fluid or power-steering fluid | Use the correct fluid-specific tester | AS503 is an engine-oil tester |
If the oil specification or additive package is unknown, identify it from the service record, container or oil supplier before testing. Color alone cannot establish compatibility or condition.
Before you open the dipstick access
Have four 1.5 V AAA batteries, a clean lint-free wipe, suitable gloves, the vehicle service information and a confirmed oil specification. Park securely, switch the engine off, keep clear of hot or moving components and wait until the sampled oil/access condition is below the manual’s 60°C limit.
Stop if the vehicle does not provide a suitable dipstick or approved oil sampling point, the probe is damaged, the oil identity is uncertain, or the route would require force. Do not run the engine while the probe is inserted.
AUTOOL AS503 step-by-step procedure
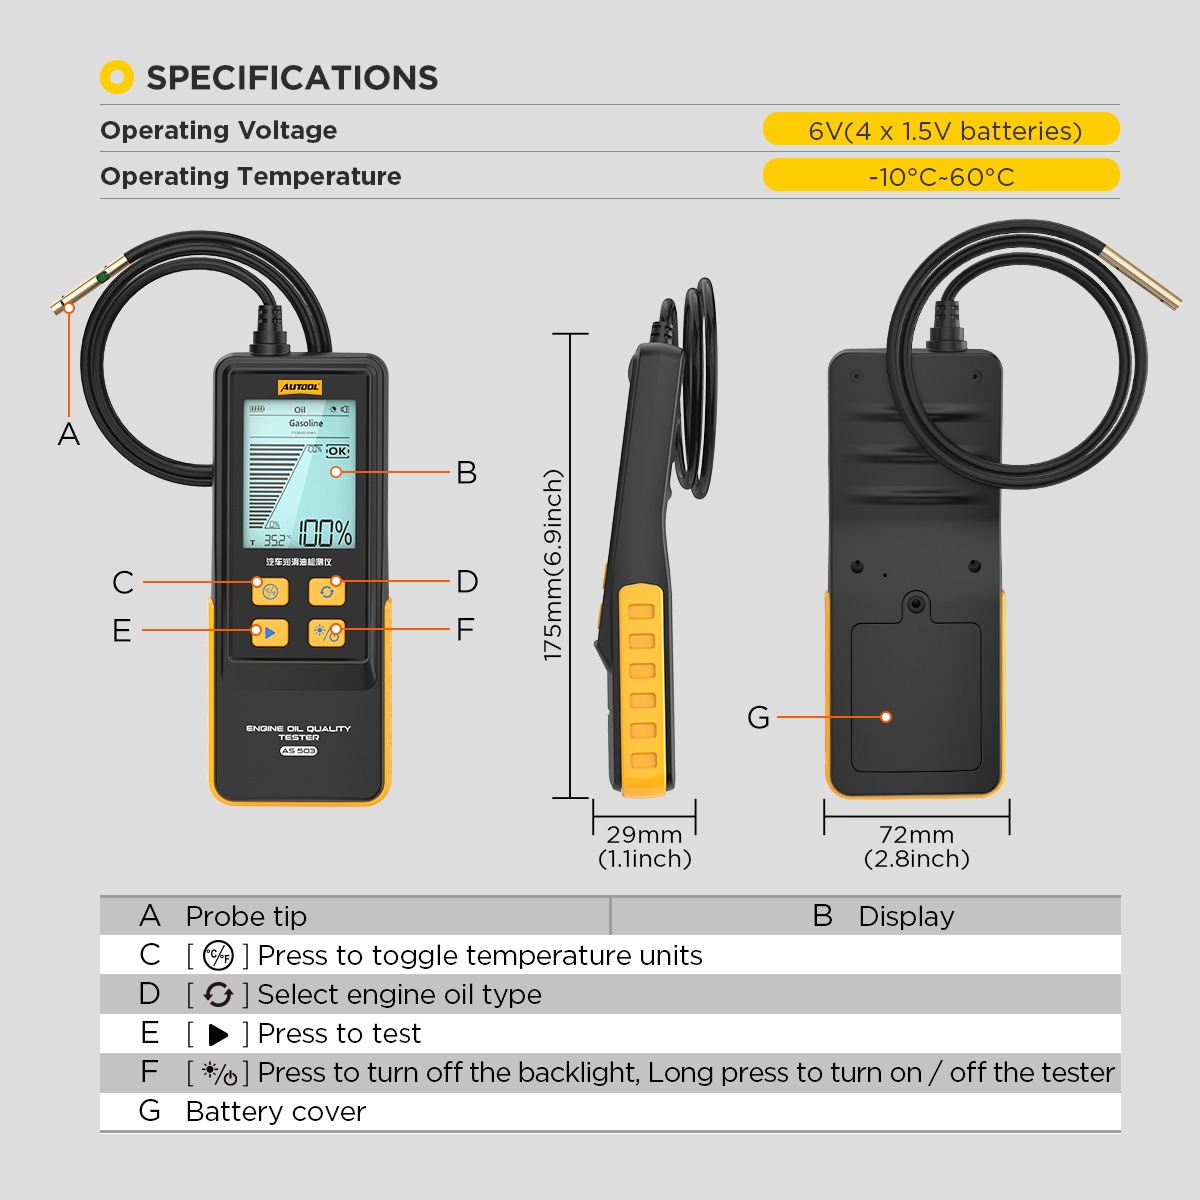
Step 1: Confirm the exact tester and task
Verify that the device is an AS503 and the task is an optical transmittance check on gasoline- or diesel-engine lubricating oil. Do not use the tool as a fluid identifier.
Completion check: The model, fluid and intended measurement all match.
Step 2: Check oil and engine compatibility
Confirm the actual oil and additive package. Do not use AS503 on oil containing molybdenum disulfide (MoS₂), organic molybdenum, graphene or a similar optical-interference additive. The current product guidance also excludes Suzuki J20A engine testing.
Stop: If compatibility cannot be confirmed, do not interpret an optical result as oil condition.
Step 3: Secure and cool the vehicle
Park on a stable surface, apply the parking brake, switch the engine off and wait for a safe working condition. The manual requires the engine/test condition to be below 60°C; avoid hot surfaces and all moving components.
Completion check: The engine is off, the access route is stable and the sampled oil/access condition is below 60°C.
Step 4: Identify the dipstick or approved access point
Use the vehicle service information to locate the correct engine-oil dipstick tube or approved sampling point. Clean loose dirt from around the opening while it remains closed.
Common mistake: A convenient-looking tube is not proof of correct oil access.
Step 5: Inspect the AS503 and probe
Check the housing, display, buttons, flexible hose and optical sensing end. The probe should be straight enough to guide smoothly and free of cracks, residue or a loose tip.
Stop: Do not insert a damaged or contaminated probe.
Step 6: Install four AAA batteries
Open the rear cover, install four 1.5 V AAA batteries in the marked polarity and close the cover securely.
Completion check: The batteries are seated correctly and the cover closes without force.
Step 7: Wipe the probe clean
Use a clean lint-free wipe on the sensing end before every measurement. Remove old oil and fibers without adding solvent or another fluid.
Completion check: The optical area is clean and free of visible residue.
Step 8: Power on the AS503
Hold the power key for more than about two seconds. Confirm that the screen starts and the battery indicator is stable. The tester can switch itself off after five minutes without activity.
Stop: Reseat or replace the batteries if power or the display is unstable.
Step 9: Select gasoline or diesel mode
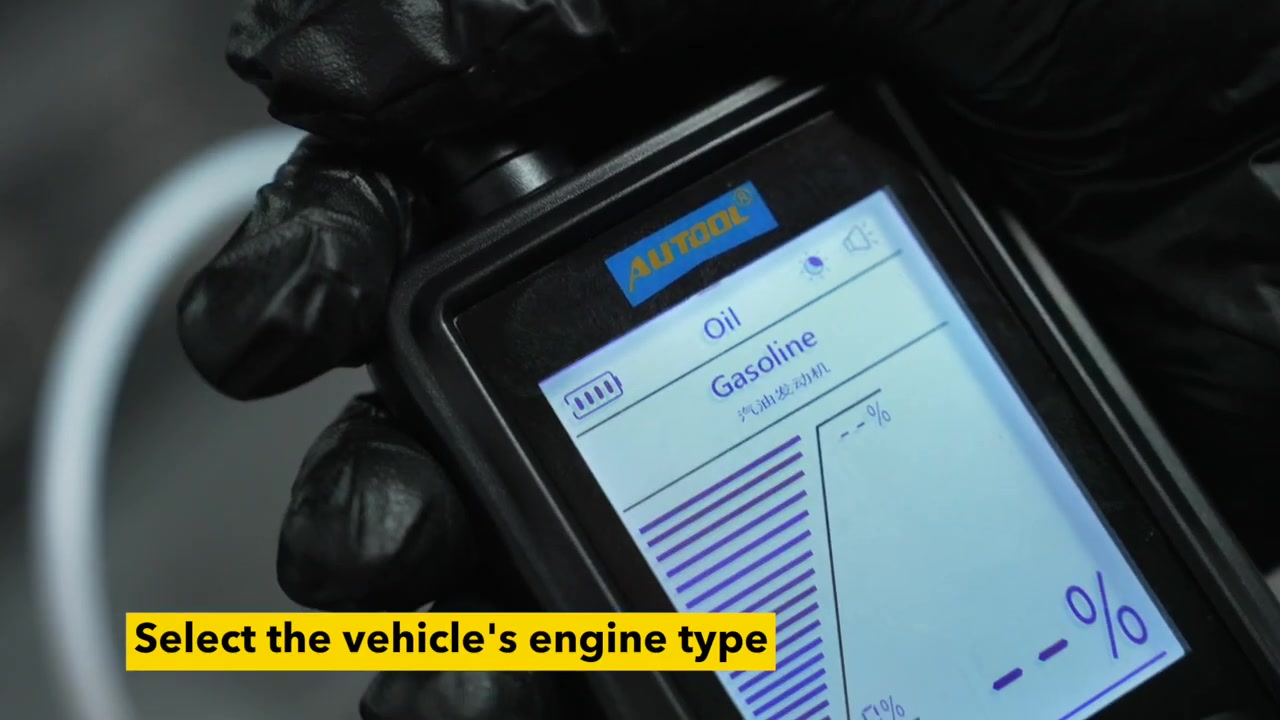
Press the engine-oil-type key until the screen matches the actual engine: gasoline/petrol or diesel. Make this selection from the vehicle, not from the oil’s color.
Completion check: The engine type shown on screen matches the vehicle.
Step 10: Set the temperature unit and backlight
Toggle °C or °F if needed and use the backlight control when the display is difficult to read. These display choices do not change the transmittance result.
Completion check: Mode, temperature unit and screen symbols are clearly readable.
Step 11: Remove the dipstick cleanly
Remove the dipstick or open the approved sampling point without letting dirt enter. Place the dipstick on a clean surface where its oil cannot contaminate the AS503 probe before the test.
Common mistake: Letting the probe touch the engine bay, floor or a dirty dipstick wipe can change the sample at the sensing end.
Step 12: Guide the sensing end into the oil
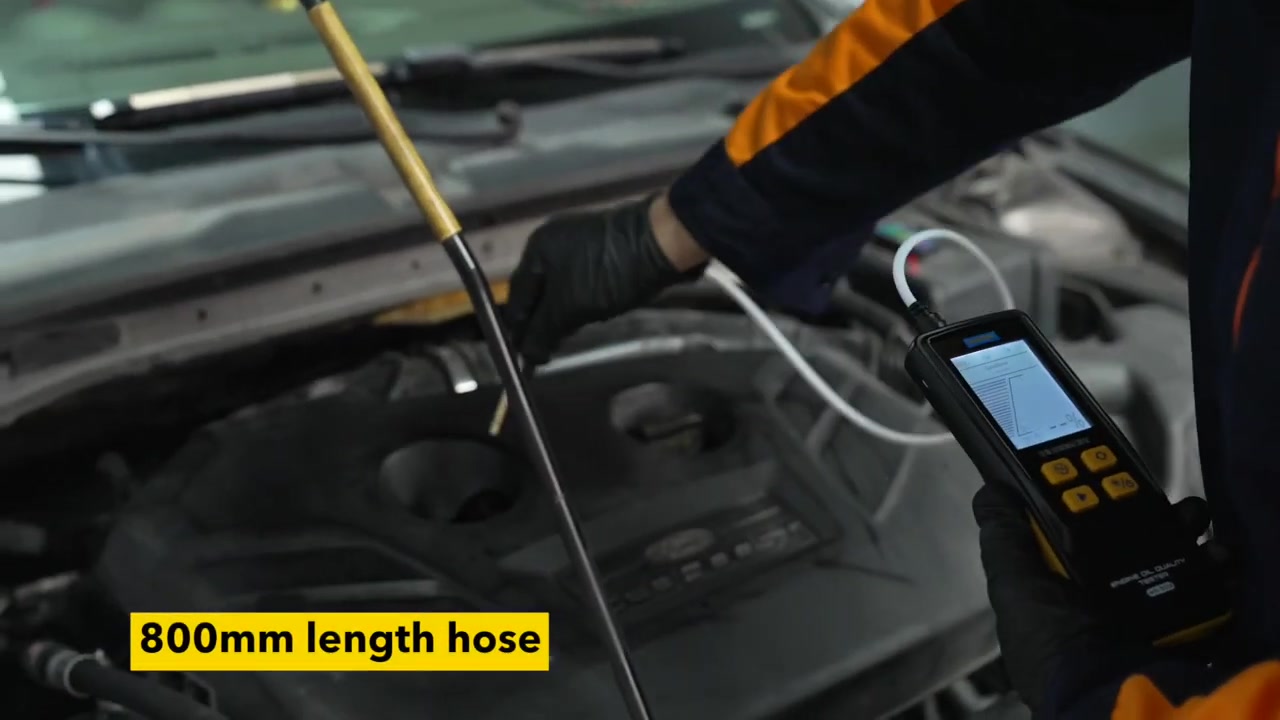
Feed the flexible probe gently through the specified access until the sensing area reaches the engine oil. Do not push against resistance, create a sharp bend or improvise a route around an obstruction.
Stop: If the probe catches or cannot reach the oil smoothly, withdraw only with gentle control and use the vehicle’s approved sampling method.
Step 13: Press TEST and keep the probe stable
Press the TEST key once. Keep the sensing area immersed and the hose still while the AS503 completes its optical reading.
Completion check: The display settles on a transmittance percentage, result symbol and oil temperature.
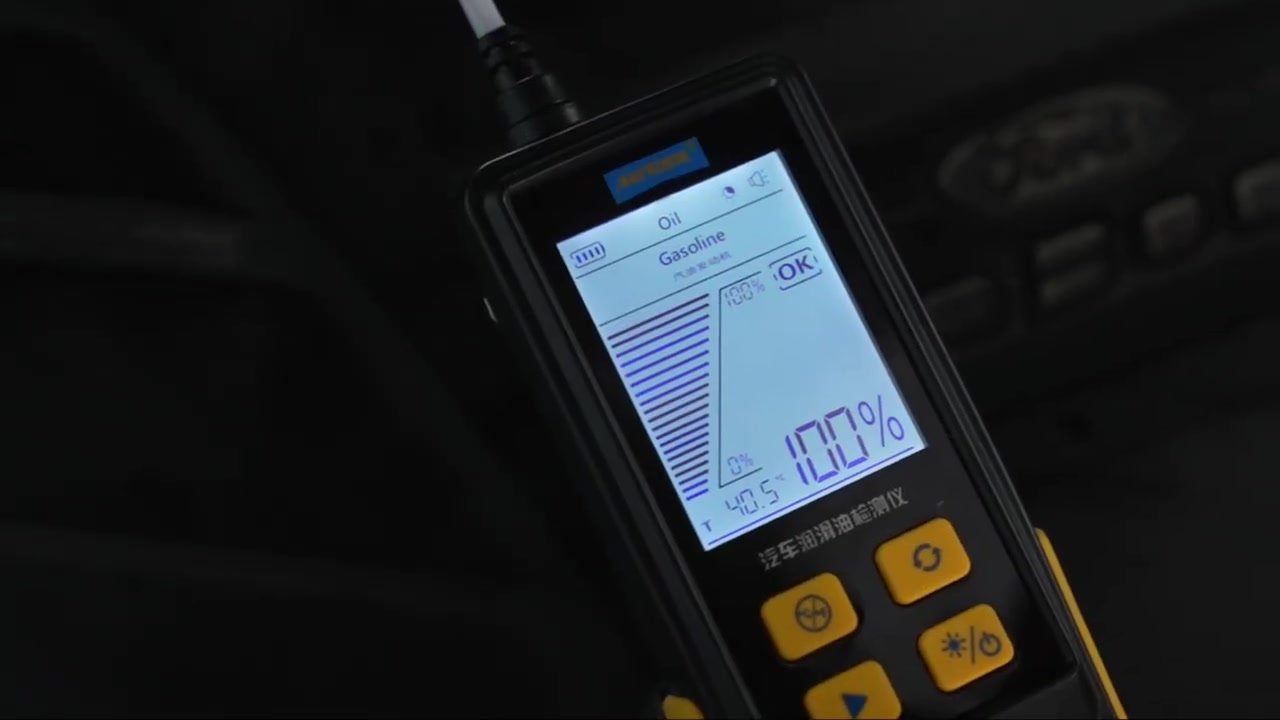
Step 14: Read all three result fields
Read the percentage together with the OK, warning or replacement symbol and the displayed oil temperature. Record the engine mode as well, because a result without its mode and condition is harder to reproduce.
Pass condition: Percentage, symbol, temperature and selected engine type are all recorded.
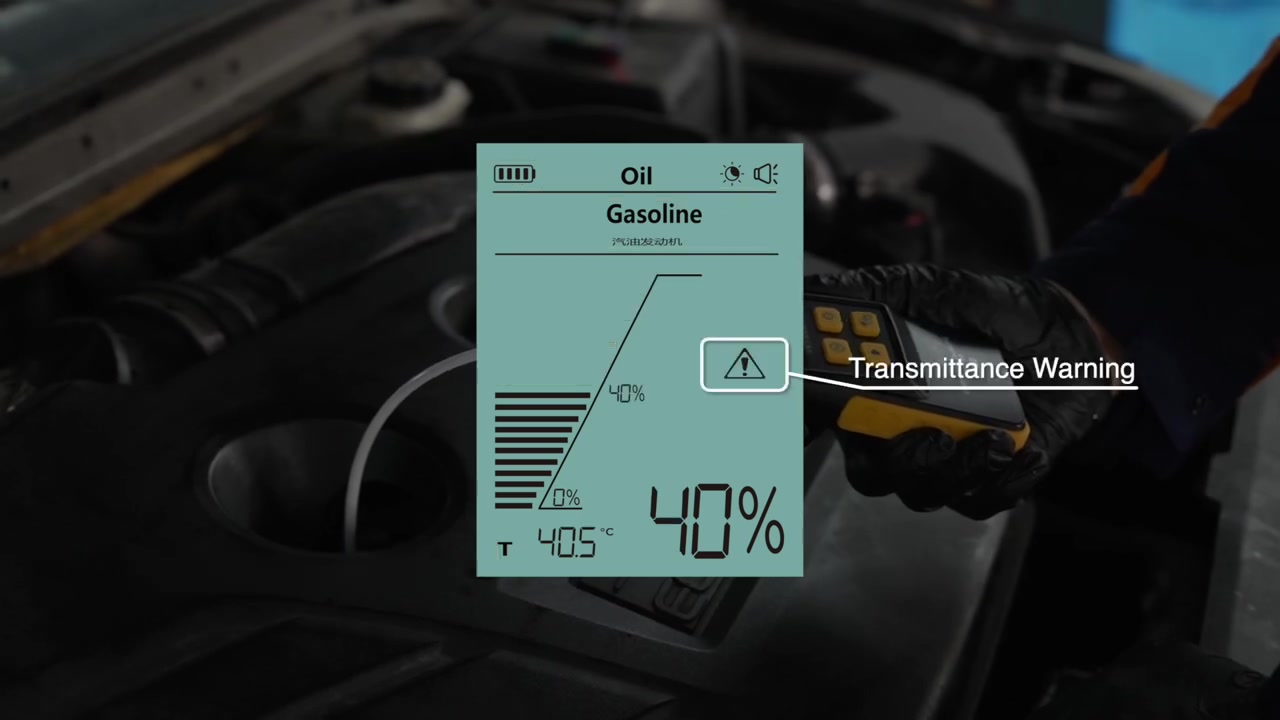
Step 15: Apply the transmittance band conservatively
The manual groups 100–50% as good, 50–30% as warning and below 30% as replacement guidance. Because the printed ranges share the exact 50% boundary, follow the symbol actually shown by the AS503 and the vehicle’s service requirements at that point.
A warning or replacement symbol is a maintenance prompt, not proof of one chemical failure. Use it with the required oil specification, mileage, duty cycle, engine condition and maintenance schedule.
Step 16: Verify an unexpected result once
For an implausible result, gently remove the probe, wipe it clean, reconfirm compatibility and engine mode, then repeat once under the same cooled and stable condition. Do not average away a warning.
Stop: End the test if readings remain unstable, the probe is difficult to remove, or the oil/additive identity becomes uncertain.
Step 17: Withdraw the probe and restore the dipstick
Guide the hose out without force. Wipe the probe immediately, then reinstall the dipstick fully or close the specified sampling point. Inspect for spilled oil or a displaced seal.
Completion check: The probe is clean, the access is correctly closed and no foreign material entered the engine.
Step 18: Power off and store dry
Hold the power key for about two seconds to switch off. Store the clean, dry probe without a tight bend and keep the tester away from moisture and contamination. Remove the batteries for long storage.
Common mistake: Storing the optical tip with used oil on it can contaminate the next sample and make a future result less reliable.
What a complete AS503 test looks like
A complete test begins with compatibility, not probe insertion. The oil and engine were supported, the engine was off and cool, the probe and access stayed clean, the correct engine mode was selected, the result included percentage, symbol and temperature, and the dipstick access was restored without force or contamination.
When the reading or vehicle schedule calls for service, follow the oil specification and procedure for that vehicle. For the delivered button layout, localized pages or an updated revision, find the AS503 entry in the AUTOOL manual download center before beginning work.











Comments 0
Questions, fixes, and real-world diagnostic notes from readers.
Be the first to share a diagnostic result or ask a follow-up question.