
How to Use the MRCARTOOL 1.5 L Manual Oil Extractor Pump

The MRCARTOOL 1.5 L manual oil extractor pump is a hand-operated syringe-style tool for moving automotive fluid through an accessible service opening. The official product page lists transmission fluid, brake fluid, gear oil and antifreeze/coolant among its applications. A transparent 1500 mL chamber, double plunger seals, a hose shutoff and a locking adapter help the operator contain and monitor the transfer.
Quick answer: Confirm the vehicle procedure and exact fluid first. Dedicate the extractor, hose and adapters to one fluid family. Inspect the barrel and seals, connect the hose at the pump port, press the locking connector fully home and pull-test it, then attach the extension tube. Open the hose path and pull the handle slowly to extract, or load approved clean fluid and press slowly to dispense. Close the shutoff before disconnecting, keep each transfer below the 1.5 L capacity, and verify the vehicle’s final level by its specified temperature and operating-state procedure.
In this guide
Qualify the job before opening the system
1. Confirm that top-side fluid transfer is permitted
Use current service information for the exact vehicle, engine, transmission or component. Identify the authorized extraction or fill opening, the required vehicle attitude, the specified fluid temperature and the final level-setting method. Some components are checked cold, some at a temperature window and some with the engine running. The extractor moves fluid; it does not replace those conditions or prove that a dipstick tube is a valid service path.
Check insertion depth before feeding any hose into a reservoir, dipstick guide or fill port. A flexible tube can catch a baffle, pickup, valve, sensor or rotating part. If the approved maximum depth is known, mark that depth on the extension. Stop if the route needs force or if the hose cannot be recovered with light hand pressure.
2. Confirm the fluid and tool compatibility
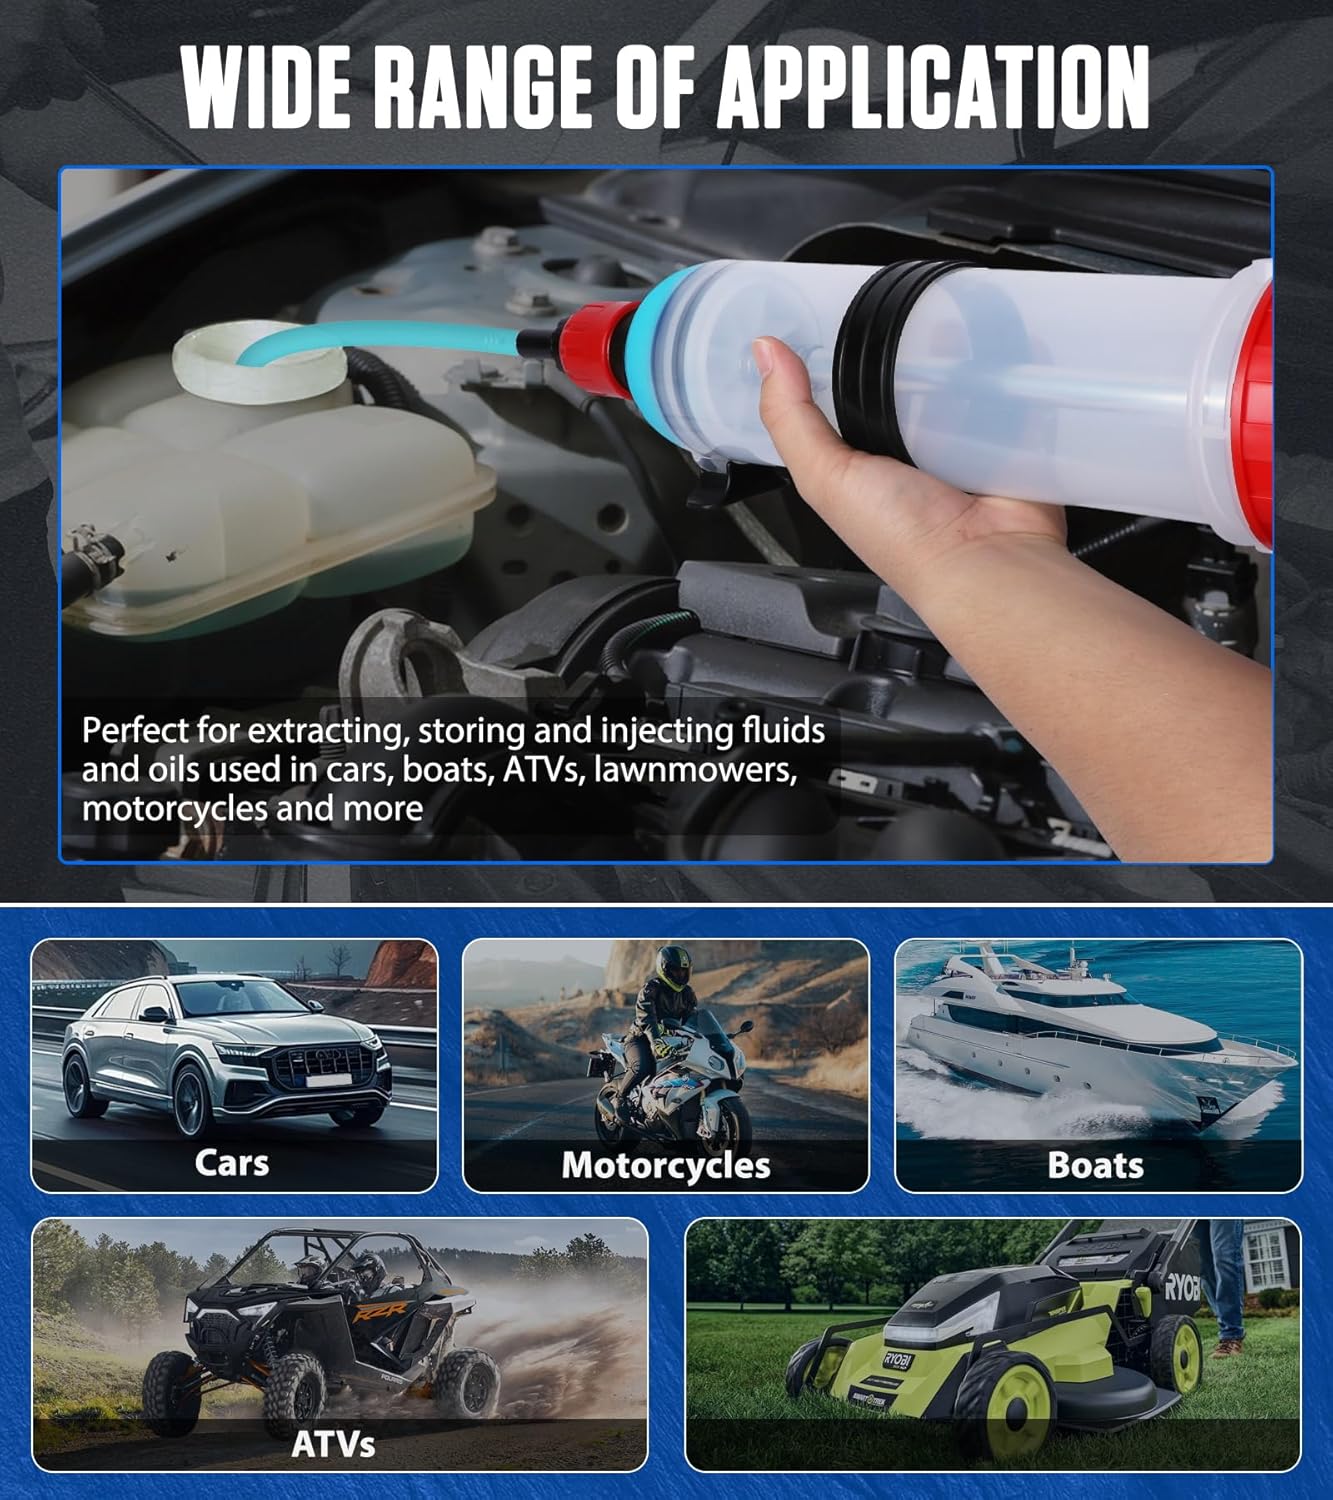
Match the container label to the vehicle’s exact fluid specification. The product page gives examples of intended automotive fluids, but it does not publish a seal-material chart, maximum temperature or universal chemical-compatibility table. Do not infer that every cleaner, solvent or vehicle chemical is acceptable. Never use the pump for gasoline, diesel fuel, refrigerant, flammable or explosive liquid, toxic chemical, or a fluid whose compatibility is uncertain.
Keep fluid families separate. Brake fluid, coolant, engine oil, gear oil and transmission fluid must not share residue. Assign one extractor, hose and adapter set to one fluid family unless a validated cleaning and compatibility process proves safe reuse. Label the tool before its first job.
3. Plan capacity and containment
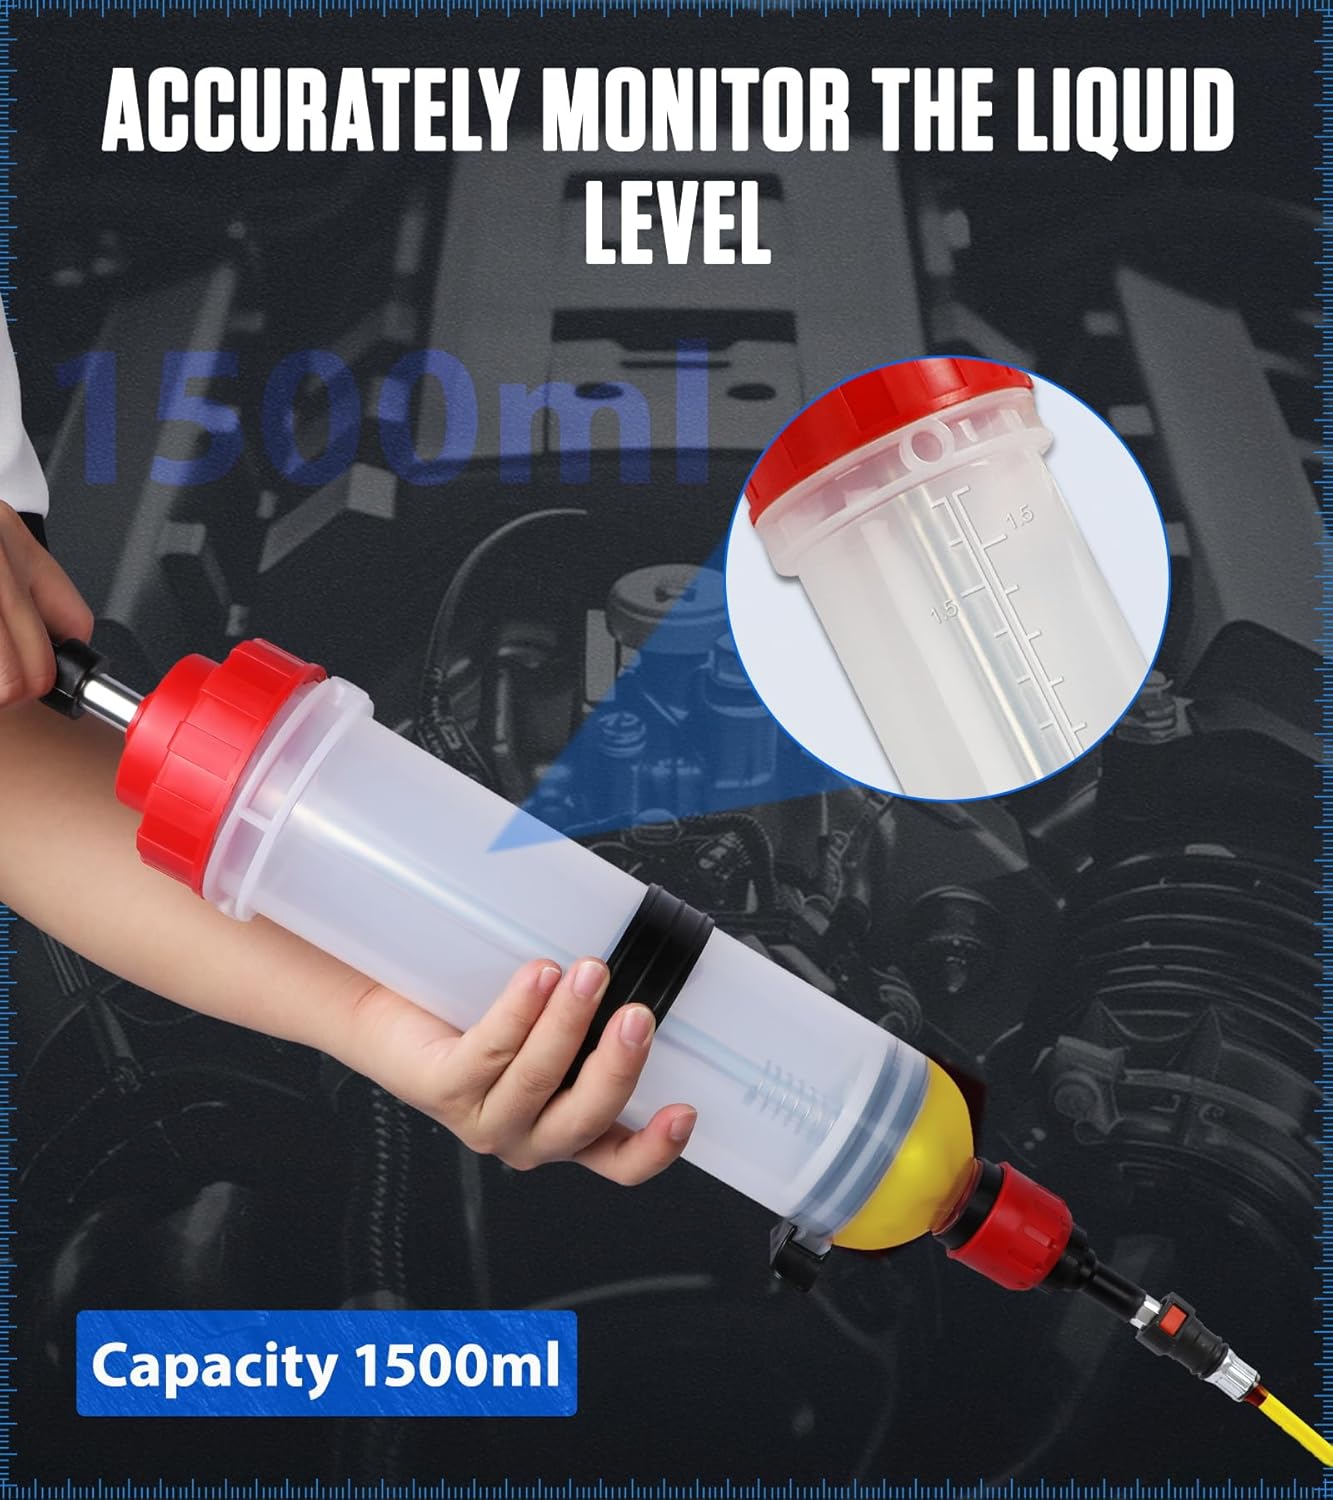
The chamber is rated at 1500 mL. Estimate the amount to remove or add, but leave headroom instead of filling to the physical limit. Prepare a stable waste container with more capacity than the planned draw, absorbent spill control and caps for the hose ends. For a refill, pour only the quantity needed into a separate clean transfer vessel; never place a hose that has touched the vehicle into the original supply bottle.
Inspect and connect the extractor
4. Check every pressure-containing and sealing part
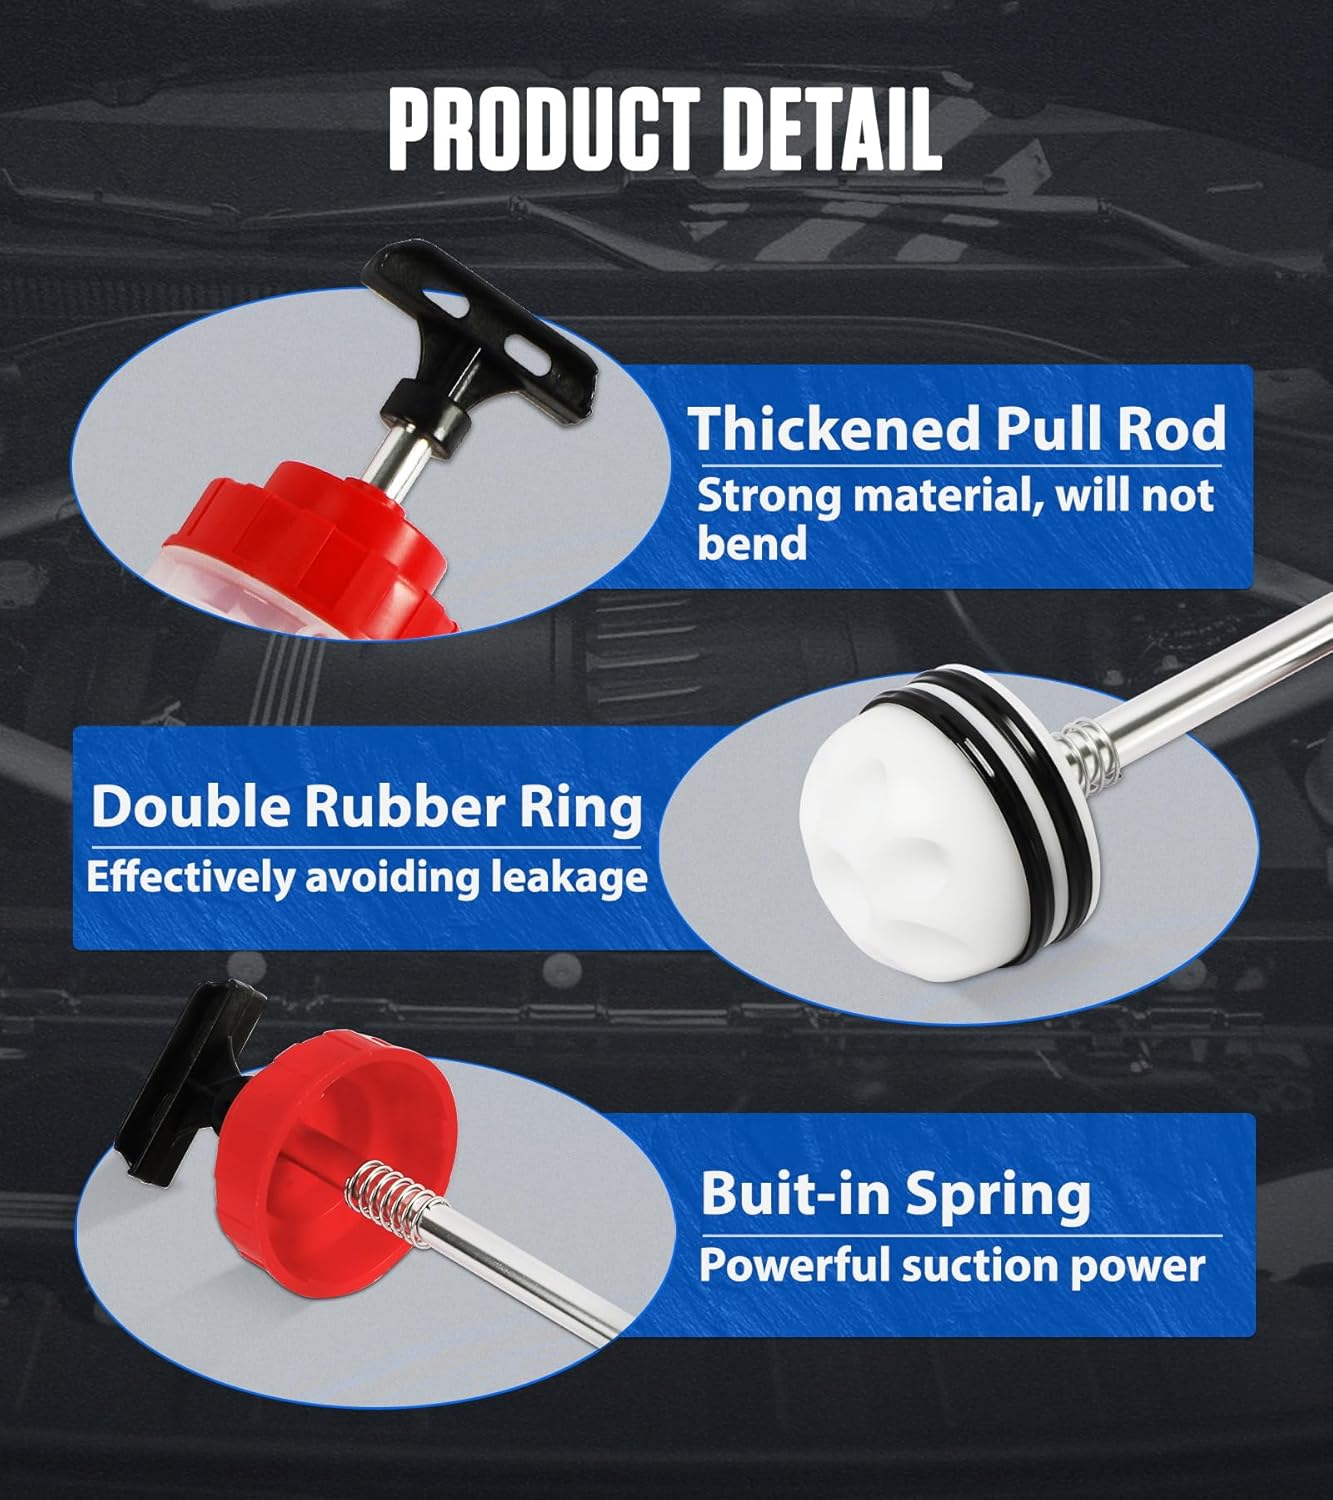
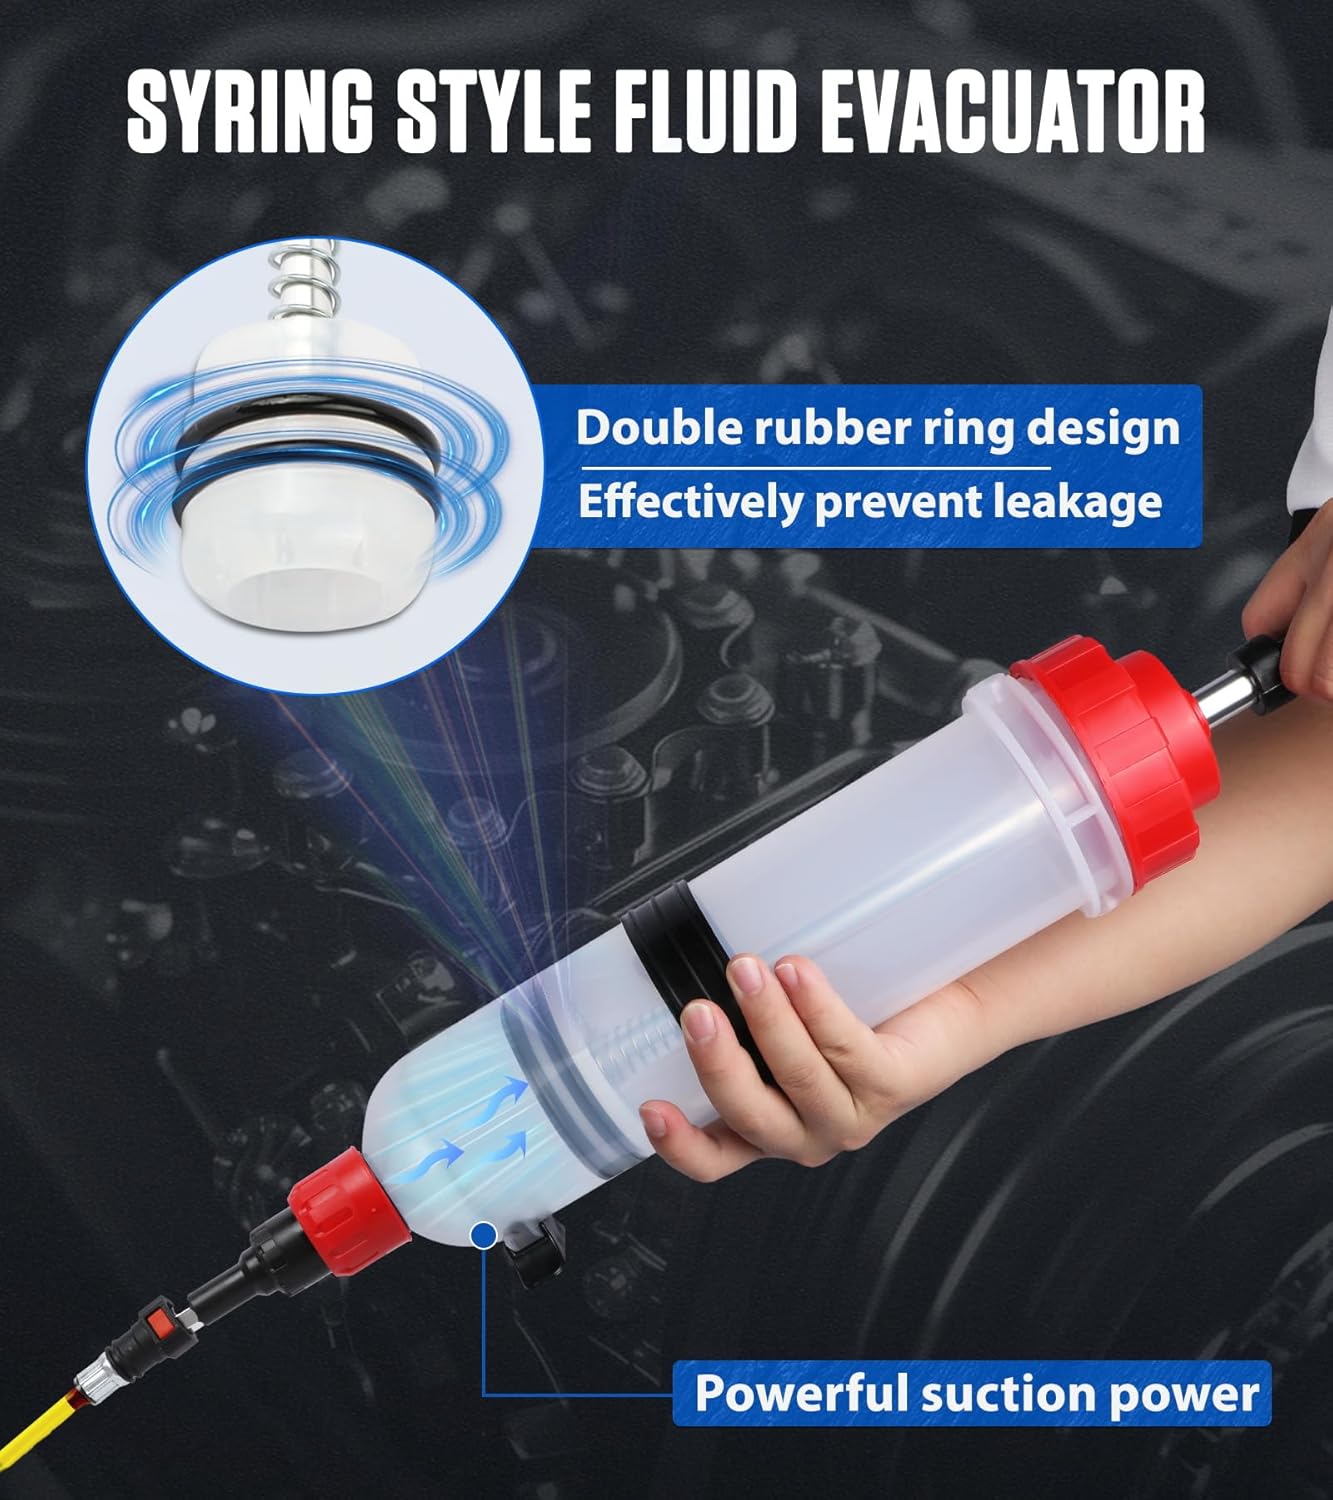
Wear fluid-appropriate gloves and eye protection. Examine the transparent barrel for cracks, haze, heat distortion or damaged graduations. Check the red end caps, pull rod, handle, internal spring area and anti-slip support for looseness or deformation. Inspect both black plunger rings for cuts, flattening, swelling or hardening. A leaking or binding seal is a replacement condition, not a reason to pull harder.
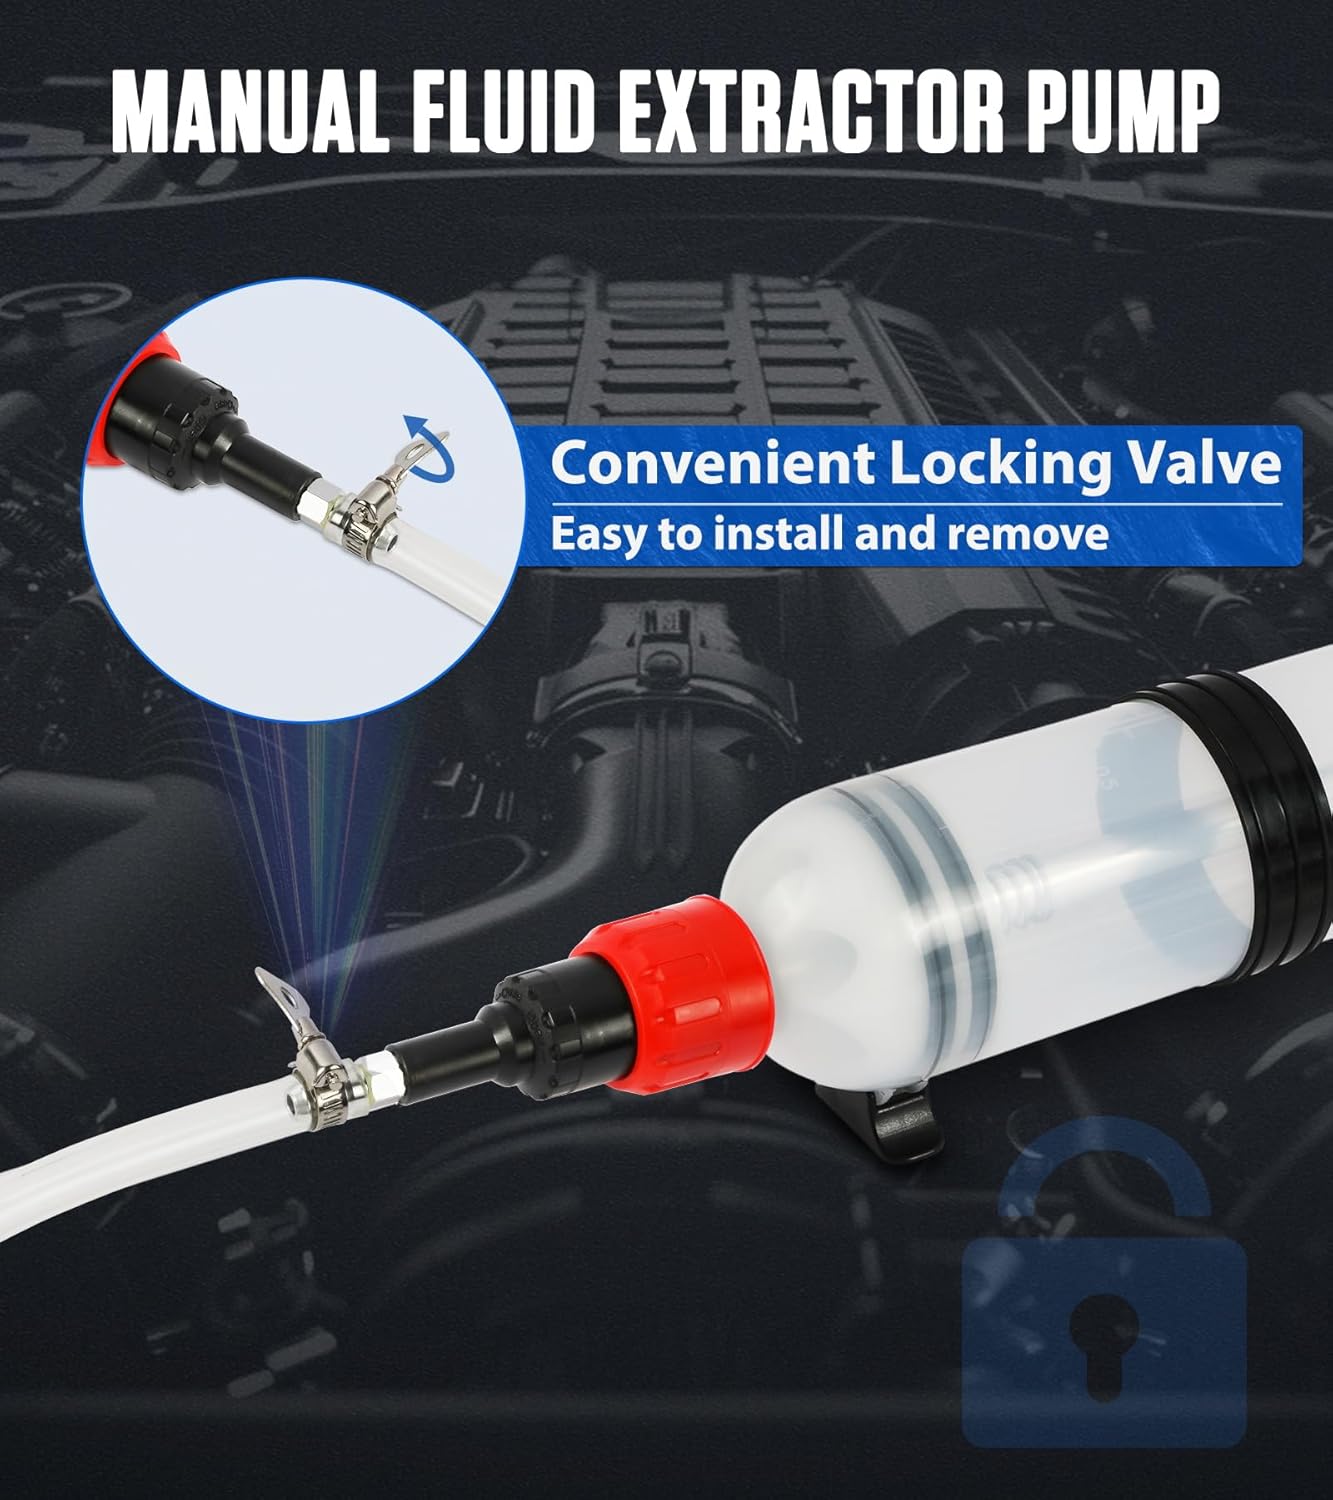
Inspect the pump port, quick connector, hose shutoff, clamps, extension tube and three metal adapters shown with the product. Reject a tube that is kinked, brittle, cloudy, permanently soft or poorly retained. Move the hose valve through its normal range before introducing fluid. Do not use tape, wire or an improvised clamp to compensate for a damaged lock.
5. Avoid repeated dry operation
The official care notes say not to run the pump dry. Wet or prime the fluid path only with a small amount of the same approved fluid used for that job, and keep the priming liquid out of the clean supply. Do not add an unknown lubricant to the barrel or seals. If the correct priming method cannot be confirmed for the intended fluid, pause and obtain product support before use.
6. Build and test the hose path
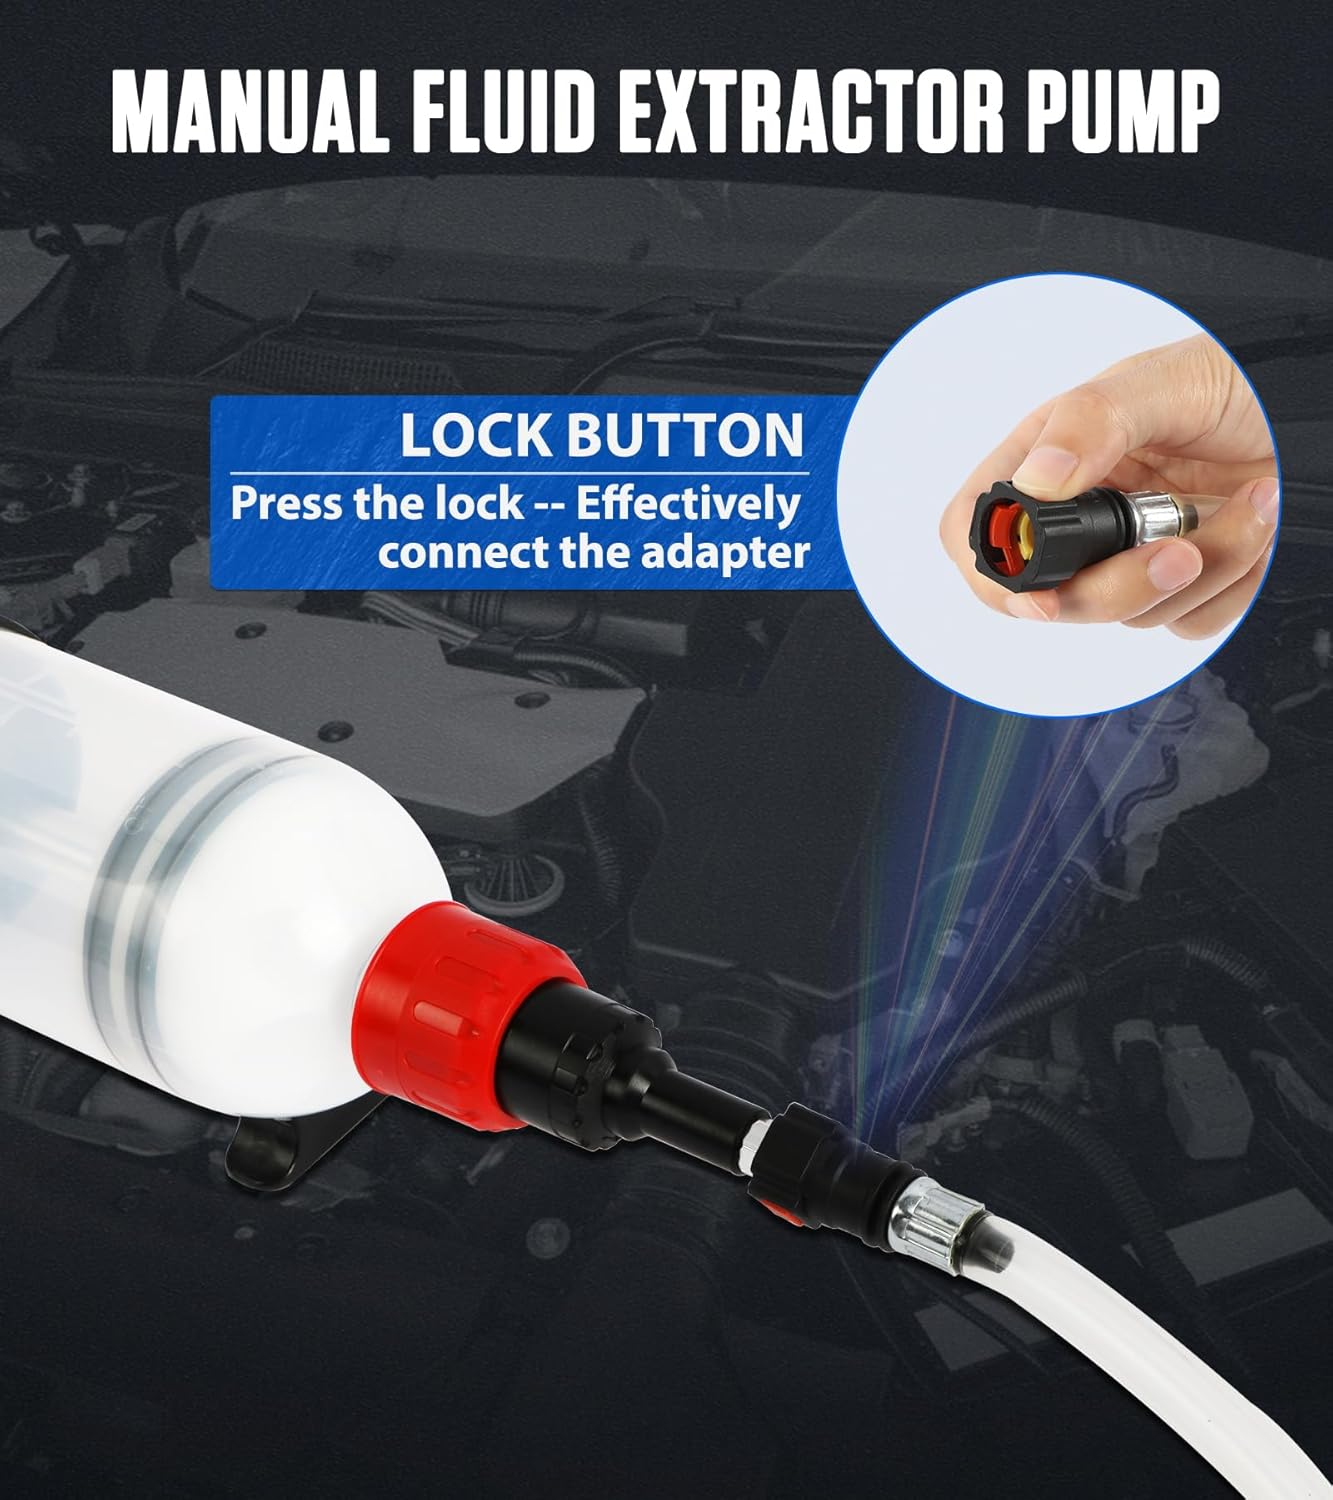
Connect the hose to the extractor’s suction port. Press the locking connector or collar as shown, insert the matching adapter completely, release the lock and apply a gentle pull test. Attach the extension tube and the adapter that fits without stretching or crushing the hose. Keep the shutoff closed while routing the assembly so an accidental plunger movement cannot spill fluid.
Bench-check the assembled path over a compatible container. Open the shutoff, make a short slow stroke with the approved fluid and inspect every joint. Close the shutoff and verify that the captured fluid remains contained. A persistent bubble stream, loss of hold or wet connector means the seal path is not ready for the vehicle.
Extract used or excess fluid
7. Position the tool and tube
Place the extractor on a stable flat surface when the anti-slip base can support it, or hold it with the barrel controlled and the pull rod aligned. Keep the hose away from belts, fans, hot exhaust parts and electrical connectors. Insert the extension only to the authorized depth and keep its end below the liquid surface. Do not let the tool’s weight hang from the service opening.
8. Open the path and pull slowly
Confirm the waste container is ready, then open the hose shutoff. Pull the handle gently and straight, as the product instructions specify. Watch the transparent chamber and hose. A steady liquid column indicates the path is immersed and sealed; recurring bubbles suggest the tube has risen above the fluid, a connection is leaking or the source is nearly empty. Stop rather than increasing force.
For thick gear oil or transmission fluid, use only the component’s approved service temperature. Never heat the extractor or work on a system hot enough to burn the operator or deform the tool. If the approved fluid still will not flow with gentle force, check for a kink, blocked adapter or unsuitable access route and change to purpose-rated equipment if necessary.
9. Isolate each loaded chamber
Stop the draw before fluid reaches the end of the scale or the pull rod reaches a hard limit. Close the hose shutoff while the tube is still controlled. Lift the hose from the service point under drip control, cap the opening temporarily if the procedure permits and move the hose to the labeled waste container. Keep the extractor upright enough to prevent fluid from reaching unintended seal or vent areas.
10. Discharge into the waste container
Open the shutoff only after the hose is secure in the waste container. Press the handle slowly and keep the hose restrained. Do not spray fluid, use compressed air or apply body weight to the handle. Record the approximate amount removed from the chamber scale. Repeat controlled draws as needed, keeping total vehicle removal aligned with the service plan.
Transfer or refill clean fluid
11. Load from a separate clean vessel
Use a cleaned, dedicated extractor for refill work. Verify the fluid label again, place the clean hose into a small clean vessel and draw slowly. Keep the end submerged to reduce air. Close the shutoff before lifting the hose. Do not return unused fluid from the vessel or extractor to the original bottle, because contact with the hose and atmosphere has already changed its cleanliness status.
12. Connect to the approved fill point
Secure the correct adapter to the vehicle fill opening without forcing mismatched threads or fittings. Press and seat the product’s locking connector, release it and pull-test the connection. Route the hose without a kink and support the extractor separately. The lock holds the adapter connection; it is not a substitute for supporting a full 1.5 L chamber.
13. Dispense in controlled increments
Open the shutoff and press the handle slowly in line with the barrel. Pause if pressure rises, the hose moves or the adapter leaks. A blocked port, closed valve, kink or already-full component must be corrected before continuing. The extractor is a low-speed transfer tool, not a pressure-flushing device. Use the barrel graduations to estimate delivery, allowing for fluid retained in the tube and fittings.
Verify level and disconnect
14. Set the final level by the vehicle procedure
Treat the chamber scale as a transfer aid rather than calibrated metrology. Vehicle attitude, temperature, fluid retained in the hose, trapped air and partial strokes affect the result. As the target approaches, use smaller increments. Cycle the transmission, steering system or other component only when the service procedure explicitly requires it, then perform the specified final check at the correct state.
15. Close, disconnect and inspect
Close the hose shutoff before removing the extension or adapter. Control drips, then reinstall the correct service plug, reservoir cap, seal or fastener to specification. Inspect the work area for leaks and clean any spill using a method compatible with the vehicle surface and fluid. Keep brake fluid away from paint and keep oil or coolant off belts and tires.
Clean, label and store
16. Empty the tool without mixing waste streams
Drain the chamber and hose into the correct labeled waste container. Never combine brake fluid, coolant, oil or solvent simply because one pump can move them. Follow local disposal rules. If the fluid identity is uncertain, isolate it for identification rather than returning it to a vehicle or clean supply.
17. Use only a compatible cleaning method
The product page says to clean after use but does not name a solvent or provide a material chart. Use a cleaning fluid only when it is confirmed compatible with the PP body, seals, hose, adapters and transferred fluid. Otherwise, drain and wipe the exterior, retain the tool for the same fluid family and obtain a validated method. Replace worn parts rather than relying on cleaning to restore damaged seals.
18. Store depressurized and protected
Close or cap clean ends after drainage, label the assigned fluid family and inspection date, and store the extractor dry, shaded and protected from impact or crushing. Do not leave the barrel full or the pull rod under sustained load. Keep the adapter set together so an unverified fitting is not substituted at the next service.
Troubleshooting
| Symptom | Check first |
|---|---|
| No fluid enters the chamber | Shutoff open, hose end submerged, adapter path clear, no kink and service point authorized |
| Continuous bubbles | Loose quick connector, damaged hose, tube above liquid or worn double seals |
| Fluid leaks at the piston | Stop; inspect both rings for damage, swelling and chemical incompatibility |
| Connector will not lock | Match the adapter, clean the socket and replace a damaged lock rather than forcing it |
| Handle force rises sharply | Closed valve, blocked or kinked line, high viscosity, unsuitable temperature or full component |
| Transferred quantity seems wrong | Read scale at eye level and account for hose retention, air and incomplete strokes |
| Hose moves at the service point | Stop flow, support the tool, correct routing and secure only by the approved method |
| Fluid identity is uncertain | Isolate it; do not add it to the vehicle or clean stock |
Final 1.5 L extractor checklist
- Exact vehicle service opening and level procedure confirmed
- Correct fluid specification and safe service temperature confirmed
- Extractor, hose and adapters dedicated to one fluid family
- Barrel, pull rod, double seals, spring area and base inspected
- Hose, shutoff, quick connector and selected adapter inspected
- Approved-fluid priming plan avoids repeated dry operation
- Quick connector fully seated, released and gently pull-tested
- Extension routed without force, heat exposure or contact with moving parts
- Handle moved slowly with no side load or hard-stop force
- Shutoff closed before every loaded disconnect or move
- Working volume kept below the 1500 mL capacity
- Clean supply and waste-fluid zones kept separate
- Final vehicle level verified independently of the chamber scale
- Service closure installed and work area checked for leaks
- Compatible cleaning method used or tool retained as fluid-specific
- Tool emptied, capped, labeled and stored without load
Good results come from controlling the whole fluid path, not merely pulling a large syringe. Qualify the service opening and fluid, dedicate the tool, inspect and lock every connection, move the 1.5 L chamber slowly, isolate it with the shutoff, and verify the final level using the vehicle procedure. Clean and label the complete hose-and-adapter set before storage so the next job begins with a known fluid history.










Comments 0
Questions, fixes, and real-world diagnostic notes from readers.
Be the first to share a diagnostic result or ask a follow-up question.