
DIY or Repair Shop? Choose by Risk, Access, and Verification

The right DIY decision is not a list of easy and hard jobs. It asks what happens if the diagnosis, support, fastener, fluid, programming, or verification is wrong on this exact vehicle. A low-cost part can still sit inside a high-consequence system.
What to do first
- Choose a shop when failure could affect braking, steering, restraint, high voltage, fuel containment, structural integrity, refrigerant handling, or a loaded spring and you cannot control every required step.
- DIY only when you have exact service information, compatible tools and consumables, safe access/support, a way to measure the result, and a recovery plan if the job does not go as expected.
- A hybrid path is often best: document the symptom and scan data yourself, then pay for the hazardous access, calibration, machining, pressure test, or final verification.
In this guide
1. Define the job and the failure consequence
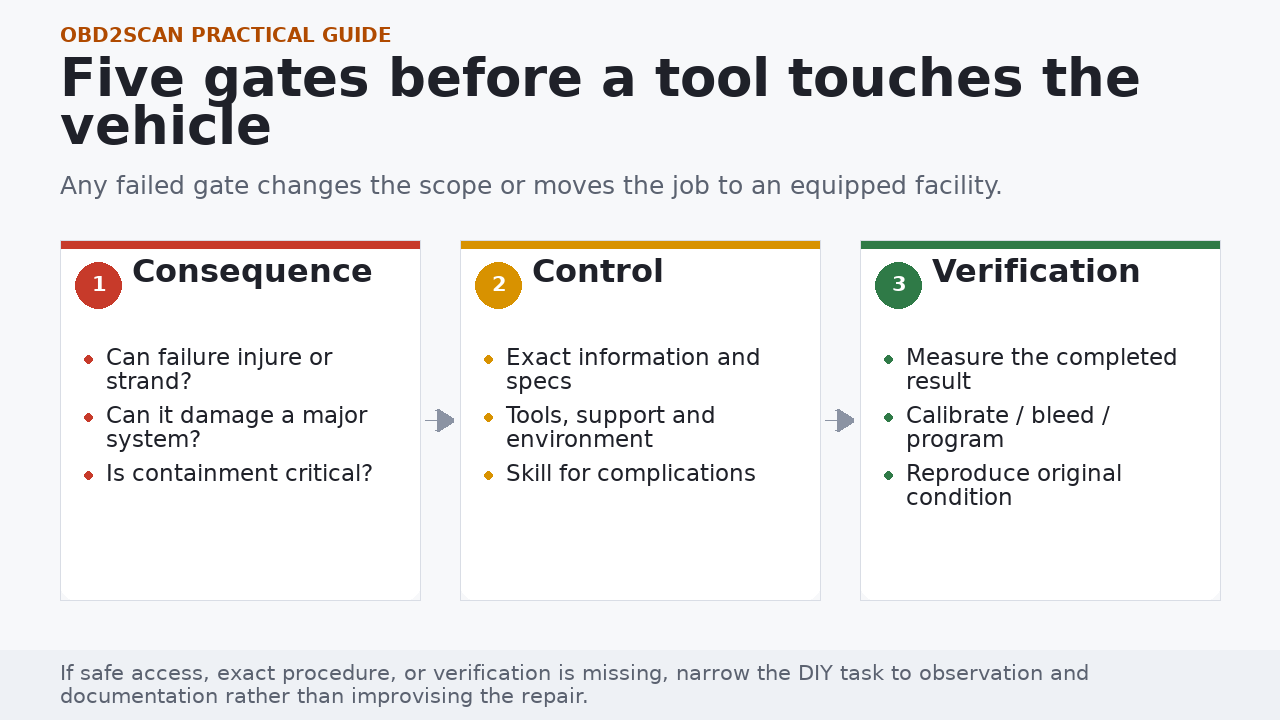
- Write the symptom, exact operating condition, codes/status, recent work, and what has already been measured. ‘Replace sensor’ is not a diagnosis or complete scope.
- Identify every system the job opens or disturbs: hydraulic, fuel, cooling, high voltage, restraint, refrigerant, steering, structural, network/programming, or emissions controls.
- List credible complications: seized or broken fastener, stripped thread, contaminated fluid, lost programming, unexpected stored energy, inability to move the vehicle, or no way to verify the result.
- State the worst plausible result and the point at which you will stop. If that outcome cannot be contained in the work location, the repair scope belongs elsewhere.
2. Check information, access, equipment, and environment
| Gate | Questions that need a clear yes |
|---|---|
| Information | Do you have the exact procedure, specifications, warnings, sequence, updates, and required initialization for this VIN/configuration? |
| Equipment | Are tools rated and compatible, including torque/angle, pressure, electrical category, lifting/support, extraction, programming, or calibration equipment? |
| Access | Can you reach and identify the part without defeating guards, damaging connectors, releasing stored energy, or entering a no-touch zone? |
| Environment | Is there light, ventilation, fire control, spill handling, stable ground, time, weather protection, and a way to keep others clear? |
| Recovery | Can you stop mid-job, source a damaged fastener/connector, move the vehicle, and hand it off without hiding what changed? |
Lifting changes the risk category
OSHA requires a jack’s rated capacity and operating limit to be respected, a firm foundation, and blocking after a load is raised. Follow the vehicle lift points and support procedure; a jack alone is not support.
3. Choose DIY, shop, or a hybrid scope
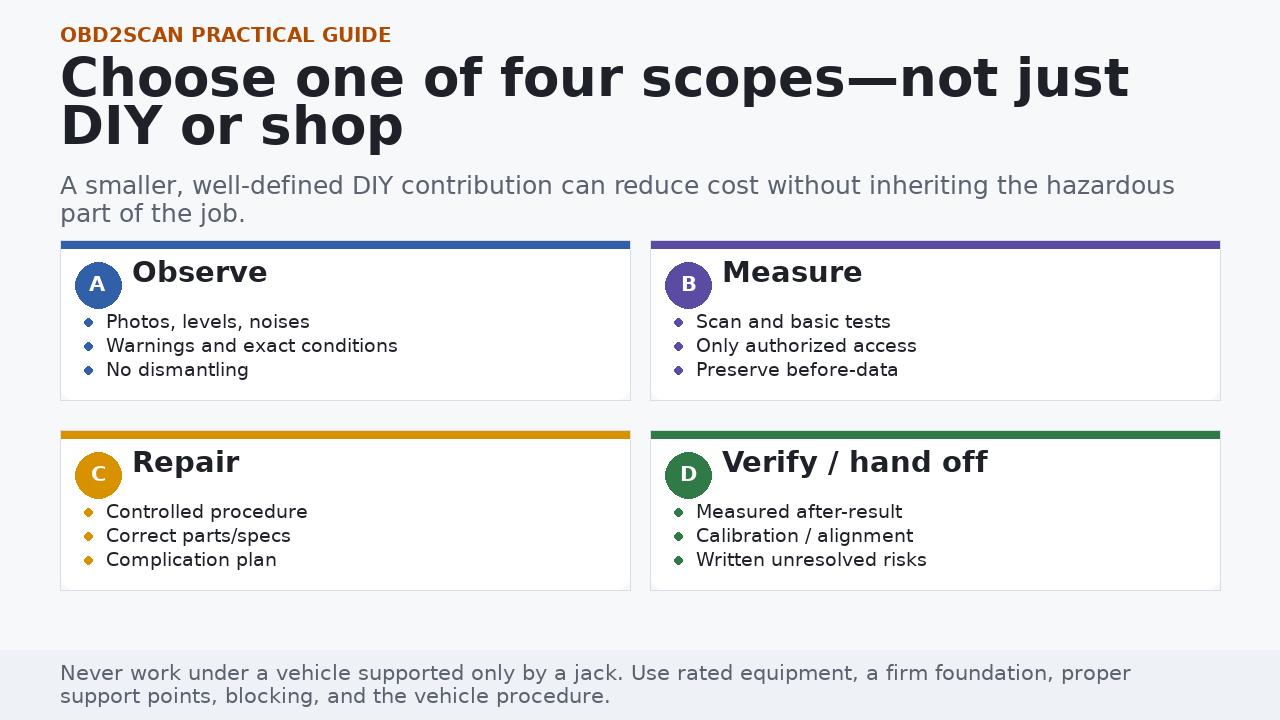
Observation and evidence capture are often safe owner contributions. Repair scope narrows as energy, pressure, height, consequence, access, or programming demands rise. Systems involving air bags, high voltage, fuel leakage, structural repair, loaded coil springs, refrigerant recovery, advanced driver-assistance calibration, or uncertain brake/steering integrity commonly need trained personnel and controlled equipment.
A shop handoff can be precise: provide the before-data, ask which tests will distinguish the hypotheses, authorize diagnosis before parts where appropriate, request measurements/specifications on the invoice, and identify whether outside machining, alignment, programming, or calibration is required.
4. Verify the result and preserve the next decision
- Inspect the work area for tools, rags, disconnected grounds, open caps, leaks, routed wiring/hoses, loose fasteners, and removed safety devices.
- Complete every specified fill, bleed, torque, initialization, relearn, programming, calibration, and static test before movement.
- Reproduce the original condition safely and compare the same measurements, warning status, scan data, sound, temperature, pressure, or alignment result.
- Perform follow-up checks at the specified heat cycle, distance, or time; do not invent a generic re-torque or recheck interval.
- Record parts, fluid/specification, measurements, software or calibration, date/mileage, unresolved conditions, and who performed each stage.
The decision is complete only when verification is possible
If a repair cannot be measured or safely tested in your environment, plan the verification or shop handoff before starting. ‘It seems better’ is weak closure for a high-consequence system.
Official references
Use these sources for the principles in this guide, then use the owner’s manual and current service information for your exact vehicle.
- OSHA 1910.244: Jacks (osha.gov)
- Toyota Owners: General Maintenance (toyota.com)
- NHTSA: Check for Recalls (nhtsa.gov)
The useful outcome
You can now choose a scope that matches consequence, control, and verification: observe, measure, repair, or hand off. A disciplined partial contribution is a successful outcome when it preserves evidence and keeps hazardous work inside an equipped process.




Comments 0
Questions, fixes, and real-world diagnostic notes from readers.
Be the first to share a diagnostic result or ask a follow-up question.