
How to Use the AUTOOL Workshop Tool Storage Cabinet

The AUTOOL Workshop Tool Storage Cabinet is a customizable workshop tool storage cabinet system. This guide combines the exact product configuration with the retained assembly manual where available and a controlled load, movement and storage workflow.
Quick answer: Confirm the customized A/B cabinet plan and delivered parts, prepare a suitable level site, assemble each bay square, join only the approved combination, and have the complete system restrained by the site-specific method before loading. Keep heavy tools low, add loads gradually, label storage zones and unload any shelf or bay that moves, deflects or becomes damaged.
In this guide
Before you start
A tall loaded cabinet can become a tip, crush and falling-object hazard. The current product record explains A and B configurations and a 220lb system statement but does not provide an exact public anchoring specification or per-shelf ratings. Plan the layout, supporting building surface, restraint and permitted loads before assembly, and use qualified installation help where the site or fastening method requires it.
- confirm the approved A, B, A+B or A+B+A order and final workshop dimensions;
- inventory every structural panel, column, beam, shelf, rear panel, mesh section, bracket, hook and fastener;
- protect finished faces and separate Type A display parts from Type B tiered-storage parts;
- verify a level sound floor and suitable supporting building surface with concealed services located;
- keep vehicles, lift travel, doors, electrical panels, fire equipment and walkways clear; and
- prepare enough installers and safe lifting support for long panels and partially assembled bays.
Use the AUTOOL manual download center to locate the current instructions when a manual is available. The delivered model label and current vehicle service information control if an older image or remembered setting differs.
Workshop Tool Storage Cabinet controls and specifications
The current product page states that the cold-rolled carbon-steel cabinet system supports up to 220lb without warping. It does not establish that figure for every shelf, hook, custom bay or A+B+A combination. Treat the lower confirmed shelf, bay, total-system, wall and floor limit as controlling, and never use the furniture itself as an anchoring design.
How to use the Workshop Tool Storage Cabinet
Step 1: Confirm the A/B layout and exact delivered bill of materials
Treat this as a customized storage system. Confirm whether the approved plan is A, B, A+B or A+B+A, measure the intended wall and corner clearances, and compare every delivered side panel, column, beam, shelf, rear panel, mesh panel, bracket, hook and fastener with the current order documents before assembly.
Before moving on, confirm the approved A/B layout, site dimensions, complete structural parts and a qualified restraint plan; do not begin from a marketing image alone.
Step 2: Clear and evaluate the installation area
Remove vehicles, lifts, power leads and trip hazards from the work zone. Confirm the floor and supporting building surface are level, sound and suitable for the planned cabinet load. Locate concealed electrical, plumbing and other services before any anchoring; mounting design and fasteners require the site-specific instructions and qualified installer.
Step 3: Stage Type A and Type B parts separately
Keep Type A display-frame parts apart from Type B tiered-cabinet parts. Protect finished faces on clean padding, group matching hardware, and do not substitute a screw, beam or bracket because it appears to fit. Damaged, missing or unidentified structural parts are a stop condition.
Step 4: Build each lower frame loosely and square it
With adequate help, assemble the applicable side panels or columns, lower beams and shelf supports in the order shown by the delivered layout. Start fasteners by hand and leave enough movement to square the frame; do not fully tighten a twisted or rocking section.
Step 5: Fit shelves, rear panels and the Type A display structure
Install the ordered shelves and rear panels on their intended supports. For Type A, add the dividers, long and short beams, mesh rear panels and front panel in their labeled positions. For Type B, keep the vertical columns, shelf beams and shelves matched to that bay rather than borrowing Type A hardware.
Step 6: Join the approved cabinet combination
Bring the completed A and B sections together in the approved A+B or A+B+A order, align the faces and maintain the measured access clearance. Use only the supplied joining points or the current project installation design; an adjacent cabinet is not structural support unless the approved system says it is.
Step 7: Level, secure and inspect before loading
Level the complete run, remove rocking and complete the required wall, floor or inter-cabinet restraint with qualified site-specific methods. Tighten structural connections in a progressive pattern, then check every shelf seat, panel edge, hook rail and opening for movement or interference.
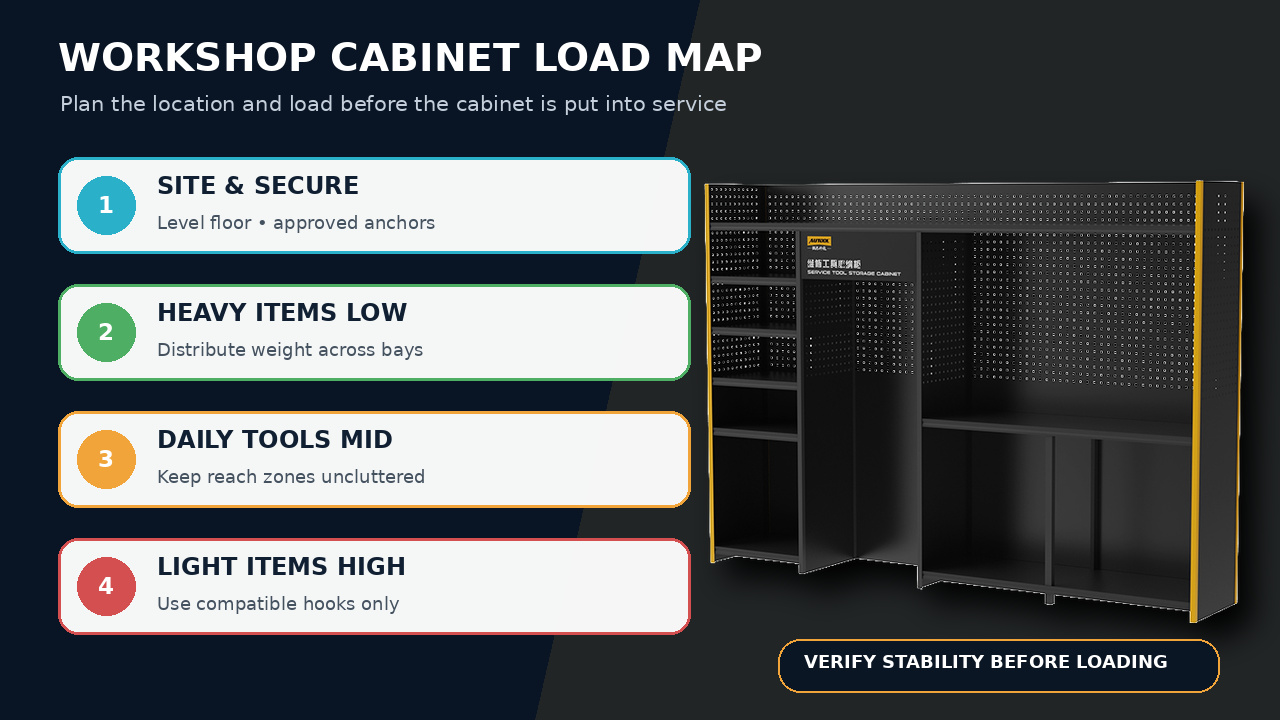
Step 8: Create a load map from heavy and frequently used items
Keep heavy tools low and close to the cabinet supports, distribute mass across shelves and place frequently used hand tools within comfortable reach. Do not treat the advertised 220lb system statement as a per-shelf rating; use the delivered layout’s lower applicable shelf, bay and total limits.
Step 9: Install hooks and accessories without crowding aisles
Fit the intended yellow single, double and small hooks fully into the Type A pegboard or mesh system. Keep sharp or heavy tools from projecting into walkways, prevent tools from masking outlets or safety equipment, and leave enough space to lift each item without dislodging its neighbors.
Step 10: Run a loaded stability and access check
Add the planned load gradually while watching frame movement, shelf deflection and restraint points. Open the work area as it will be used and confirm doors, drawers, vehicles and people cannot strike the cabinet. Remove load immediately if a shelf moves, a fastener loosens or the system leans.
Step 11: Label storage zones and control changes
Label shelves and hooks by tool group and applicable load boundary so technicians return heavy items to the planned zone. Review any later cabinet extension, shelf move or equipment change as a new load-and-clearance decision rather than silently modifying the approved arrangement.
Step 12: Inspect and maintain the cabinet system
Regularly check beams, shelves, panels, hooks, joins and restraints for looseness, impact, corrosion or deformation. Remove corrosive spills promptly with a compatible method, keep the area dry and ventilated, and unload and isolate any bay that shows structural damage until it is correctly repaired.
Before closing the installation, confirm every bay is restrained, the load map has passed a gradual stability check and the inspection owner understands when to unload and isolate a damaged section.
Read and verify the result
The finished cabinet should remain square, level and restrained, with every shelf fully seated and no connection moving as the planned load is added gradually. Safe use also depends on access: tools must lift free without dislodging neighbors, sharp items must not project into aisles and vehicles or doors must not strike the cabinet.
- Check frame diagonals or another approved squareness reference before final tightening and again after joining bays.
- Verify every restraint and structural connection before loading; a neighboring cabinet is not support unless the approved system makes it one.
- Add heavy items low and gradually, watching shelf deflection, frame movement and changing floor contact.
- Label load zones and tool locations so later users do not move heavy equipment onto an unverified shelf or hook.
- Reinspect after an impact, layout change or new equipment load rather than assuming the original setup still applies.
Stop and unload the affected section if the cabinet rocks, leans, pulls away from its restraint, shows a loose beam or shelf, deflects under load, has a damaged hook, or is struck by a vehicle or moving equipment. Keep the bay isolated until the structure and site restraint are correctly assessed and repaired.
Common mistakes and care
- Use a qualified site-specific installation and anchoring plan; the retained product record is not an anchoring specification.
- Do not climb, stand or sit on the cabinet, shelves, beams or pegboard accessories.
- Do not assume the advertised 220lb statement applies to each shelf or each customized bay.
- Keep heavy tools low, distribute loads and remove any load that causes movement, deflection or instability.
- Unload and isolate a damaged, corroded, impacted or unsecured section until it is correctly repaired.
- Do not use generic wall plugs or fasteners without verifying the actual supporting construction and approved restraint design.
- Do not treat the advertised 220lb statement as a rating for each shelf, hook or cabinet bay.
- Do not climb the frame, shelves or pegboard to reach upper tools; use suitable access equipment.
- Do not place heavy or sharp tools high where a small impact can release them into the work area.
- Do not extend or rearrange the cabinet without reassessing total load, restraint, aisle and vehicle clearance.
Frequently asked questions
What is the difference between the A and B cabinet styles?
Type A is the display-oriented section with pegboard or mesh panels, dividers, beams and hooks. Type B is the tiered storage section built around side panels, columns, shelf beams and shelves. Confirm the customized A+B or A+B+A order before assembly.
Can I use 220lb on every shelf?
No. The product record presents 220lb as a cabinet-system capacity statement and does not provide a 220lb per-shelf or per-hook rating. Use only the lower confirmed limit for the exact shelf, bay, total system and supporting site.
How should the cabinet be anchored?
Use a qualified site-specific restraint design based on the actual cabinet configuration, wall or floor construction, concealed services and expected loads. The product overview does not establish a universal anchor or fastener.
Final Workshop Tool Storage Cabinet checklist
- Approved A/B layout, site dimensions and delivered parts confirmed
- Floor, supporting surface, concealed services and restraint plan verified
- Every bay square, level, joined and secured before loading
- Shelves, panels, beams and hooks seated with no sharp exposed edge
- Heavy loads low and distributed inside confirmed boundaries
- Aisles, doors, vehicles, lifts and safety equipment remain clear
- Storage zones labeled and post-load stability inspection passed
- Inspection plan established for fasteners, corrosion, impact and layout changes
A cabinet system is complete only when the layout, restraint, load map and access path work together. Build it square, secure it to the actual site, load it from the bottom up and treat every future layout or equipment change as a new stability check.










Comments 0
Questions, fixes, and real-world diagnostic notes from readers.
Be the first to share a diagnostic result or ask a follow-up question.