
How to Use the AUTOOL C100 Fuel System Cleaning Machine

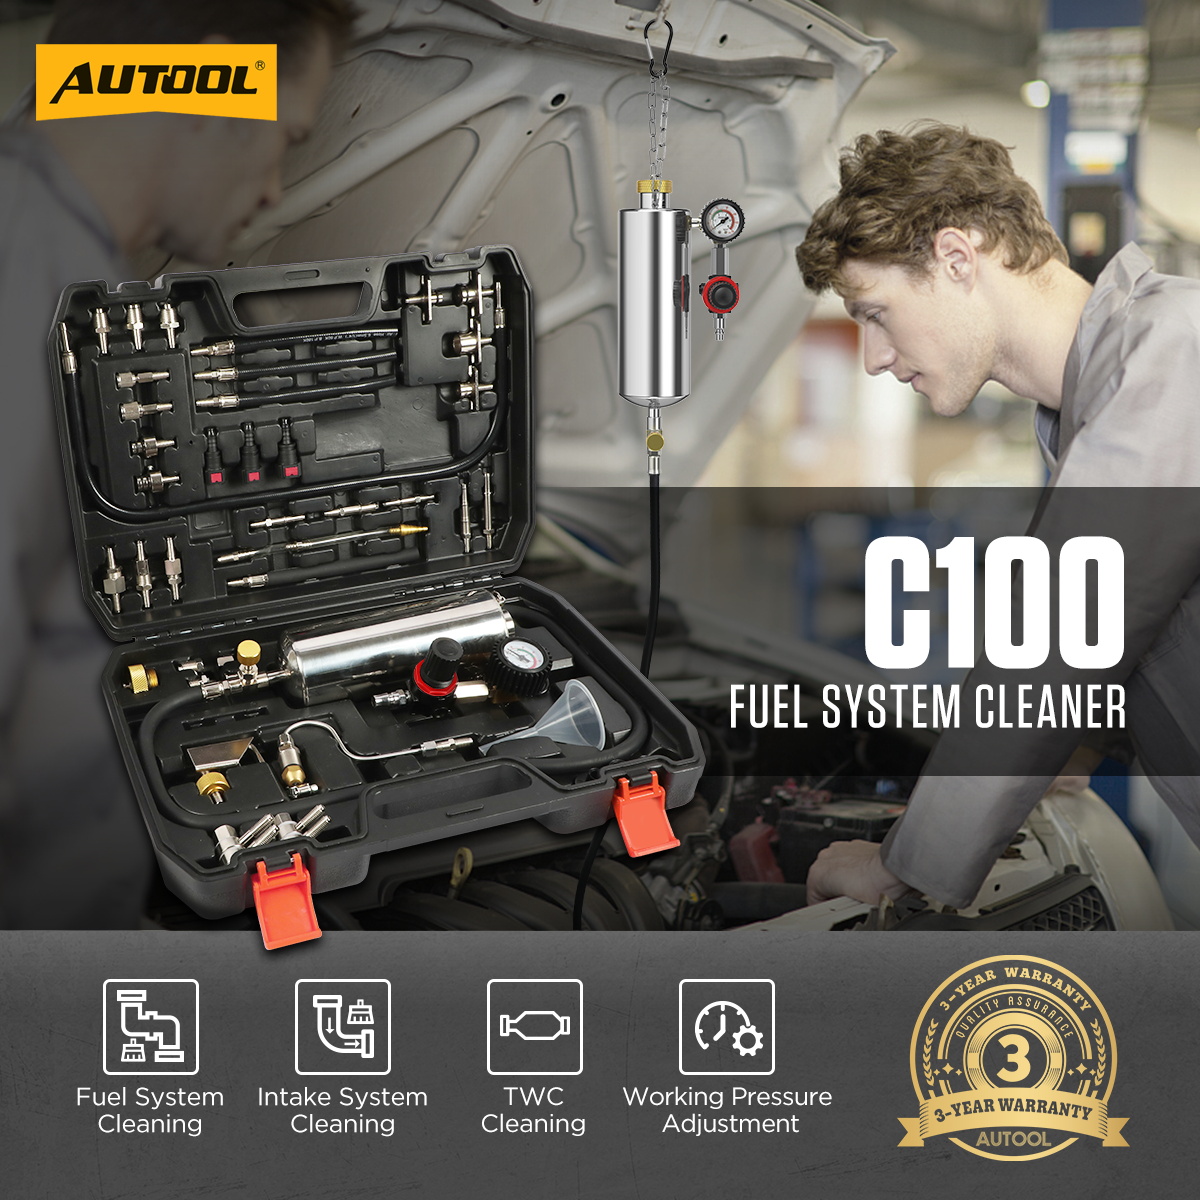
The AUTOOL C100 is an on-vehicle fuel-system cleaning machine. This guide turns the current model-specific controls and official operating sequence into a practical start-to-finish workflow.
Quick answer: For a compatible petrol EFI vehicle, relieve fuel pressure by the vehicle procedure, disable the vehicle fuel supply, connect the C100 with the exact adapter, add approved cleaning fluid and regulated air, then prove every temporary joint leak-free before starting. Monitor pressure, fluid and ventilation continuously; shut down, depressurize to zero, restore the original fuel circuit and complete an engine-off plus running leak check.
In this guide
Before you start
This service puts a running gasoline engine on a temporary pressurized cleaning-fluid supply. Fuel vapor, hot exhaust and incorrect adapters can create fire, exposure and engine-damage hazards. Use a trained technician, exact vehicle fuel-system information, effective workshop and tailpipe extraction, approved cleaning fluid and immediate fire protection. Do not guess a line from its size or appearance.
- confirm the cleaner label reads AUTOOL C100 and the target is a compatible gasoline EFI service;
- open the vehicle procedure for pressure relief, supply/return identification, pump disable, connection restoration and priming;
- remove ignition sources, control the work area and start workshop plus tailpipe extraction;
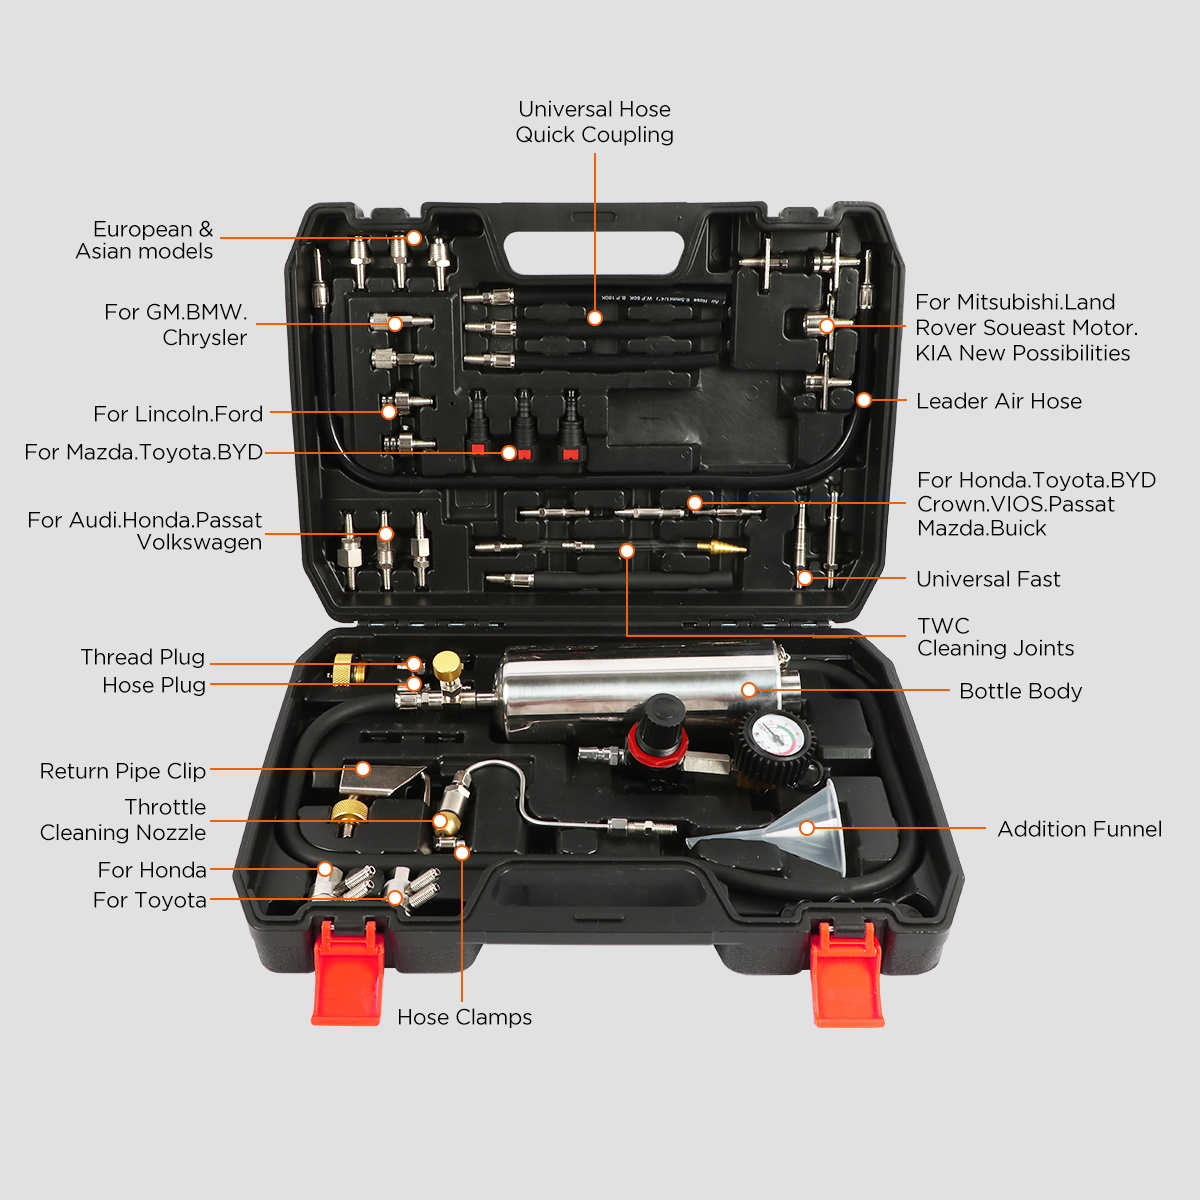
- inspect the bottle, gauge, regulator, relief valve, hoses, seals and exact adapter with the unit at zero pressure;
- prepare only approved cleaning fluid, absorbent material and a suitable fire extinguisher; and
- decide the permitted cleaning pressure and stop criteria before connecting compressed air.
Use the AUTOOL manual download center to locate the current instructions when a manual is available. The delivered model label and current vehicle service information control if an older image or remembered setting differs.
C100 controls and specifications
| Specification or function | Current model |
|---|---|
| EFI Fuel System | Find the fuel return hose, disconnect it, plug it with a suitable adapter, then connect the fuel inlet hose to the cleaner outlet hose with the proper adapter. |
| EFI Cleaning Pressure | Adjust the compressed-air source to about 40-50 PSI for EFI fuel system cleaning, then check all connection points before starting the engine. |
| Manual Pressure Reference | The manual describes adjusting air pressure within about 0.3-0.4MPa for fuel system flushing. |
| No Return Hose | If the vehicle has no return hose, remove the fuel pump fuse or disconnect the fuel pump power cable so the fuel pump will not work during cleaning. |
| Throttle / Carburetor Style | The connection method is similar, but the air source pressure should be adjusted to low pressure, about 1-5 PSI. The manual also gives a carburetor reference of 0.07-0.35kgf/cm². |
| Hose Identification | The inlet hose is usually larger, the return hose is usually smaller, a filter is often connected on the inlet side, a buffer is often on the return side, and arrows may show fuel flow direction. |
The 0-140 PSI C80 gauge range is not a universal vehicle setting. Current C-series product guidance describes roughly 40-50 PSI for its petrol EFI workflow and low pressure for other specific tasks, but the vehicle, adapter and cleaning-fluid limits all apply; use the lowest controlling boundary. This article covers the petrol EFI supply workflow. TWC, intake or throttle spraying uses different connections and must follow the exact current instructions rather than being improvised from the fuel-line sequence.
How to use the C100
Step 1: Qualify the petrol EFI vehicle and cleaning objective
Use the C100 only for a gasoline system and service path confirmed by current vehicle information. Record the complaint and relevant faults, then identify the fuel supply, return layout, specified rail pressure and fuel-pump disable method from the vehicle procedure. Do not identify a line only by hose diameter or guess adapter compatibility.
Before moving on, confirm the vehicle fuel circuit, pump-disable method, fire controls and ventilation come from exact service information; do not identify fuel lines by appearance alone.
Step 2: Establish fire, ventilation and exhaust controls
Work outdoors or with effective workshop and tailpipe extraction. Eliminate smoking, flames, heaters, relays or tools that can spark, and keep the specified fire extinguisher immediately available. Wear eye protection, fuel-resistant gloves and protective clothing; control access to the running-engine work area.
Step 3: Cool, secure and depressurize the vehicle
Secure the transmission and parking brake, switch the engine off and let hot surfaces cool. Relieve fuel-system pressure by the vehicle maker’s method and isolate battery or pump power only as that procedure requires. Wrap an approved absorbent material around a connection before opening it and capture residual fuel safely.
Step 4: Inspect and prepare the C100
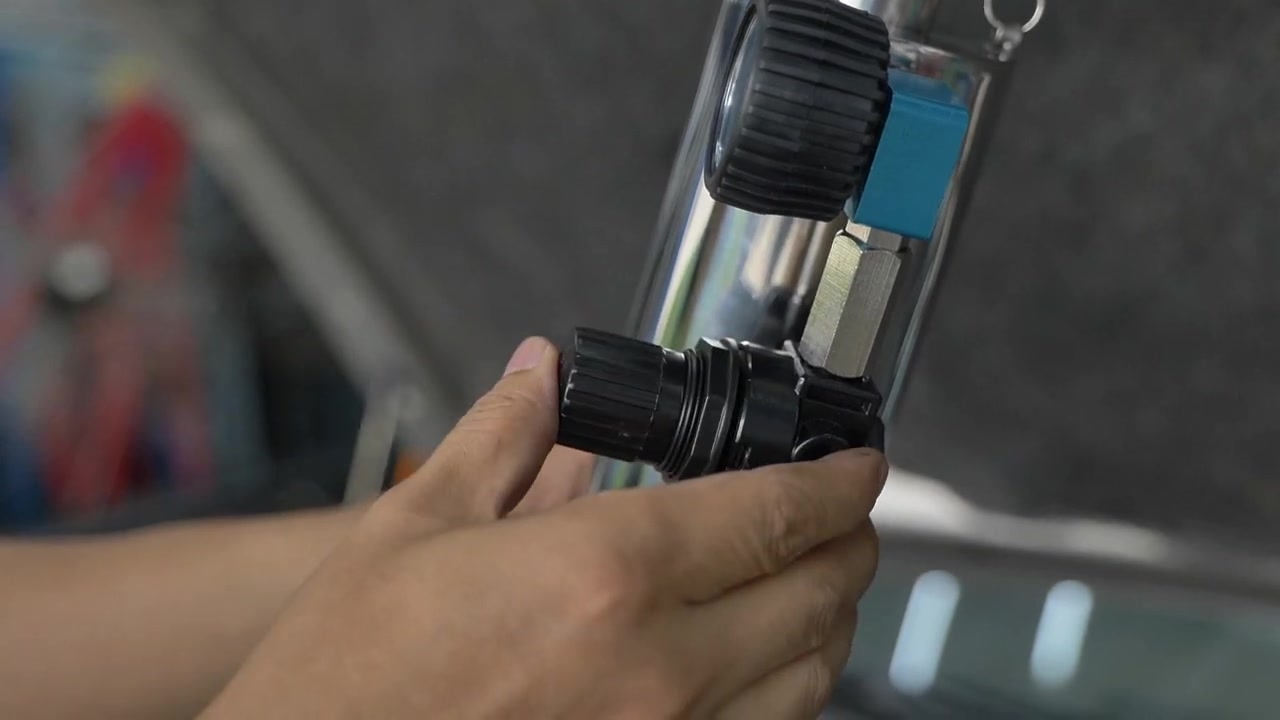
With the cleaner depressurized, inspect its bottle or tank, cap, relief valve, pressure gauge, regulator, shutoff valve, outlet hose, air inlet and every proposed adapter. Reject damaged seals, unclear gauge zero, contaminated hoses or incompatible threads. Close the fluid outlet before adding only the cleaning fluid approved for this service; never use gasoline in the cleaner bottle.
Step 5: Isolate the vehicle fuel supply by the approved method
Identify supply and return from reliable vehicle data. Disable the vehicle pump through the specified fuse, relay, connector or control procedure, and cap or join the tank-side lines exactly as required so the pump cannot feed or spill fuel. Keep open ports clean and never use a makeshift plug.
Step 6: Connect the cleaner to the engine-side supply
Select the exact adapter that seats without forced thread or hose stretch. Connect the cleaner outlet to the engine-side fuel supply and secure the C-series bottle upright, away from exhaust heat, belts, fans and electrical terminals. Keep the air source disconnected and the outlet closed while checking the physical setup.
Step 7: Connect regulated air and establish the verified pressure
Back the cleaner regulator out, connect a clean regulated air source and raise pressure gradually while watching the gauge. The current C100 guidance describes approximately 40-50 PSI (about 0.3-0.4 MPa) for its petrol EFI workflow. The exact vehicle and detergent procedure still controls the permissible pressure. Do not exceed the cleaner range, the vehicle limit or the cleaning-fluid instruction, and do not use maximum gauge range as a target.
Step 8: Prove the temporary circuit leak-free before starting
Open the fluid path only as the current C-series procedure directs and inspect every cap, adapter, hose, cleaner fitting and vehicle connection under the intended static pressure. There must be no wetness, fuel odor, pressure loss or hose movement. Shut the air off and depressurize before correcting any leak.
Step 9: Run the controlled cleaning cycle
Start the engine only after the static leak check passes and exhaust extraction is operating. Keep an operator at the cleaner, watch pressure and every connection continuously, and follow the detergent and vehicle procedure for engine speed and duration. Stop before the cleaner runs dry and stop immediately for a leak, pressure instability, abnormal engine behavior or inadequate ventilation.
Step 10: Shut down and depressurize before disconnecting
Close the cleaner outlet as instructed, switch the engine off, close and disconnect the air supply, then use the cleaner’s relief method until the gauge is confirmed at zero. Treat the bottle and vehicle line as pressurized until zero is verified; never loosen an adapter to bleed pressure.
Step 11: Restore the original fuel system and verify
Remove the temporary cleaner circuit, reinstall every original line, clip, fuse, relay or connector by the vehicle procedure, and clean controlled residue. Prime the vehicle system, perform an engine-off leak check, then run the engine with ventilation and recheck every restored joint. Clear or initialize systems only when the vehicle procedure requires it, and preserve the before/after result.
Before closing the job, verify the cleaner and vehicle were depressurized before disconnection, every original fuel connection and pump-power component is restored, and both engine-off and running leak checks are dry.
Read and verify the result
A useful cleaning result requires a stable temporary supply and a verified restoration. During the cycle, pressure should remain within the selected boundary, every connection should stay dry, the engine should run without abnormal behavior and the cleaner must not run dry. Afterward, the original fuel circuit must hold pressure with no odor or wetness before any performance change is interpreted.
- A pressure drop, odor or damp connection is a failed setup check—not a reason to start the engine and see whether it clears.
- Idle or response may change as the cleaning fluid enters, but an abnormal knock, misfire, warning or unstable pressure is a stop condition.
- Cleaning can address deposits; it does not repair electrical faults, mechanical injector damage, low compression or a failed fuel pump.
- Preserve pre-service symptoms and fault data, then compare the same operating condition after the fuel circuit is restored and leak-free.
Stop immediately for liquid leakage, fuel or solvent odor, unstable pressure, a moving hose, an adapter deforming, insufficient exhaust extraction, abnormal engine noise, misfire, warning indication, cleaner fluid nearing empty or any ignition source entering the area. Switch the engine off, close the cleaner path, shut off air and depressurize by the approved relief method before touching a connection.
Common mistakes and care
- Use only on a compatible gasoline fuel system with exact vehicle service information and a trained technician.
- Keep fuel, cleaning fluid and vapor away from every ignition source; provide effective workshop and tailpipe ventilation.
- Use only approved cleaning fluid in the cleaner bottle—never gasoline—and verify every adapter and temporary cap.
- Prove the complete temporary circuit leak-free under static pressure before starting the engine.
- Monitor the running service continuously and stop before the cleaner runs dry.
- Shut off air and confirm the gauge is at zero before loosening any fuel or cleaner connection.
- Do not identify supply and return only by hose diameter, filter location or a remembered layout; verify the exact vehicle circuit.
- Do not put gasoline in the cleaner bottle, exceed the vehicle pressure or target the gauge’s maximum range.
- Do not bypass the static leak test, leave the running cycle unattended or let the cleaner run dry.
- Do not loosen a fitting to release pressure; shut off air and use the intended relief path until the gauge is at zero.
- Do not close the job until every original connector, line and pump-power component is restored and passes both engine-off and running leak checks.
Frequently asked questions
Can I fill the C100 with gasoline?
No. Use only the cleaning fluid approved for the specific C-series and service procedure. Gasoline in a temporary compressed-air cleaner creates an unacceptable fire and equipment hazard.
Is 40-50 PSI correct for every gasoline vehicle?
No. It is the current C-series petrol EFI workflow reference, not a universal vehicle specification. Confirm the exact vehicle, adapter and detergent limits and use the lowest controlling boundary.
Can I disconnect when the engine is off?
Engine-off does not prove the cleaner is depressurized. Close the fluid and air supply, use the intended relief method and verify the gauge is at zero before loosening any connection.
Final C100 checklist
- Compatible petrol EFI system and exact vehicle procedure confirmed
- Ignition sources controlled; workshop and tailpipe extraction operating
- Approved fluid, exact adapters and permitted pressure established
- Temporary circuit passed the static pressure leak check
- Running cycle monitored continuously and stopped before empty
- Air closed and gauge verified at zero before disconnection
- Original fuel circuit restored, primed and leak-checked off and running
Used this way, the C100 provides a controlled temporary cleaning-fluid supply without turning a broad adapter kit or pressure gauge into a shortcut. The decisive steps are exact vehicle identification, a dry static check, continuous monitoring and a verified restoration.










Comments 0
Questions, fixes, and real-world diagnostic notes from readers.
Be the first to share a diagnostic result or ask a follow-up question.