
How to Use the MRCARTOOL H90 Spark Plug Tester

The MRCARTOOL H90 spark plug tester is a 12 V bench tool for observing one plug or comparing two plugs at the same simulated engine speed. Its adjustable test sockets accept different plug lengths, while the digital display shows a selectable 500–9000 rpm simulation. The useful result is a repeatable comparison under the same tester conditions—not a promise that a plug will fire correctly under cylinder pressure.
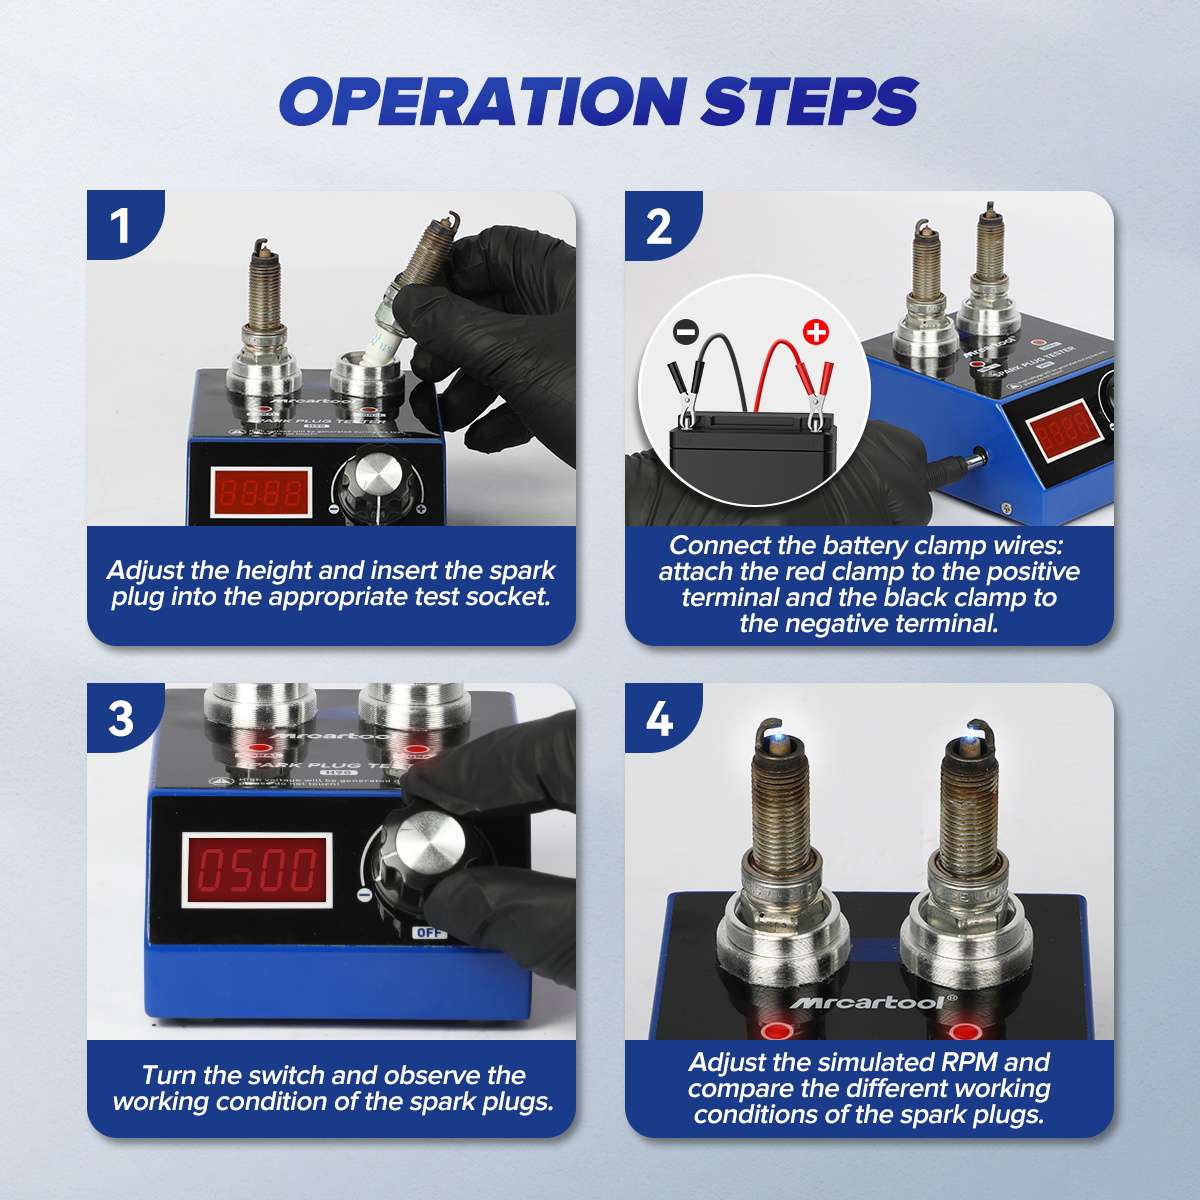
Quick answer: Work on a dry, nonflammable bench with the H90 knob at OFF. Inspect the removed plugs, adjust each socket height and insert the plugs fully. Connect the DC lead to the H90, then clamp red to a verified 12 V battery positive terminal and black to negative. Keep hands and tools away from the plugs. Turn the knob clockwise until the indicator and display come on, begin at the low end and increase rpm gradually. Compare both plugs at identical settings for repeatability and intermittent loss. Return the knob to OFF before touching, removing or repositioning either plug, then disconnect black, red and the DC plug.
In this guide
Understand what the H90 test can prove
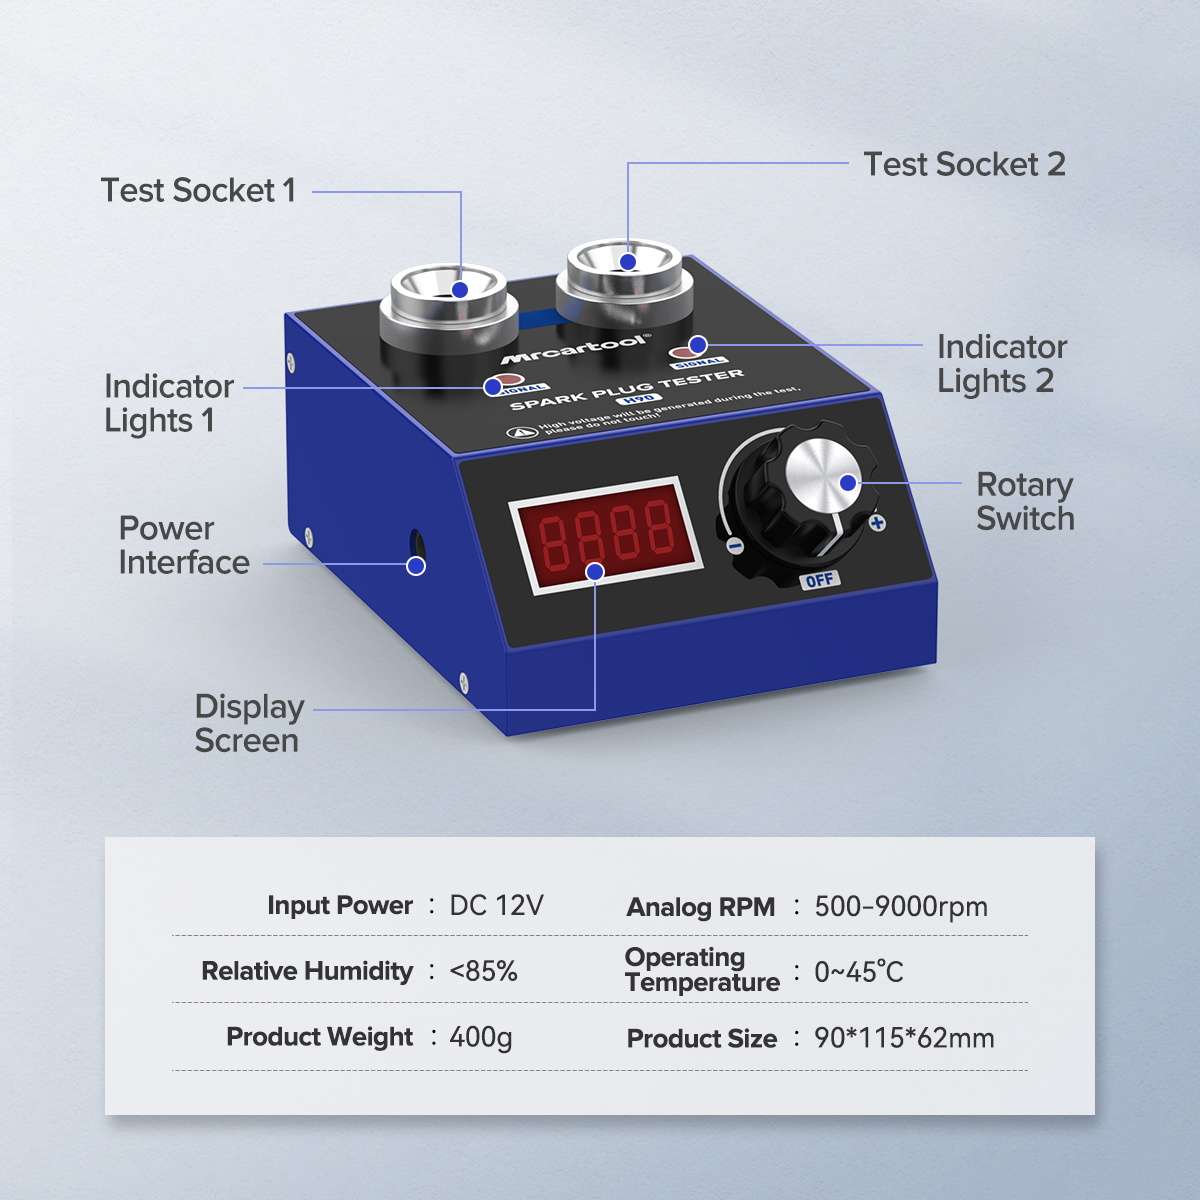
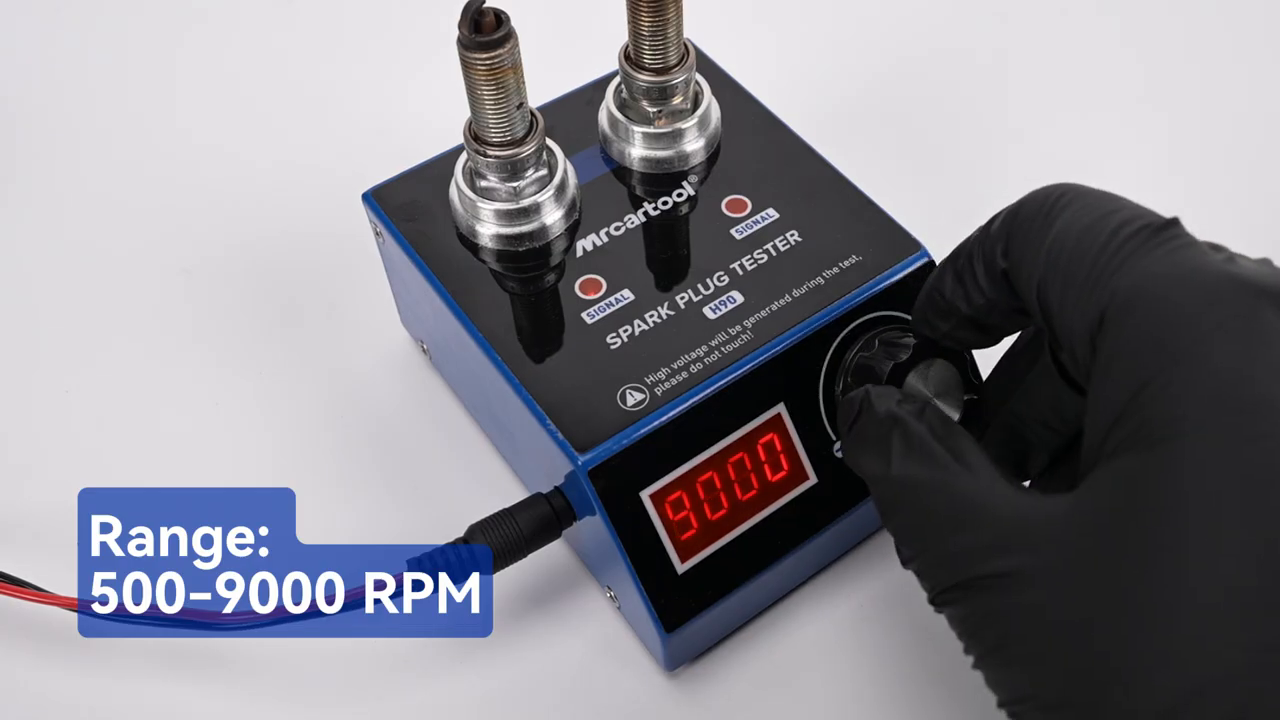
The exact H90 user manual specifies DC 12 V input, a 500–9000 rpm simulated range, 0°C to 45°C operating temperature and relative humidity below 85%. It identifies two test holes, two indicator lamps, a DC power interface, a digital display and a rotary switch. The official H90 video shows the adjustable socket collars, plug insertion, battery-clamp supply, switch-on and a sweep through displayed speeds.
The H90 creates a visible spark in open air. That is valuable for finding a plug that does not fire, cuts out as frequency rises or behaves differently from a known-matching plug. In an engine, however, the ignition system must fire across the plug gap under compression, mixture, heat, deposits and coil-loading conditions. An attractive bench spark cannot rule out a weak coil, wiring fault, incorrect gap, insulation leak or a plug that fails only under cylinder pressure.
High voltage is present whenever the tester is running. The H90 manual warns that spark-plug operating voltage reaches tens of thousands of volts. Never insert, remove or adjust a plug while energized, never touch the plug body or electrode during a test and keep fuel, solvent, aerosol, battery gas and other flammable vapor away from the spark area.
Confirm that the physical unit matches the H90 shown here: a digital display, adjustable dual sockets, a 500–9000 rpm range and battery-clamp power. If the case, lead, label or controls differ, stop and follow the instructions supplied with that exact hardware rather than transferring this sequence.
Prepare the plugs, battery and work area
1. Confirm that a bench spark comparison is appropriate
Use the vehicle diagnosis and service information first. Record the cylinder, plug part number, gap specification, removal condition and any misfire data before the plugs are mixed. A side-by-side H90 test is most meaningful when both plugs have the same design and specified gap. Comparing unrelated resistor types, heat ranges or electrode designs can create a visible difference that says nothing about which plug belongs in the vehicle.
2. Make the bench electrically and chemically safe
Choose a stable, dry, well-lit surface. Remove fuel containers, carburetor cleaner, brake cleaner, penetrating oil, solvent rags and any recently opened battery charging area. Ventilate the room and keep the 12 V battery upright, secured and away from falling tools. Wear eye protection. Do not run the tester in an engine bay, over an open fuel system or beside a battery that is being charged or visibly venting.
3. Inspect the H90 and the removed plugs
Set the rotary knob fully counterclockwise to OFF before handling the sockets. Check the case, display, DC jack, battery clips, lead insulation and adjustable collars for cracks, looseness, heat marks or contamination. Examine each plug for cracked ceramic, damaged threads, a loose terminal, severe erosion, bridged electrodes or wet fuel. A mechanically damaged or fuel-wet plug should not be energized merely to see whether it sparks.
Fit the spark plugs correctly
4. Adjust the socket height with power disconnected
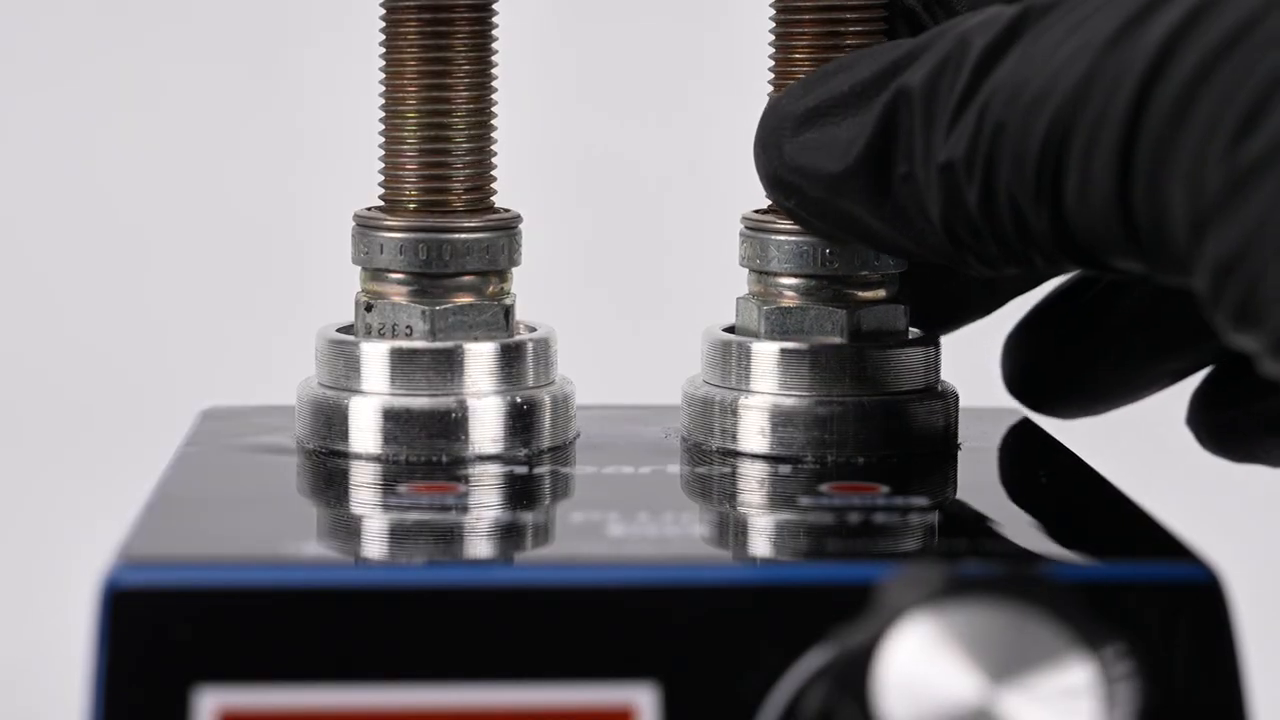
The H90 product page lists 10, 12, 14, 16 and 18 mm spark-plug applications, and its official video demonstrates rotating the metal socket assembly to change its height. Use that adjustment to support the plug body securely and keep the terminal at the intended contact position. Do not force a thread, clamp a ceramic insulator or use the collar to compensate for a plug that does not physically fit.
5. Install one plug—or a matched pair
For a basic function check, install one plug fully into either socket. For comparison, use two plugs with the same part number and verified gap, ideally the suspect plug beside a known-good reference. Seat both to the same depth and confirm neither wobbles. Leave enough clearance between the plug terminals and nearby metal objects. The two-socket layout improves comparison because both plugs experience the same selected rpm at the same time.
Do not hold a loose plug by hand and do not add an external ignition lead. The H90 test sockets provide the designed contact and grounding path. If a plug needs an improvised wire, foil, clamp or spacer to make contact, the result is no longer controlled and the exposed high-voltage path becomes unsafe. Resolve fit with the correct plug and socket adjustment instead.
Connect a verified 12 V battery
6. Connect the low-voltage lead in the documented order
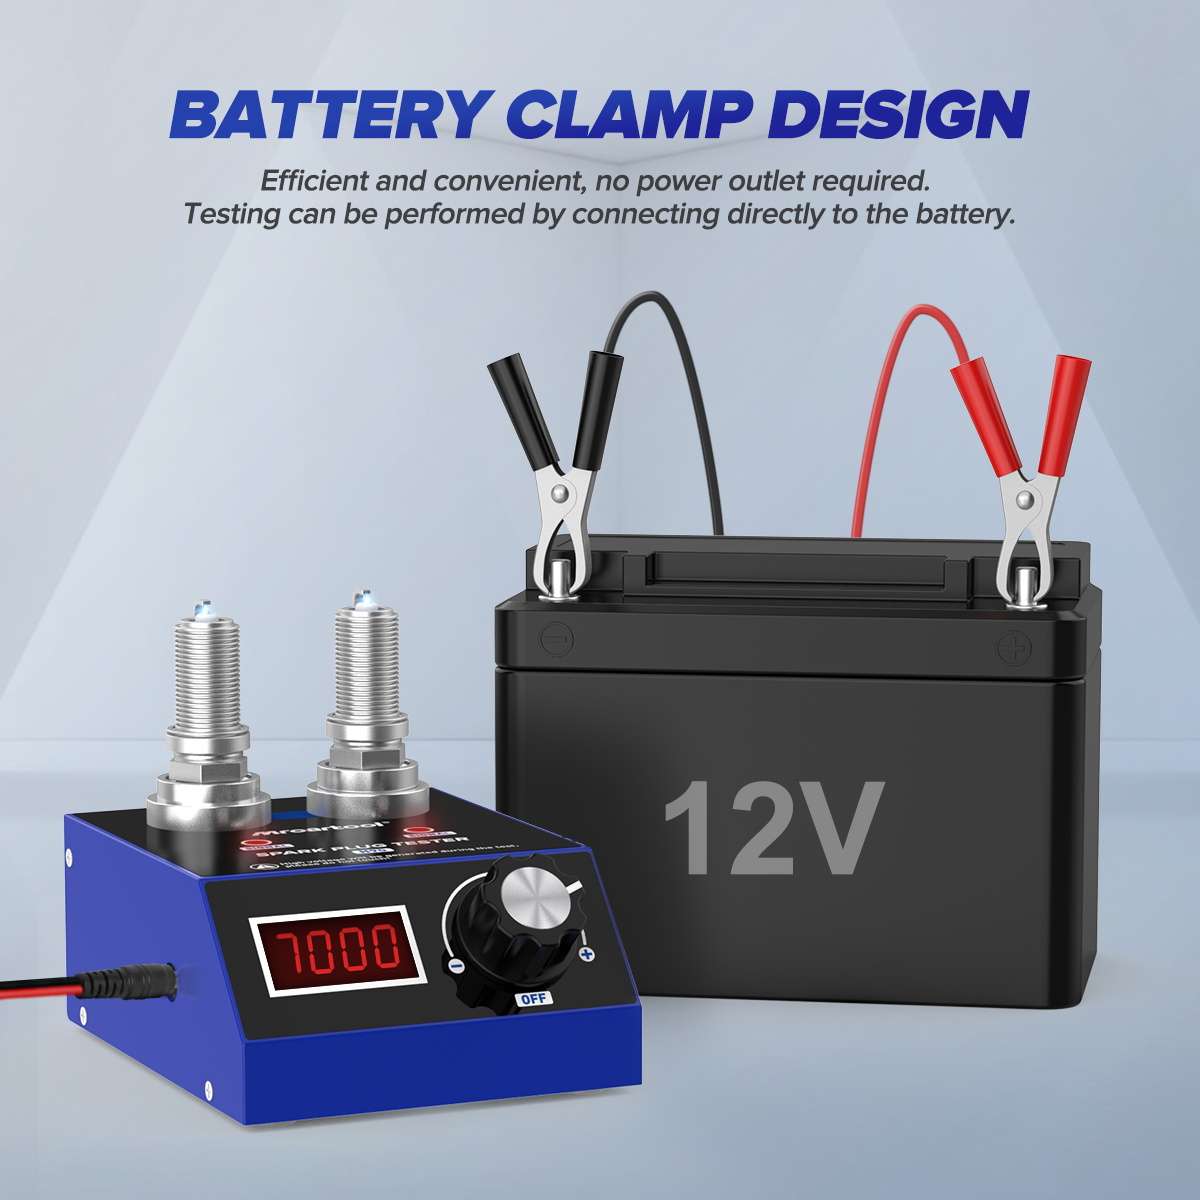
Keep the knob at OFF. Insert the lead’s DC plug into the H90 power interface first, as the exact manual instructs. Route the lead so it cannot pull the tester or cross the spark plugs. Confirm the battery is a conventional 12 V source in serviceable condition; do not connect a 24 V vehicle battery, mains adapter of unknown polarity or a charger with an uncontrolled output.
7. Attach red positive, then black negative
Identify the battery terminals from permanent markings. Attach the red clamp to positive and the black clamp to negative, matching the exact H90 operating procedure. Keep the clamps separated and prevent a tool from bridging the terminals. If a clamp is loose, polarity is uncertain, the cable warms or the display comes on with the knob at OFF, disconnect and inspect instead of continuing.
Battery clamps can spark when connected or removed. That is another reason to keep the battery physically separated from the open spark test and away from vapor. Do not allow the H90 lead to rest on a sharp battery-case edge or a hot component. Once power is attached, treat the test sockets and plugs as potentially hazardous even before the knob is turned.
Run a controlled rpm sweep
8. Start at the low end
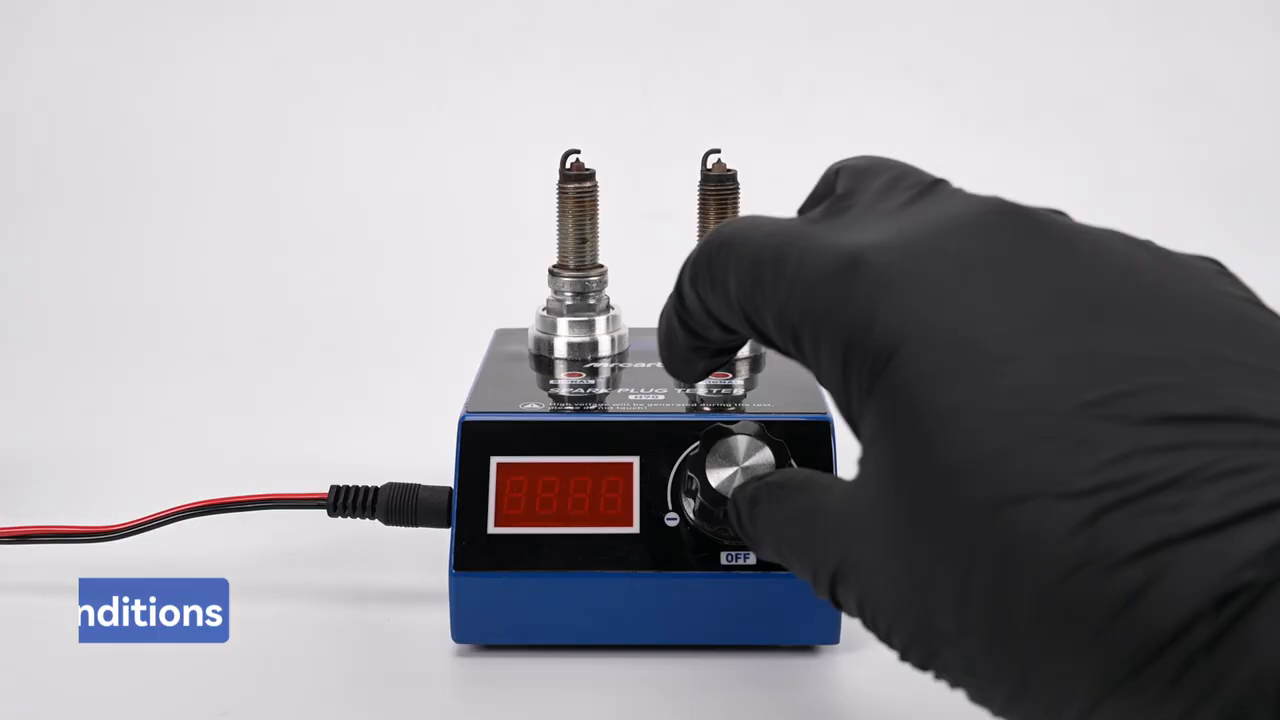
Stand clear of the electrodes and make sure no one is reaching over the tester. Rotate the knob clockwise only until the H90 indicator and display illuminate. The official video shows the unit starting and the displayed simulated rpm changing with knob position. Begin near the lower end of the 500–9000 rpm range instead of jumping immediately to maximum.
9. Observe at one steady setting
Hold the first selected speed long enough to see several firing events. Look for repeatability: does each plug fire consistently, does one stop intermittently, or does the visible behavior change without the knob moving? When two matched plugs are installed, compare them at that same moment rather than relying on memory from separate tests. Avoid placing your face close to the plug; use the illuminated test area and a safe viewing angle.
10. Increase speed gradually
Turn the knob through several repeatable points across the operating range. The manual notes that higher selected frequency produces stronger visible sparking, so intensity naturally changes as the knob is advanced. The important comparison is whether both matched plugs remain stable under the same selected speed. Pause at each point; rapidly sweeping the knob makes intermittent behavior harder to distinguish.
11. Repeat before reaching a conclusion
Return to a lower speed and repeat the same sequence. If the apparent weak side changes when the plugs are swapped between sockets, investigate socket contact or fit before condemning a plug. If the same plug remains intermittent in both sockets while the reference stays consistent, that is stronger bench evidence. Switch OFF before every swap and wait until all sparking has stopped.
Interpret the result without overclaiming
A repeatable no-spark or intermittent result from one plug, especially when the behavior follows that plug after a powered-off socket swap, supports further inspection or replacement according to the vehicle procedure. A stable side-by-side result shows that both plugs can spark in the H90’s open-air test. It does not prove their firing voltage margin under compression, their heat range, torque history or suitability for the engine.
Do not use color alone as a universal grading chart. Camera exposure, ambient light, gap, electrode geometry and test frequency change what the spark looks like. Compare like with like and record the selected rpm, socket positions, plug part numbers and whether behavior repeated. If the vehicle still misfires after both plugs appear consistent, continue with coil output, coil boot, wiring, injector, compression, leak-down and control-system diagnosis as appropriate.
The H90 is also not a spark-plug cleaning or gapping machine. Clean, gap or replace plugs only by the plug and vehicle manufacturer’s procedure. Fine-wire, iridium and platinum electrodes can be damaged by aggressive wire brushing or improper gap tools. A visibly contaminated plug may reveal an engine condition—oil consumption, rich mixture or coolant entry—that must be diagnosed rather than erased for a prettier test.
Shut down before touching the plugs
12. Return the knob fully to OFF
After the final observation, rotate the knob fully counterclockwise until the display and indicators turn off. Confirm sparking has stopped. Do not use battery-clamp removal as the normal switch and do not reach for either plug while the display is still active. Allow the plugs and sockets to remain untouched briefly before removal.
13. Disconnect and remove in a controlled order
Remove the black battery clamp first and keep it away from the positive terminal, then remove red. Unplug the DC lead from the H90. Only after low-voltage power is isolated should either spark plug be lifted from its socket or the height adjustment be changed. Keep tested plugs identified by cylinder and result so diagnosis is not lost when they return to the workbench.
14. Inspect and store
Check the test sockets and lead for heat, looseness, arcing marks or damaged insulation. Wipe the exterior with the unit disconnected; do not flood the socket openings with cleaner. Store the H90 and lead dry, with the knob at OFF and clamps protected from contact. A unit that produced odor, smoke, unstable display, uncontrolled speed or visible case arcing should remain out of service until inspected.
Troubleshooting
| Symptom | Check first |
|---|---|
| No display or indicator | Knob position, verified 12 V battery, red-positive/black-negative polarity, clamp contact, DC plug and cable condition |
| One side never sparks | Switch OFF; swap the same plug between sockets to separate plug behavior from socket contact |
| Both sides cut out together | 12 V source stability, loose clamps, DC plug seating and knob position |
| Plug fits loosely | Switch OFF; correct the adjustable socket height and confirm the plug size is supported |
| Spark changes only at high rpm | Repeat at fixed points; compare identical plug types and verify the result follows the plug |
| Visible spark but vehicle still misfires | Continue diagnosis under vehicle conditions; check coil, boot, wiring, fuel, compression and control faults |
| Heat, odor, smoke or case arcing | Turn OFF and disconnect immediately; remove the tester from service |
Final H90 checklist
- Exact H90 hardware confirmed: digital display, 500–9000 rpm and battery-clamp lead
- Dry, stable bench clear of fuel, solvent, aerosol and battery vapor
- Eye protection worn and 12 V battery secured upright
- Knob fully OFF before plug insertion, removal or socket adjustment
- Plug identity, part number, gap and cylinder recorded
- Matched plug types used for side-by-side comparison
- DC plug connected before red-positive and black-negative clamps
- Hands, tools and face kept away from energized plugs
- Test begun low and repeated at several steady rpm points
- Socket swap performed only with power OFF when confirmation is needed
- Open-air spark treated as comparative evidence, not proof under compression
- Knob OFF, black clamp removed, red clamp removed, then DC lead unplugged
- Any heat, odor, smoke, arcing or unstable display removes the tester from service
The H90 works best as a controlled A/B test. Keep the setup dry and de-energized while fitting plugs, use correct 12 V polarity, start at low simulated speed and compare matched plugs at identical settings. Repeat any abnormal result after a powered-off socket swap, then place the bench evidence back into the vehicle’s complete ignition and engine diagnosis.










Comments 0
Questions, fixes, and real-world diagnostic notes from readers.
Be the first to share a diagnostic result or ask a follow-up question.