
Battery Light On While Driving? Treat It as a Charging-System Warning

A battery-shaped light that stays on with the engine running usually means the 12V electrical system is not charging as expected; it does not identify the battery as the failed part. Switch off unnecessary electrical loads, move toward a safe place, and use the vehicle’s own manual to decide whether immediate shutdown or prompt service is required. If the warning is joined by rising coolant temperature, heavy steering, a damaged or missing belt, burning smell, smoke, severe electrical instability, or a stop-now message, stop as soon as it is safe and arrange a tow.
What to do first
- Turn off seat heaters, rear defogger, high blower speed, audio amplifiers, chargers, and other nonessential loads; keep the lights and safety systems needed for control and visibility.
- Avoid repeatedly switching the engine off and on. If the charging system is not supporting the car, the remaining battery energy may not provide another start.
- Watch for a temperature warning, steering change, belt noise, burning odor, flickering cluster, multiple module warnings, or a vehicle-specific stop message.
- Record engine speed, electrical loads, weather, warning messages, recent battery/alternator/belt work, and how long the warning remained on.

In this guide
1. Decide whether to stop now
The safest response depends on what appears with the lamp. Ford’s owner information for an applicable vehicle tells the driver to turn off unnecessary electrical equipment and have the vehicle checked immediately. Your exact owner’s manual remains controlling because warning wording, belt layout, steering assist, cooling-system drive, and hybrid/EV architecture differ.
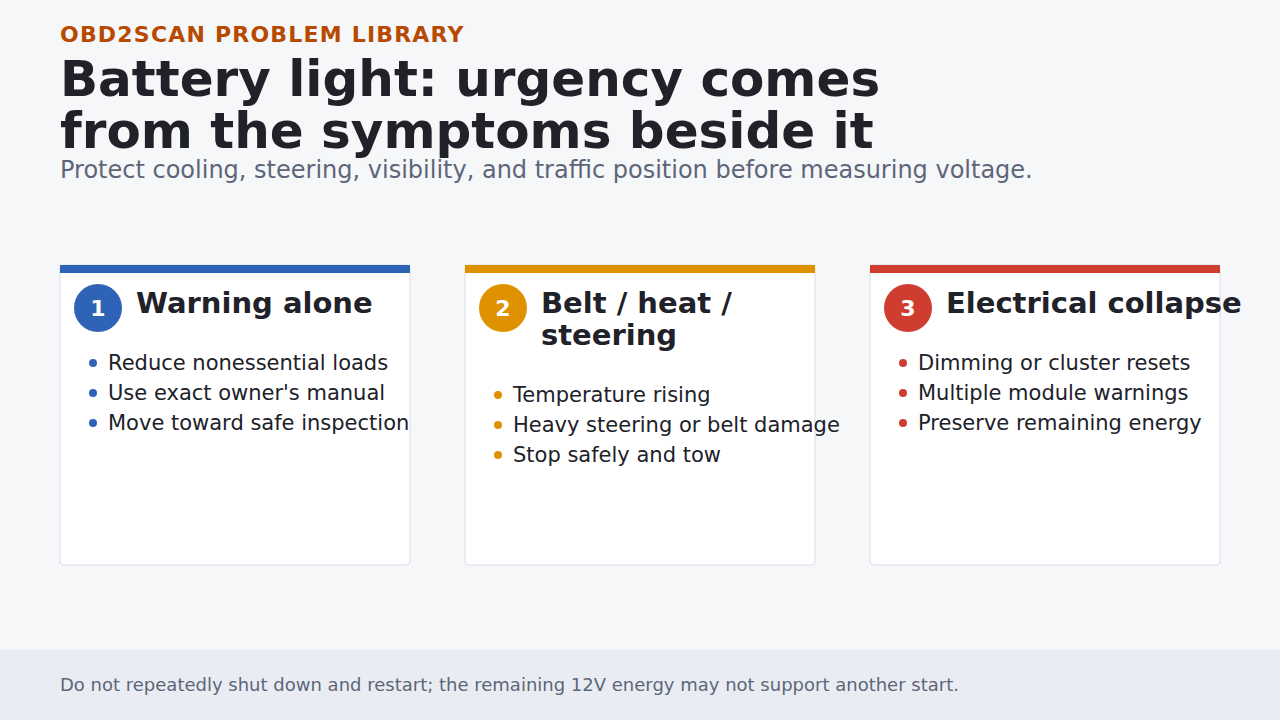
- Warning alone, vehicle otherwise normal: reduce nonessential load, avoid unnecessary stops, and head to the nearest safe inspection point allowed by the manual.
- Temperature rising or coolant warning: a shared belt may no longer be driving a water pump on some engines. Stop safely before overheating causes damage.
- Steering suddenly heavy: some vehicles may have lost belt-driven hydraulic assistance; others may be shedding electrical loads. Slow down, increase following distance, and stop safely.
- Belt slap, squeal, fragments, smoke, or burning odor: stop the engine when safely parked. Do not reach into the belt path.
- Cluster resets, lights dimming, transmission/network warnings, or engine stumble: system voltage may be approaching the point where control modules cannot operate reliably. Arrange a tow rather than trying to use the last battery energy.
Hybrid and electric vehicles
The 12V system still powers control modules and contactors, but its charging source and shutdown logic differ from a belt-driven alternator. Do not touch orange high-voltage components or treat an EV’s 12V warning as a conventional alternator test. Follow the exact rescue and service information.
2. Understand what the light proves
The warning proves that the vehicle detected an unexpected 12V charging condition. It does not distinguish among:
- a discharged or internally faulty battery;
- an alternator/generator that cannot meet commanded output;
- a loose, damaged, contaminated, or missing drive belt where one is used;
- an open fuse or fusible link;
- resistance in the output cable, battery terminals, engine ground, body ground, or alternator case ground;
- a regulator, sensor, communication, or control-strategy fault;
- an electrical load greater than the system can support at that moment.
This is why replacing the battery because the icon looks like a battery can fail, and why replacing an alternator after one low reading can also fail. Isuzu’s on-vehicle diagnostic bulletin notes that many returned alternators were found to have no fault and directs technicians to confirm battery condition before alternator diagnosis. The lesson is system-wide even though that bulletin’s exact procedure applies only to its listed vehicles.
3. Preserve the condition before parts are changed
- Photograph the messages and gauges only when safely stopped.
- Record whether the lamp appears at idle, at higher RPM, with rain, after a jump-start, or only with headlights, blower, rear defogger, or heated accessories operating.
- Record any belt noise, bearing noise, burning odor, flicker, or recent battery, belt, alternator, engine, or body repair.
- Scan all modules and preserve code status before disconnecting or charging the battery. Low voltage can create many secondary communication codes; their timing matters.
- If a meter reading can be taken safely with the engine off, record battery-post voltage and whether the posts, clamps, and visible grounds are loose, hot, corroded, or damaged. Do not lean over a damaged, hot, leaking, swollen, or frozen battery.
A resting voltage does not establish alternator output, battery capacity, or cable performance. Likewise, a jump-start that makes the lamp disappear briefly does not identify the failed component.
4. Prove each part of the charging system
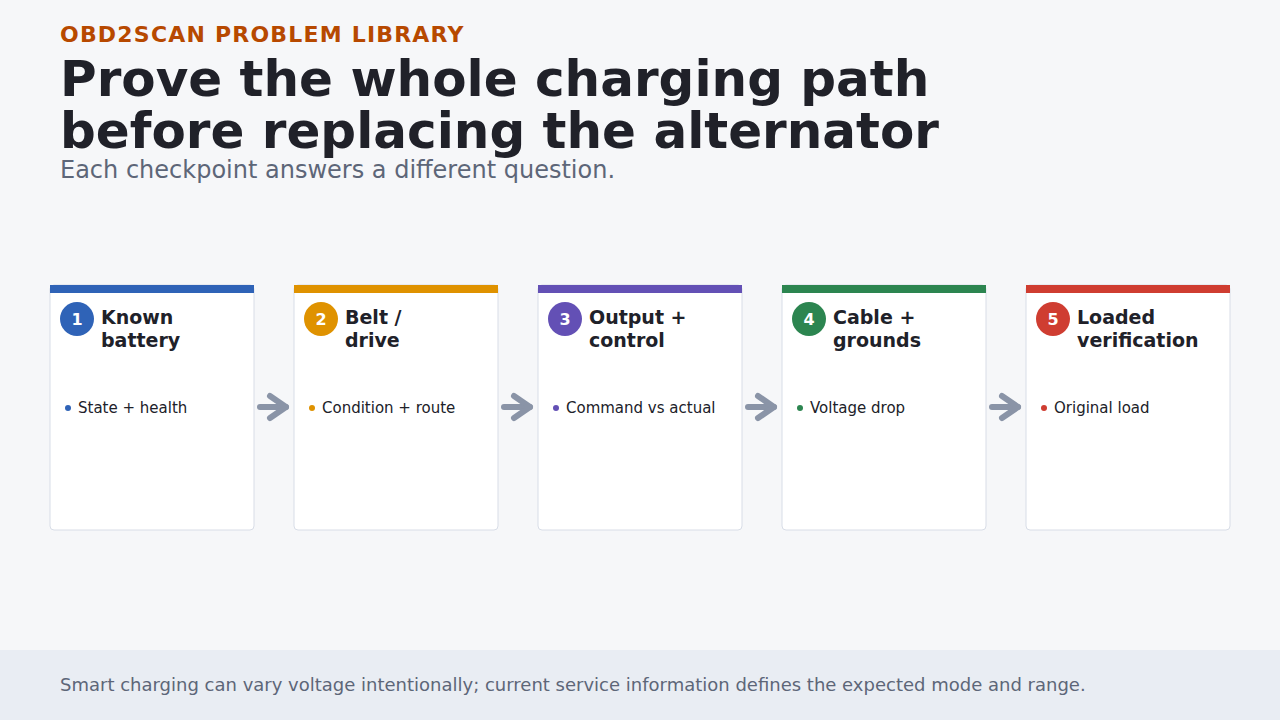
1. Establish battery state and condition
Charge and test the battery with the correct procedure before judging the charging system. A deeply discharged or defective battery can load the system abnormally, distort results, and prevent modules or relays from operating correctly. Testing only the alternator while leaving an unknown battery in the circuit creates an ambiguous result.
2. Inspect the drive and connections
With the engine off and secured, inspect the visible belt for absence, damage, contamination, or obvious loss of tension; use the exact routing and tension procedure before any correction. Inspect battery posts, cable insulation, alternator connection, engine-to-chassis grounds, and relevant fuses without placing hands or probes near a running belt.
3. Measure output and the path carrying it
A professional on-vehicle test compares voltage and current at the source and battery under controlled load, then measures voltage drop across the positive and ground sides. DENSO’s general guide illustrates this system approach: inspect the battery, belt, wires, voltage drop, and output under load. Use its numbers only when they agree with current service information for the exact vehicle.
If the alternator produces output but excessive voltage is lost before it reaches the battery, replacing the alternator does not repair the cable, fuse, terminal, or ground. Stellantis also documents cases where alternator case grounding, engine/chassis grounds, and battery-ground voltage drop belong in the inspection.
4. Account for smart charging
Modern controllers may deliberately vary alternator command by battery state, temperature, deceleration, electrical demand, and energy-management strategy. A low idle voltage can be commanded on an applicable smart-charge system; a familiar fixed number is not automatically a failure. Compare commanded versus actual output, current, battery sensor data, mode, and loaded behavior using current service information.
5. Check output quality and load
If DC output appears plausible but the warning, flicker, noise, or module instability remains, a technician may need to evaluate AC ripple, regulator control, bearing condition, and the real current demand. These tests answer different questions; one good unloaded voltage reading cannot cover all of them.
5. Verify the original warning and load condition
Useful shop handoff
- warning message and every secondary symptom;
- engine RPM, driving time, weather, and electrical loads when it appeared;
- recent battery, alternator, belt, jump-start, or engine work;
- battery condition test and state of charge;
- before-repair voltage/current/control data and positive/ground voltage-drop results;
- scan codes saved before battery disconnection.
After repair, start with a known battery state and reproduce the original RPM, temperature, and accessory load. Confirm the lamp remains off, commanded and actual charging behavior agree with service information, positive and ground paths remain acceptable under load, no belt or bearing noise is present, and the vehicle restarts normally after a suitable drive and soak. Clear evidence last, then rescan for returning current or pending faults.
Official references
The useful outcome
You should finish with a safe driving decision and a complete charging-system result—not a battery-shaped icon converted into a battery purchase.








Comments 0
Questions, fixes, and real-world diagnostic notes from readers.
Be the first to share a diagnostic result or ask a follow-up question.